


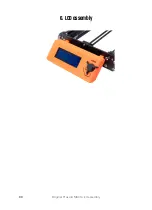


6. LCD assembly
92
Original Prusa i3 MK3S+ kit assembly
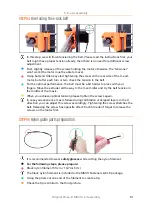
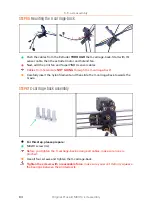
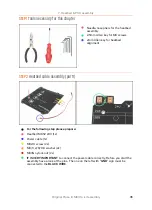
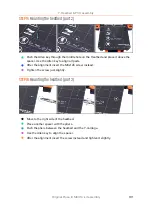
STEP 8
Mounting the LCD display onto the printer
ATTENTION!!!
In case you haven't assembled the anti-vibration feet yet, the front
part of the printer will be resting on the mounted LCD. Apply the feet now or be
very careful as you might damage the LCD holder. For assembly head back to
Chapter 2 (Y-axis).
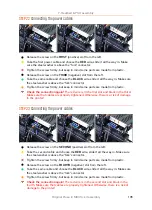
Locate the holes for M3 screws on the front plate.
Press through four M3x10 screws.
Place the LCD assembly onto the front side of the Y-axis.
Tighten all four screws.
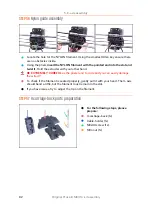
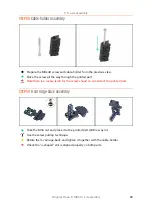
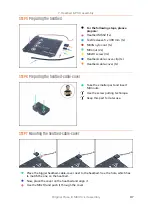
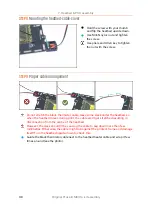
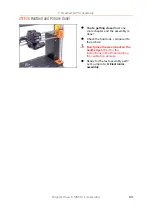
STEP 9
Assembling the LCD knob
Assemble the LCD-knob part as shown in the picture.
Knob mounting orientation doesn't matter.
Содержание i3 MK3S+
Страница 6: ...6 ...
Страница 7: ...Original Prusa i3 MK3S kit assembly 7 1 Introduction ...
Страница 15: ...Original Prusa i3 MK3S kit assembly 15 2 Y axis assembly ...
Страница 36: ...36 Original Prusa i3 MK3S kit assembly 3 X axis assembly ...
Страница 44: ...44 Original Prusa i3 MK3S kit assembly 4 Z axis assembly ...
Страница 51: ...Original Prusa i3 MK3S kit assembly 51 5 E axis assembly ...
Страница 88: ...88 Original Prusa i3 MK3S kit assembly 6 LCD assembly ...
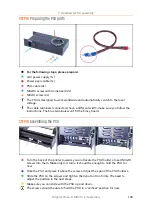
Страница 94: ...94 Original Prusa i3 MK3S kit assembly 7 Heatbed PSU assembly ...
Страница 108: ...108 Original Prusa i3 MK3S kit assembly 8 Electronics assembly ...
Страница 132: ...132 Original Prusa i3 MK3S kit assembly 9 Preflight check ...
Страница 137: ...137 Notes ...
Страница 138: ...138 ...
Страница 139: ...139 Notes ...
Страница 140: ...140 ...
Страница 141: ...141 Notes ...
Страница 142: ...142 ...
Страница 143: ...143 Notes ...
Страница 144: ...144 ...