Chapter 3: Setup
33
Setting up VTrak with the CLU
1.
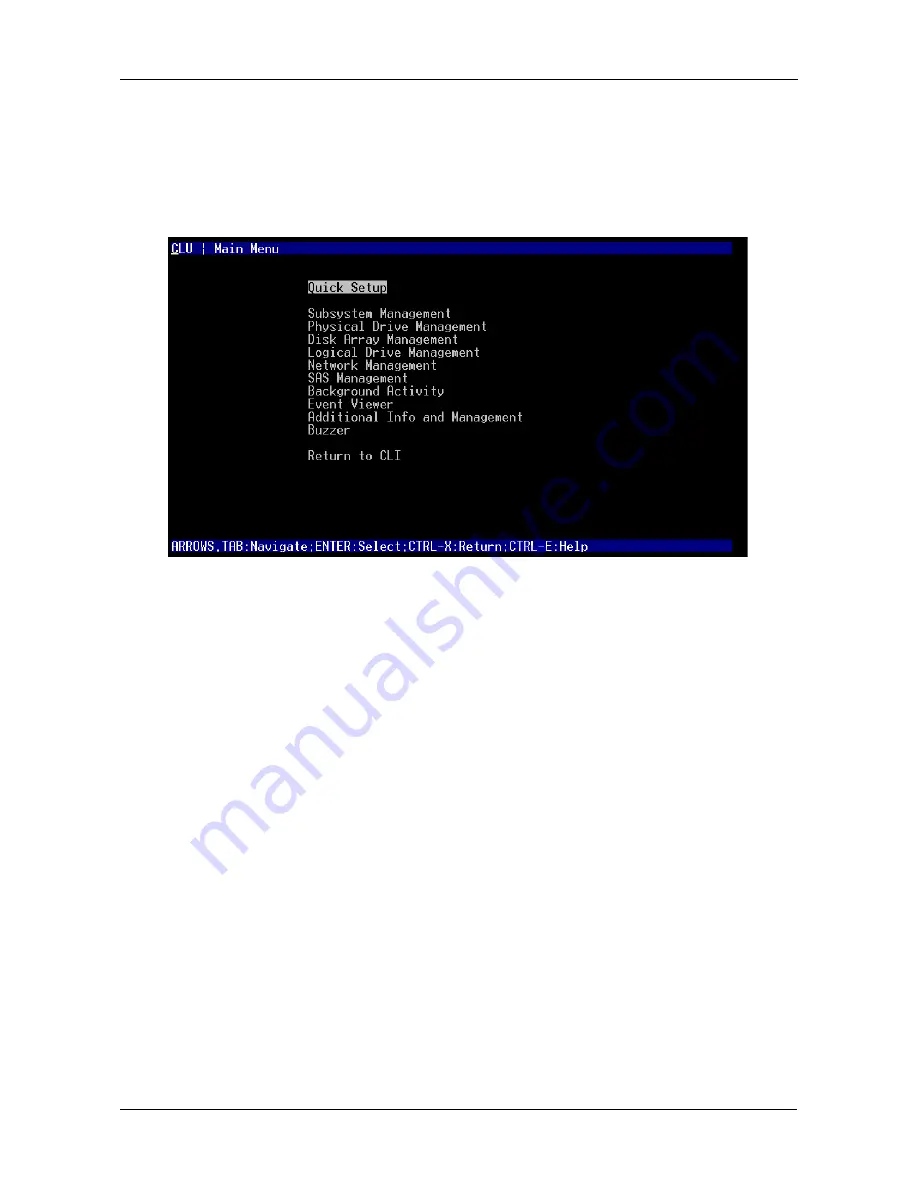
At the administrator@cli> prompt, type
menu
and press Enter.
The CLU main menu appears.
Figure 1. CLU main menu
2.
With
Quick Setup
highlighted, press Enter.
The first Quick Setup screen enables you to make Date and Time settings.
Setting system date and time
1.
Press the arrow keys to highlight
System Date
.
2.
Press the backspace key to erase the current date.
3.
Type the new date.
4.
Follow the same procedure to set the System Time.
5.
Press Ctrl-A to save these settings and move to the Management Port
configuration screen.
Making Management Port settings
By default, DHCP is disabled on VTrak and the default Management Port IP
address is set to 10.0.0.2.
Note that the IP address described here belongs to the VTrak subsystem, not to
the RAID controller. Use this IP address to log into the VTrak over your network.
Manual IP settings
To make Management Port settings manually:
1.
Press the arrow keys to highlight
IP Address
.
2.
Press the backspace key to erase the current IP Address.
Содержание E310f
Страница 1: ...VTRAK E Class E310f and E310s PRODUCT MANUAL Version 1 1 ...
Страница 14: ...VTrak E Class Product Manual xiv ...
Страница 22: ...VTrak E Class Product Manual 8 ...
Страница 58: ...VTrak E Class Product Manual 44 ...
Страница 61: ...Chapter 4 Management with WebPAM PROe 47 Figure 1 The WebPAM PROe log in screen ...
Страница 215: ...Chapter 5 Management with the CLU 201 Shutdown complete It is now safe to power off the subsystem ...
Страница 218: ...VTrak E Class Product Manual 204 ...
Страница 228: ...VTrak E Class Product Manual 214 11 Verify that the Fan LEDs are green This completes the blower replacement procedure ...
Страница 234: ...VTrak E Class Product Manual 220 Figure 13 Replacing the VTrak controller ...
Страница 304: ...VTrak E Class Product Manual 290 ...
Страница 316: ...VTrak E Class Product Manual 302 ...


