


Chapter 5: Management with the CLU
173
6.
Highlight
Hard ALPA
and press the backspace key to erase the current
value, then type the new value.
The range is 0 to 255. 255 disables this feature.
7.
Press Ctrl-A to save your settings.
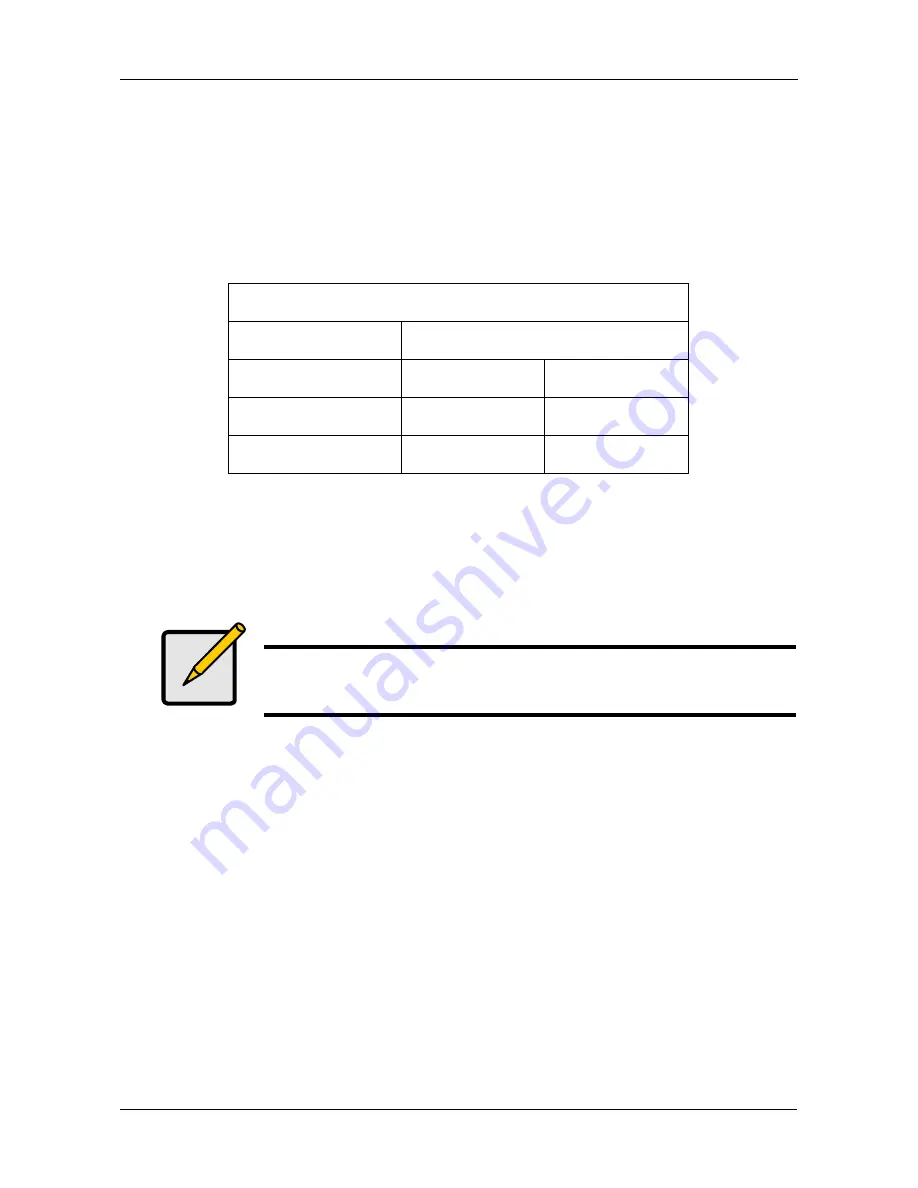
The table below shows the type of attached topology you will achieve based on
your connection type and the configured topology you select:
Example 1: If you connect the VTrak to a Fibre Channel switch and select NL-
Port topology, you will create a Public Loop attached topology.
Example 2: If you have a Point to Point attached topology, you made a direct
connection (no switch) and selected N-port topology.
Viewing SFP Information
To view information about the SFPs (small form-factor plugable transceivers):
1.
From the Main Menu, highlight
Fibre Channel Management
and press Enter.
2.
Highlight
Fibre Channel Ports
and press Enter.
3.
Highlight
Fibre Channel Port 1
or
Port 2
and press Enter.
4.
Highlight
Fibre Channel Port SFP
and press Enter.
The screen displays information about the SFP transceiver. There are no
user settings on this screen.
Viewing Fibre Channel Port Statistics
To view port statistics:
1.
From the Main Menu, highlight
Fibre Channel Management
and press Enter.
Fibre Channel Attached Topology
Configured Topology
Connection Type
N-Port
NL-Port
Switch
Fabric Direct
Public Loop
Direct
Point to Point
Private Loop
Note
In some cases, HBA settings to N-Port only work if connected to
the switch. Refer to your HBA manual for more information.
Содержание E310f
Страница 1: ...VTRAK E Class E310f and E310s PRODUCT MANUAL Version 1 1 ...
Страница 14: ...VTrak E Class Product Manual xiv ...
Страница 22: ...VTrak E Class Product Manual 8 ...
Страница 58: ...VTrak E Class Product Manual 44 ...
Страница 61: ...Chapter 4 Management with WebPAM PROe 47 Figure 1 The WebPAM PROe log in screen ...
Страница 215: ...Chapter 5 Management with the CLU 201 Shutdown complete It is now safe to power off the subsystem ...
Страница 218: ...VTrak E Class Product Manual 204 ...
Страница 228: ...VTrak E Class Product Manual 214 11 Verify that the Fan LEDs are green This completes the blower replacement procedure ...
Страница 234: ...VTrak E Class Product Manual 220 Figure 13 Replacing the VTrak controller ...
Страница 304: ...VTrak E Class Product Manual 290 ...
Страница 316: ...VTrak E Class Product Manual 302 ...


