52
05 Audio and Video Quality Settings
Video adjustments
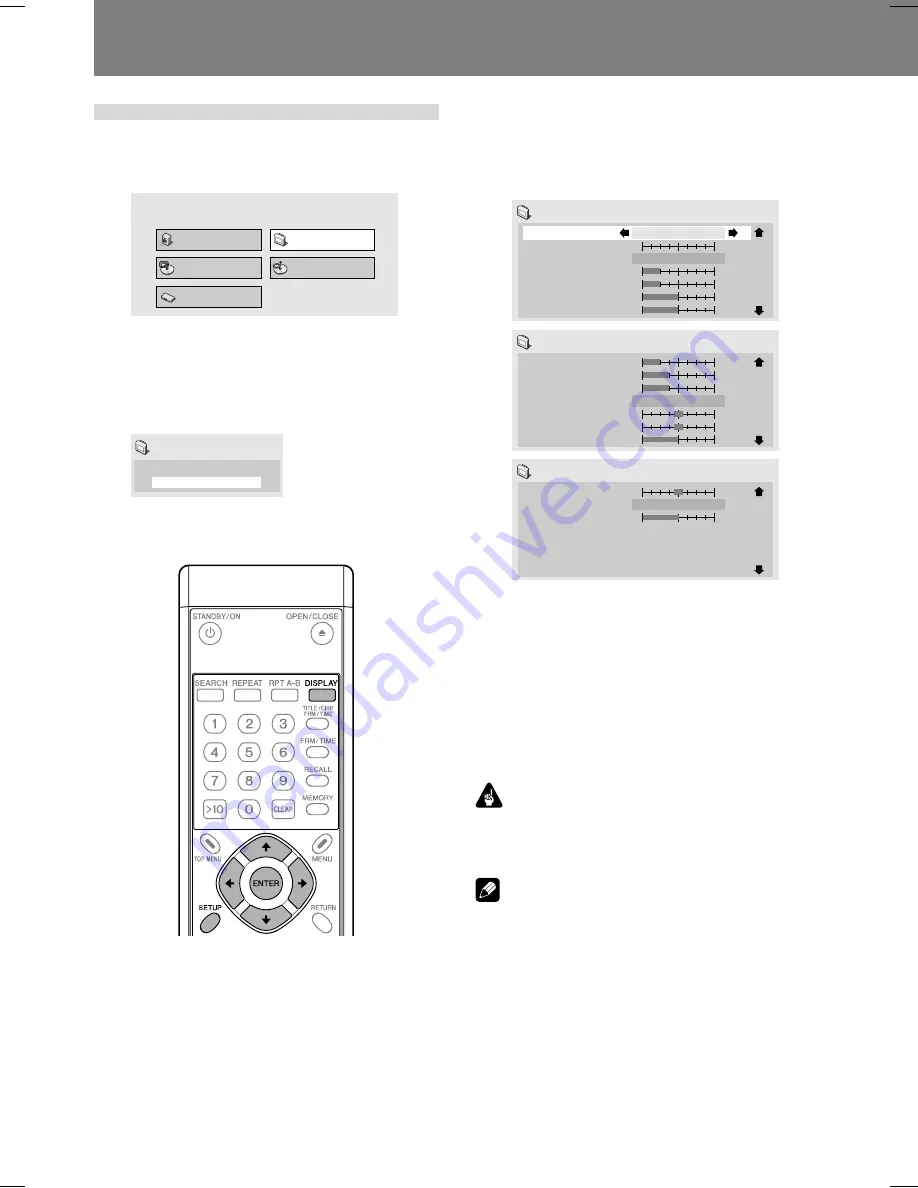
1. Press the SETUP button to display the
SETUP menu, then select [Video Adjust]
and press the ENTER button.
Audio Settings
Play Mode
Disc Navigator
Initial Settings
Video Adjust
2. Use the left/right cursor buttons (
|
,
\
)
to select from [Memory 1], [Memory 2],
or [Memory 3], then press the down
cursor button (
«
); select [Detailed
Settings] and press the ENTER button.
Memory 1
Detailed Settings
Video Adjust
If the
ENTER
button is not pressed before a certain
period of time has elapsed, the [
Video Adjust
] menu
screen will disappear and the selection will be canceled.
3. Use the up/down cursor buttons (
»
,
«
)
to select the item, then use the right/left
cursor buttons (
|
,
\
) to adjust or select
the value.
See page 53 regarding the contents of setting items.
Recall Settings
Prog. Motion
PureCinema
YNR
CNR
Sharpness High
Sharpness Mid
Memory 1
Auto 1
Memory 1
soft
fine
off
max
first
slow
off
max
soft
fine
1/3
Detail
White Level
Black Level
Black Setup
Gamma
Hue
Chroma Level
0 IRE
Memory 1
off
max
min
max
min
max
–
+
green
red
min
max
2/3
Chroma Delay
HDMI Color Adjust
DVI Detail
Standard
Memory 1
soft
fine
–
+
3/3
Pressing the
DISPLAY
button alternates between the
display of the single item selected and the full-screen
display.
4. After selecting/adjusting the necessary
items, press the ENTER button to exit the
menu.
The video memory setting [
Memory 1
], [
Memory 2
],
[
Memory 3
] selected in step 2 will be stored.
If the selected memory bank already has a video
memory setting stored in it, the previous contents will
be erased (overwritten).
Important
After completing settings, be sure to press the
EN-
TER
button or
SETUP
button to confirm the selections.
If any other button is used to exit the setting menu,
the newly set contents will not be stored.
Note
Some settings may not appear obvious, depending on
the disc or display used.


