


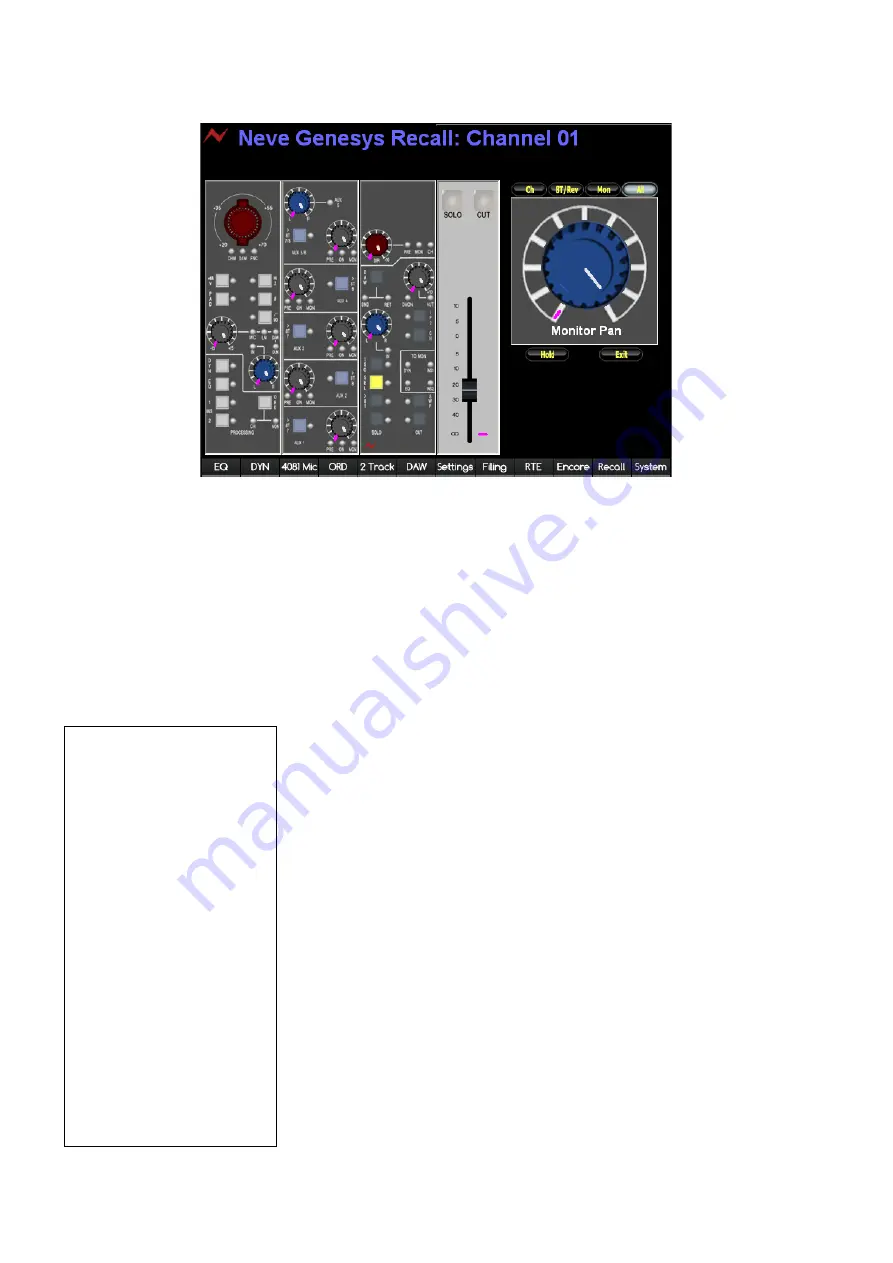
You will now be shown a screen that shows which controls require
manually resetting on Channel Strip 1 (if there are no controls on Strip 1
that require resetting, the graphic will show the first channel strip where
this is the case).
The Channel Strip being displayed on-screen will also be shown on the
console surface, with the relevant
SOLO
LED for that Channel strip being
lit.
Where a control on the surface matches that held in the Recall file, there
will be no purple mark around it, and the control will appear lighter in
colour.
The graphic on the right side of the screen is an enlarged version of the
first control that requires resetting.
The four buttons above the large control display allow you to set which
sections of the desk to be reset and verified.
u
Select as appropriate.
For example, if you only have
Ch
selected, then no controls for the 8T or
Monitor sections will be displayed on screen, or included in the verify
procedure.
u
Each time you click
Ch
,
8T/Rev
or
Mon
, the Recall software to start
to scan those sections of the console and display any differences so they
can be reset.
By default, this will be set to
All
, until another selection is made.
u
Turn each control on the desk until it matches the purple mark.
Once a control has been set, the next control down on that particular
channel strip will be displayed on the right hand side.
u
Continue to match all the controls as they are displayed.
Please note, that you do not have to set the controls on a channel strip in
the order that they are displayed.
If you select another control other than is currently displayed on the right
side of the screen, the display will change to show whichever control you
are resetting.
Once a particular section on the desk has been set, that section on the left
side of the screen will clear until all controls for all three sections on a
channel strip have been set.
- 121 -
Keyboard Shortcuts
Tab
– turns Hold mode on and
off (see below)
0
– Directly displays the Monitor
Panel when Recall is active.
Auto mode:
Left Arrow
– will advance the
on-screen display by 1 channel.
If there are no controls to be
reset on this channel, it will
advance to the next channel
that does.
Right Arrow
- will decrease the
on-screen display by 1 channel.
If there are no controls to be
reset on this channel, it will
have no effect.
Hold mode:
Left Arrow
– will advance the
on-screen display by 1 channel
Right Arrow
- will decrease the
on-screen display by 1 channel.


