background image


10-46  Firmware User Guide


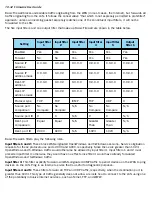
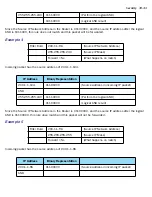
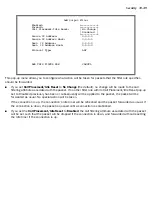
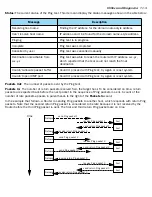
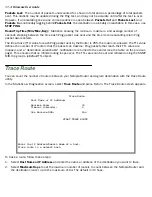
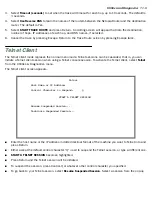
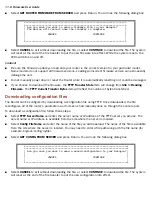
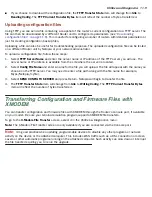
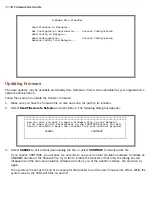
A warning screen will ask you to confirm your choice.

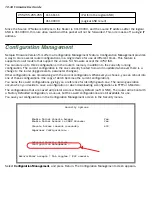
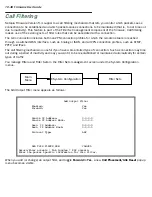
                           Configuration Management

         Save Current Configuration as...   +-Configuration Name---Type---+
         Replace Existing Configuration...  +-----------------------------+
         Boot from a Configuration...       | Backup Config        Binary |
         Delete a Configuration...          | HappyInternet        Binary |
                                            |                             |
                                            +-----------------------------+

Содержание 4000 Series

Страница 1: ...e e e e N N N Ne e e et t t to o o op p p pi i i ia a a a 4 4 4 40 0 0 00 0 0 00 0 0 0 S S S Se e e er r r ri i i ie e e es s s s E E E Eq q q qu u u ui i i ip p p pm m m me e e en n n nt t t t N N N Ne e e et t t to o o op p p pi i i ia a a a F F F Fi i i ir r r rm m m mw w w wa a a ar r r re e e e V V V Ve e e er r r rs s s si i i io o o on n n n 5 5 5 5 4 4 4 4 ...

Страница 2: ... registered U S Patent and Trademark Office Broadband Without Boundaries and 3 D Reach are trademarks belonging to Netopia Inc All other trademarks are the property of their respective owners All rights reserved Netopia Inc 6001 Shellmound Street Emeryville CA 94608 U S A Part Number Netopia part number 6161184 00 01 ...

Страница 3: ...uration screen 2 3 G SHDSL Line Configuration screen 2 6 T1 Line Configuration screen 2 7 Frame Relay Configuration 2 9 Frame Relay DLCI configuration 2 11 Multiple ATM Permanent Virtual Circuits 2 16 Multiple ATM PVC overview 2 16 Multiple ATM PVC configuration 2 16 Editing circuits 2 20 Changing a circuit 2 21 Monitoring multiple virtual circuits 2 22 Creating a New Connection Profile 2 24 The D...

Страница 4: ...t Protocol 2 43 Security 2 43 Upgrade Feature Set 2 43 RFC 1483 Transparent Bridging 2 44 Logging 2 46 Chapter 3 Multiple Network Address Translation 3 1 Overview 3 1 Features 3 2 Supported traffic 3 5 Support for Microsoft Network MSN Messenger 3 5 Support for AOL Instant Messenger AIM File Transfer 3 5 MultiNAT Configuration 3 6 Easy Setup Profile configuration 3 6 Server Lists and Dynamic NAT c...

Страница 5: ...ion 4 11 ATMP PPTP Default Profile 4 11 VPN QuickView 4 13 Dial Up Networking for VPN 4 14 Installing Dial Up Networking 4 14 Creating a new Dial Up Networking profile 4 15 Configuring a Dial Up Networking profile 4 16 Installing the VPN Client 4 17 Windows 95 VPN installation 4 17 Windows 98 VPN installation 4 18 Connecting using Dial Up Networking 4 19 Allowing VPNs through a Firewall 4 19 PPTP ...

Страница 6: ...ication configuration 6 10 Connection Profiles and Default Profile 6 16 IP Address Serving 6 17 IP Address Pools 6 20 DHCP NetBIOS Options 6 22 More Address Serving Options 6 24 Configuring the IP Address Server options 6 25 DHCP Relay Agent 6 30 Connection Profiles 6 32 Multicast Forwarding 6 34 Chapter 7 Line Backup 7 1 External Dial Backup Support 7 2 Configuring External Dial Backup 7 2 WAN Co...

Страница 7: ...ols 9 1 Quick View Status Overview 9 1 General status 9 2 Current status 9 3 Status lights 9 3 Statistics Logs 9 4 Event Histories 9 4 IP Routing Table 9 7 General Statistics 9 7 System Information 9 9 Simple Network Management Protocol SNMP V2c 9 10 Enterprise specific SNMP Changes 9 10 The SNMP Setup screen 9 11 SNMP traps 9 12 Chapter 10 Security 10 1 Suggested Security Measures 10 1 Console Ti...

Страница 8: ...a filter set 10 27 Deleting a filter set 10 31 A sample filter set 10 31 Policy based Routing using Filtersets 10 34 TOS field matching 10 35 Firewall Tutorial 10 37 General firewall terms 10 37 Basic IP packet components 10 37 Basic protocol types 10 37 Firewall design rules 10 38 Filter basics 10 40 Example filters 10 41 Configuration Management 10 44 TFTP and X Modem 10 47 Call Filtering 10 48 ...

Страница 9: ...nsole connection problems A 2 Network problems A 2 How to Reset the Router to Factory Defaults A 3 Power Outages A 3 Technical Support A 4 How to reach us A 4 Appendix B Understanding IP Addressing B 1 What is IP B 1 About IP Addressing B 1 Subnets and subnet masks B 2 Example Using subnets on a Class C IP internet B 3 Example Working with a Class C subnet B 5 Distributing IP Addresses B 5 Technic...

Страница 10: ...x Firmware User Guide Packet header types B 14 Appendix C Binary Conversion Table C 1 Index ...

Страница 11: ...a Router Getting Started guide or the applicable User s Reference Guide You should read the Getting Started guide before reading this Firmware User Guide Note This Guide also includes descriptions of new features and changes to the functionality of the firmware for the current release Netopia Firmware Version 5 4 Such descriptions supersede the descriptions of the corresponding features given in t...

Страница 12: ...rmit changing the values contained in the default connection profile You can use Easy Setup to initially configure the router directly through a console session Easy Setup menus contain up to five descendant screens for viewing or altering these values The number of screens depends on whether you have optional features installed The Getting Started manual describes the Easy Setup menus to get you ...

Страница 13: ...ter your network and their history See Statistics Logs beginning on page 9 4 The Quick Menus screen is a shortcut entry point to the most commonly used configuration menus that are accessed through the other menu entry points The Quick View menu displays at a glance current real time operating information about your router See Quick View Status Overview on page 9 1 Netopia Models This Firmware Use...

Страница 14: ...hing the console cable see Connecting a Console Cable to your Equipment on page 1 5 Telnet software installed on the computer you will use to configure the router Configuring Telnet software If you are configuring your device using a Telnet session your computer must be running a Telnet software program If you connect a PC with Microsoft Windows you can use a Windows Telnet application or simply ru...

Страница 15: ... port Since Macintosh computers have different serial bus connectors you may need a USB to DB 9 or USB to serial adapter These are available from a variety of third party manufacturers This connection lets you use the computer to configure and monitor the Router via the console screens Example back panel To connect to your computer for serial console communication use a console cable appropriate t...

Страница 16: ...uses Parameter Suggested Value Terminal type PC ANSI BBS Mac ANSI VT 100 or VT 200 Data bits 8 Parity None Stop bits 1 Speed 9600 57600 bits per second Flow Control None Note The router firmware contains an autobaud detection feature If you are at any screen on the serial console you can change your baud rate and press Return HyperTerminal for the PC requires a disconnect The new baud rate is disp...

Страница 17: ...tem Configuration and press Return The System Configuration screen appears 2 Select IP Setup and press Return The IP Setup screen appears To go back in this sequence of screens use the Escape key To Use These Keys Move through selectable items in a screen or pop up menu Up Down Left and Right Arrow Set a change to a selected item or open a pop up menu of options for a selected item like entering a...

Страница 18: ...1 8 Firmware User Guide ...

Страница 19: ...g topics WAN Configuration on page 2 1 ADSL Line Configuration screen on page 2 2 SDSL IDSL Configuration screen on page 2 3 G SHDSL Line Configuration screen on page 2 6 T1 Line Configuration screen on page 2 7 Frame Relay Configuration on page 2 9 Multiple ATM Permanent Virtual Circuits on page 2 16 Creating a New Connection Profile on page 2 24 The Default Profile on page 2 28 Scheduled Connect...

Страница 20: ...on or FDM the default 4 If you selected Multimode Circuit Type the Fast Retrain Enabled field appears Toggle it to On the default or Off 5 Select Data Link Encapsulation and press Return The pop up menu will offer you the choice of PPP or RFC1483 6 Press Escape to return to the WAN Configuration screen For multiple permanent virtual circuit PVC configurations see Multiple ATM Permanent Virtual Cir...

Страница 21: ... the router must reboot and you will see a warning screen to confirm your choice IDSL configuration offers different options See IDSL Line Configuration screen on page 2 5 The Operation Mode pull down menu allows you to select the type of SDSL ATM DSLAM to which you will be connecting Generic Lucent Nokia EOC Fast Nokia Fixed Paradyne Nortel UE IMAS or Newbridge SDSL Line Conf Line Type SDSL ATM O...

Страница 22: ...n is attempted If you choose Locked the Data Rate you select in the next menu will always be used The Data Rate pull down menu allows you to select the data rate for your connection This is usually assigned by your Service provider Your Data Link Encapsulation may be either PPP or RFC1483 as assigned by your Service Provider If you are using PPP the PPP Mode menu offers either VC Multiplexed or LL...

Страница 23: ...using Frame Relay a PPP over Frame Relay Enabled option appears and allows you to tog gle it either On or Off If you enable PPP over Frame Relay the DLCI and LMI fields appear The DLCI field is editable the default is 16 The LMI pull down menu offers the choices None ANSI Annex D CCITT Annex A or LMI IDSL Line Configuration Line Type IDSL Data Rate kbps 144 2B D Data Link Encapsulation PPP Return ...

Страница 24: ...unless your provider specifically tells you to do so Select Unused Cell Format and from the pop up menu select either Idle the default or Empty This setting must match the format used by your service provider Idle is the most common so you probably do not need to change it unless your provider specifically tells you to do so Select Data Link Encapsulation and from the pop up menu choose your DLE I...

Страница 25: ...e to use the auto detection feature Toggle this item to Yes if your service provider uses equipment that supports DS0 channel auto detection Otherwise accept the default No Select Number of DS0 Channels and enter the number of DS0 channels that you and your telephone service provider have determined are necessary for your T1 line The default setting for DS0 Channels is 1 one Press Return Note Each...

Страница 26: ...ing on your selection T1 Line Configuration Operation Mode Normal Line Encoding B8ZS Framing Mode ESF Number of DS0 Channels 1 First DS0 Channel 1 Channel Data Rate Nx64k Data Link Encapsulation RFC1483 RFC1483 Mode Bridged 1483 PPP over Ethernet PPPoE Off TO MAIN MENU NEXT SCREEN Return Enter goes to new screen Enter Information supplied to you by your telephone company T1 Line Configuration Oper...

Страница 27: ... Relay as your data link encapsulation method see Frame Relay Configuration on page 2 9 for more information Frame Relay Configuration If you chose Frame Relay as your data link encapsulation type you can now configure the Frame Relay options from the WAN Configuration menu From the WAN Configuration screen select WAN Setup then select the Frame Relay Configuration option and press Return The Frame...

Страница 28: ... if you want the frames on your line that exceed the configured service parameters to be dropped at the router Buffered if you want the frames on your line that exceed the link capacity to be delayed until the link is less busy or None if you want all of the frames on your line to be transmitted Press Return Note If you select None as the Tx Injection Management type the three Tx Injection Managem...

Страница 29: ...Ns Forward Explicit Congestion Notification This feature is designed to notify you that congestion avoidance procedures should be initiated where applicable for traffic in the same direction as the received frame It indicates that the frame in question has encountered congested resources Note The Congestion Management Enabled field will only appear if Standard or Buffered is selected as the option...

Страница 30: ...Change DLCIs in the Frame Relay DLCI Configuration screen and press Return The Frame Relay DLCI Configuration table is a handy way to quickly view the DLCI names and DLCI numbers that you attribute to your Frame Relay profiles Frame Relay DLCI Configuration Display Change DLCIs Add DLCI Delete DLCI Add delete and modify DLCIs from here Frame Relay DLCI Configuration DLCI Name DLCI Number DLCI 16 1...

Страница 31: ...I Configuration screen Select a DLCI Name from the table and press Return to go to the Change DLCI screen The parameters in this screen are the same as the parameters in the Add DLCI screen To find out how to set them see Adding a Frame Relay DLCI configuration on page 2 14 Change DLCI DLCI Name DLCI 33 DLCI Enabled Yes DLCI Number 16 991 32 Remote IP Address 2 0 0 2 ...

Страница 32: ...4 Select Remote IP Address and enter the remote IP address your ISP or network administrator gave you that represents the remote sites IP address for their router Press Return If you selected Standard or Buffered as the Tx Injection Management type in the Frame Relay Configuration screen go to the next bulleted item below If you selected None in the Frame Relay Configuration screen go to step 6 Be...

Страница 33: ...mber of CIRs for all PVCs exceeds the line rate setup 5 Select ADD DLCI NOW to save the current static Frame Relay DLCI profile that you have just entered and press Return to go back to the Frame Relay DLCI Configuration screen Alternately you can cancel the Frame Relay DLCI profile you have just created by selecting CANCEL to exit the Add DLCI screen Deleting a Frame Relay DLCI configuration To de...

Страница 34: ...r between one and eight corresponding to the circuit s position in the list of up to eight circuits You can also individually enable or disable a circuit without deleting it This is useful for temporarily removing a circuit without losing the configured attributes In order to function each circuit must be bound to a Connection Profile or to the Default Profile Among other attributes the profile bi...

Страница 35: ...Virtual Path Identifier and the Virtual Channel Identifier in the Circuit VPI and Circuit VCI fields respectively ATM Circuits Configuration Show Change Circuit Add Circuit Delete Circuit Add Circuit Circuit Name Circuit 2 Circuit Enabled Yes Circuit VPI 0 255 0 Circuit VCI 32 65535 QoS UBR Peak Cell Rate 0 line rate CBR Use Connection Profile Default Profile Use Default Profile for Circuit ADD Ci...

Страница 36: ...two ATM classes of ser vice for data connections Unspecified Bit Rate UBR and Constant Bit Rate CBR You can configure these classes of service on a per VC basis The default ATM class of service is UBR Then select a Connection Profile for the Circuit To use the Default Profile select Use Default Profile for Circuit and press Return For other options select a profile from the Use Connection Profile ...

Страница 37: ... the Default Profile If you add a second VC it is initialized to the Default Profile and the menu screens display the VC Connection Profile related items allowing you to bind to a specific Connection Profile instead of the Default Profile In addition the router statically binds the first VC according to the rules used to select a profile for dynamic binding At this point each profile uses static b...

Страница 38: ...he ATM Circuits Configuration screen From the Main Menu navigate to the ATM Circuits Configuration screen Select Show Change Circuit and press Return Main Menu WAN Configuration ATM Circuits Configuration ATM Circuits Configuration Show Change Circuit Add Circuit Delete Circuit ...

Страница 39: ... character name with the circuit The default circuit name is Circuit n where n is some number between one and eight corresponding to the circuit s position in the list of up to eight circuits ATM Circuits Configuration Circuit Name VPI VCI Show Change Circuit Circuit 1 8 35 Add Circuit Voice Circuit 0 0 Delete Circuit Up Down Arrow Keys to select ESC to dismiss Return Enter to Edit Change Circuit ...

Страница 40: ...uit menu depends not on the number of Connection Profiles you have created but the number of data VCs you have added See Multiple ATM PVC configuration on page 2 16 If you have more than one data VC you can choose how Connection Profiles are associated with VCs otherwise you get default behavior and the Connection Profile Is field cannot be selected Monitoring multiple virtual circuits The General...

Страница 41: ...iew Press Return A pop up window appears displaying detailed information for the selected circuit ATM VC Statistics VPI VCI Local IP Addr Frames Rx Frames Tx Bytes Rx Bytes Tx SCROLL UP 0 39 111 222 333 4 0 0 0 0 8 36 1 0 70 0 SCROLL DOWN ATM VC Statistics View St VPI VCI 0 39 Circuit Name Circuit 4 8 36 Connection Profile Name Profile 4 Bytes Rx 0 Bytes Tx 0 Frames Rx 0 Frames Tx 0 Frames Rx Disc...

Страница 42: ... Add Connection Profile The Add Connection Profile screen appears On a Netopia Router you can add up to 15 more connection profiles for a total of 16 but you can only use one at a time unless you are using VPNs 1 Select Profile Name and enter a name for this connection profile It can be any name you wish For example the name of your ISP 2 Toggle Profile Enabled to Yes or No The default is Yes You ...

Страница 43: ...file Name Profile 1 Profile Enabled Yes Encapsulation Type RFC1483 Mode Bridged 1483 Routed 1483 IP Profile Parameters COMMIT CANCEL Add Connection Profile Profile Name Profile 1 Profile Enabled Yes Encapsulation Type PPP Underlying Encapsulation None PPP Mode VC Multiplexed Encapsulation Options IP Profile Parameters Interface Group Primary COMMIT CANCEL Configure a new Conn Profile Finished COMM...

Страница 44: ... the default or No See Line Backup on page 7 1 for more information Datalink PPP MP Options Data Compression Standard LZS Send Authentication PAP Send User Name Send Password Receive User Name Receive Password Dial on Demand Yes Data Compression defaults to Standard LZS You can select Ascend LZS if you are connecting to compatible equipment or None from the pull down menu The Send Authentication p...

Страница 45: ...files in your device return to the WAN Configuration screen and select Display Change Connection Profile The list of Connection Profiles is displayed in a scrolling pop up screen IP Profile Parameters Address Translation Enabled Yes IP Addressing Numbered NAT Map List Easy PAT List NAT Server List Easy Servers Local WAN IP Address 0 0 0 0 Local WAN IP Mask 0 0 0 0 Filter Set Remove Filter Set RIP ...

Страница 46: ... screen from the Main Menu by selecting WAN Configuration and then selecting Default Profile The Default Profile screen appears You can set Must Match a Defined Profile item to Yes or No the default This item controls whether or not the DSL link will come up without an explicitly configured connection profile If your ISP is serving you a dynamic IP Address you need not explicitly configure a conne...

Страница 47: ...able it by toggling to Yes For details on setting up IP Parameters see IP Setup on page 6 2 Scheduled Connections Scheduled connections are useful for PPPoE PPTP and ATMP connection profiles To go to the Scheduled Connections screen from the WAN Configuration screen select Advanced Connection Options and then select Scheduled Connections IP Parameters Default Profile Address Translation Enabled No...

Страница 48: ...resenting a day is capitalized the connection will be activated on that day a lower case letter means that the connection will not be activated on that day If the scheduled connection is configured for a once only connection the word once will appear instead of the days of the week Scheduled Connections Display Change Scheduled Connection Add Scheduled Connection Delete Scheduled Connection Naviga...

Страница 49: ...connection To activate the connection select Scheduled Connection Enable and toggle it to On You can make the scheduled connection inactive by toggling Scheduled Connection Enable to Off Decide how often the connection should take place by selecting How Often and choosing Weekly or Once Only from the pop up menu The Schedule Type allows you to set the exact weekly schedule or once only schedule Op...

Страница 50: ...Start Time and enter the time to initiate the scheduled connection You must enter the time in the format H M where H is a one or two digit number representing the hour and M is a one or two digit number representing the minutes The colon is mandatory For example the entry 1 3 or 1 03 would be accepted as 3 minutes after one o clock The entry 7 0 or 7 00 would be accepted as seven o clock exactly T...

Страница 51: ...d be accepted as seven o clock exactly The entries 44 5 and 2 would be rejected Select AM or PM and choose AM or PM Select Scheduled Window Duration and enter the maximum duration allowed for this scheduled connection Use the same format restrictions noted above You are finished configuring the once only options Return to the Add Scheduled Connection screen to continue In the Add Scheduled Connect...

Страница 52: ... are the same as the ones in the Add Scheduled Connection screen except that ADD SCHEDULED CONNECTION and CANCEL do not appear To find out how to set them see Adding a scheduled connection on page 2 31 Deleting a scheduled connection To delete a scheduled connection select Delete Scheduled Connection in the Scheduled Connections screen to display a table of scheduled connections Select a scheduled...

Страница 53: ...the system configuration options described in later chapters System configuration of dynamic IP address distribution through DHCP or BootP Greater network security through the use of filters Use of Network Time Protocol To access the system configuration screens select System Configuration in the Main Menu then press Return IP Setup on page 2 36 Filter Sets on page 2 36 IP Address Serving on page ...

Страница 54: ... configure IP address serving on your network by means of DHCP WANIP and BootP Details are given in IP Address Serving on page 6 17 Network Address Translation NAT These screens allow you to configure the Multiple Network Address Translation MultiNAT features Details are given in Multiple Network Address Translation on page 3 1 System Configuration IP Setup Filter Sets IP Address Serving Network A...

Страница 55: ...UDP no activity time out The time in seconds after which a UDP session will be terminated if there is no traffic on the session TCP no activity time out The time in seconds after which an TCP session will be terminated if there is no traffic on the session Exposed Addresses The hosts specified in Exposed addresses will be allowed to receive inbound traffic even if there is no corresponding outboun...

Страница 56: ... screen appears IP Profile Parameters Address Translation Enabled Yes IP Addressing Numbered NAT Map List Easy PAT List NAT Server List Easy Servers NAT Options Stateful Inspection Enabled No Local WAN IP Address 0 0 0 0 Local WAN IP Mask 0 0 0 0 Filter Set Remove Filter Set RIP Profile Options Return Enter to select among between Configure IP requirements for a remote network connection here IP P...

Страница 57: ...te If Stateful Inspection is enabled on a base connection profile for example for PPP RFC1483 bridged routed or PPPoE Enable default mapping to router must be yes to allow inbound VPN terminations for example for PPTP ATMP client access to the router Deny Fragmented Packets Toggling this option to Yes causes the router to discard fragmented packets on this interface You can apply these parameters ...

Страница 58: ...WAN interface The hosts specified in exposed addresses will be allowed to receive inbound traffic even if there is no corresponding outbound traffic Stateful Inspection Parameters Exposed Address List N Max TCP Sequ my_xposed_list 0 None Enable defaul No Deny Fragment No Exposed Addre Up Down Arrows to select then Return Enter ESC to cancel Add Exposed Address List Exposed Address List Name my_xpo...

Страница 59: ...range The acceptable range is from 1 65535 You can edit or delete exposed address lists by selecting Show Change Exposed Address List or Delete Exposed Address List A list of previously configured exposed addresses appears This allows you to select an exposed address list for editing or deletion Change Exposed Address Range my_xposed_list First Exposed Address 192 168 1 10 Last Exposed Address Pro...

Страница 60: ...ime server in the field Time Server Host Name IP Address 3 Select the Router s time zone from the Time Zone pop up menu and press Return 4 In the NTP Update Interval field enter how often to synchronize with the time server using the format HHHH MM where H is hours and M is minutes 5 Select a System Date Format the options are MM DD YY DD MM YY and YY MM DD where M is month D is day and Y is year ...

Страница 61: ...hese screens allow you to monitor and configure your network by means of a standard Simple Network Management Protocol SNMP agent Details are given in Simple Network Management Protocol SNMP V2c on page 9 10 Security These screens allow you to add users and define passwords on your network Details are given in Security on page 10 1 Upgrade Feature Set You can upgrade your Router by adding new feat...

Страница 62: ...elect Change Device to a Bridge and press Return You will be challenged to confirm this choice If you chose CONTINUE the device will reboot and restart in bridge mode Routing features will be disabled and the console menus corresponding configuration items such as Easy Setup will be removed System Configuration IP Setup Filter Sets IP Address Serving Network Address Translation NAT Date and Time C...

Страница 63: ...dged mode with the WAN handling Frame Relay packets that are bridged to the Ethernet interface For these models LMI multiple DLCIs etc can be configured If you choose to run the router in bridged mode and select Frame Relay as the data link encapsulation method in the WAN Wide Area Network Setup menu the WAN Configuration menu now offers options to configure Frame Relay and Frame Relay DLCIs Netop...

Страница 64: ...ch ones are logged and which are ignored You can enable or disable the syslog client dynamically When enabled it will report any appropriate and previously unreported events You can specify the syslog server s address either in dotted decimal format or as a DNS name up to 63 characters You can specify the UNIX syslog Facility to use by selecting the Facility pop up Erase the log by selecting DUMP ...

Страница 65: ...xt netopia com ASYNC Modem carrier detected more Modem reports 26400 V34 May 5 10 14 06 tsnext netopia com WAN 56K Modem 1 activated at 115 Kbps May 5 10 14 06 tsnext netopia com Connect Confirmed to our DN 5108645534 May 5 10 14 06 tsnext netopia com PPP Channel 1 up Answer Profile name Default Profile May 5 10 14 06 tsnext netopia com PPP NCP up session 1 Channel 1 Final fallback negotiated auth...

Страница 66: ...2 48 Firmware User Guide ...

Страница 67: ...erview NAT Network Address Translation is a means of mapping one or more IP addresses and or IP service ports into different values This mapping serves two functions It allows the addresses of many computers on a LAN to be represented to the public Internet by only one or a few addresses saving you money It can be used as a security feature by obscuring the true addresses of important machines fro...

Страница 68: ...ake it possible to provide access from the public network to hosts on the LAN Server lists allow you to define particular services such as Web ftp or e mail which are available via a public IP address You define the type of service you would like to make available and the internal IP address to which you would like to provide access You may also define a specific public IP address to use for this ...

Страница 69: ...translation Netopia s NAT implementation makes it possible to have a static mapping of one public address to one private address thus allowing applications such as NetMeeting to work by assuring that any traffic sent back to the source IP address is forwarded through to the internal machine Static one to one mapping works well if you have enough IP addresses for all the workstations on your LAN If...

Страница 70: ...t applies to the traffic being initiated is used For example if a connection is initiated from the public network and is destined for a public IP address configured on the Netopia Router the following comparisons are made in this order 1 The Netopia Router first checks its internal NAT cache to see if the data is part of a previously initiated connection if not 2 The Netopia Router checks the conf...

Страница 71: ...at supports the following IP protocols PAT TCP UDP traffic which does not carry source or destination IP addresses or ports in the data stream i e HTTP Telnet r commands tftp NFS NTP SMTP NNTP etc Static NAT All IP protocol traffic which does not carry or otherwise rely on the source or destination IP addresses in the data stream Dynamic NAT All IP protocol traffic which does not carry or otherwis...

Страница 72: ... Address is used to configure a NAT public address range consisting of the Local WAN IP Address and all its ports The public address map list is named Easy PAT List and the port map list is named Easy Servers The two map lists Easy PAT List and Easy Servers are created by default and NAT configuration becomes effective This will map all your private addresses 0 0 0 0 through 255 255 255 255 to you...

Страница 73: ...e they are to be associated with 4 Associate the Map or Server List to your WAN interface via a Connection Profile or the Default Profile The three NAT features all operate completely independently of each other although they can be used simultaneously on the same Connection Profile You can configure a simple 1 to many PAT often referred to simply as NAT mapping using Easy Setup More complex setup...

Страница 74: ...and ports so that connections initiated from the outside can access an interior server IP Setup Ethernet IP Address 192 168 1 1 Ethernet Subnet Mask 255 255 255 0 Define Additional Subnets Default IP Gateway 127 0 0 2 Primary Domain Name Server 0 0 0 0 Secondary Domain Name Server 0 0 0 0 Domain Name isp com Receive RIP Both Transmit RIP Off Static Routes IP Address Serving Network Address Transla...

Страница 75: ...nd last exterior ports in the range These are the ports that will be used for traffic initiated from the private LAN to the out side world Note For PAT map lists and server lists if you use the Public Address 0 0 0 0 the list will acquire its public IP address from the WAN IP address specified by your WAN IP configuration in the Connection Profile If that is a static IP address then the PAT map li...

Страница 76: ...he Network Address Translation screen Once the public ranges have been assigned the next step is to bind interior addresses to them Because these bindings occur in ordered lists called map lists you must first define the list then add mappings to it From the Network Address Translation screen select Add Map List and press Return The Add NAT Map List screen appears Select Map List Name and enter a ...

Страница 77: ...ng the public ranges you have defined From the list of public ranges you defined select the one that you want to map to the interior range for this Add NAT Map my_map First Private Address 192 168 1 1 Last Private Address 192 168 1 254 Use NAT Public Range ADD NAT MAP CANCEL Add NAT Map my_map Public Address Range Type Name 0 0 0 0 pat Easy PAT 206 1 1 6 pat my_first_range 206 1 1 1 206 1 1 2 stat...

Страница 78: ...u can create a new public range to be used by this map See Add NAT Public Range on page 3 9 The Add NAT Map screen now displays the range you have assigned Select ADD NAT MAP and press Return Your mapping is added to your map list Add NAT Map my_map First Private Address 192 168 1 1 Last Private Address 192 168 1 254 Use NAT Public Range my_first_range Public Range Type is pat Public Range Start A...

Страница 79: ...ation screen select Show Change Map List and press Return Select the map list you want to modify from the pop up menu The Show Change NAT Map List screen appears Network Address Translation NAT Map List Name Add Out Easy PAT List Show Ch my_map Delete Add Map Show Ch Delete Add Ser Show Ch Delete NAT Ass Up Down Arrow Keys to select ESC to dismiss Return Enter to Edit Show Change NAT Map List Map ...

Страница 80: ...hen select CHANGE NAT MAP and press Return Your changes will become effective and you will be returned to the Show Change NAT Map List screen Show Change NAT Map List Private Address Range Type Public Address Range 192 168 1 1 192 168 1 254 pat 206 1 1 6 192 168 1 253 192 168 1 254 static 206 1 1 1 206 1 1 2 192 168 1 1 192 168 1 252 dynamic 206 1 1 3 206 1 1 5 Change NAT Map my_map First Private ...

Страница 81: ... s port accessible and it isn t accessible through other means such as a static mapping you must create a server list Select Add Server List from the Network Address Translation screen The Add NAT Server List screen appears Select Server List Name and type in a descriptive name A new menu item Add Server appears Add NAT Server List Server List Name my_servers Add Server ...

Страница 82: ...your own by selecting Other If you select Other a screen is displayed that allows you to enter the port number range for your customized service Add NAT Server my_servers Service Server Private IP Address 192 168 1 45 Public IP Address 206 1 1 1 ADD NAT SERVER CANCEL Add NAT Server my_servers Type Port s Service ftp 21 telnet 23 Server Private IP Address smtp 25 tftp 69 Public IP Address gopher 70...

Страница 83: ... lists and server lists if you use the Public Address 0 0 0 0 the list will acquire its public IP address from the WAN IP address specified by your WAN IP configuration in the Connection Profile If that is a static IP address then the PAT map list and server lists will acquire that address If it is a negotiated IP address such as may be assigned via DHCP or PPP the PAT map list and server lists wi...

Страница 84: ...tion screen Select the Server List Name you want to modify from the pop up menu and press Return The Show Change NAT Server List screen appears Network Address Translation NAT Server List Name A my_servers S D A S D A S D Up Down Arrow Keys to select ESC to dismiss Return Enter to Edit Show Change NAT Server List Server List Name my_servers Add Server Show Change Server Delete Server ...

Страница 85: ...press Return Your changes take effect and you are returned to the Show Change NAT Server List screen Show Change NAT Server List Private Address Public Address Port Se 192 168 1 254 206 1 1 6 smtp 192 168 1 254 206 1 1 5 smtp 192 168 1 254 206 1 1 4 smtp Ad 192 168 1 254 206 1 1 3 smtp 192 168 1 254 206 1 1 1 smtp Sh De Up Down Arrow Keys to select ESC to dismiss Return Enter to Edit Change NAT Se...

Страница 86: ...u lists your configured servers Select the one you want to delete and press Return A dialog box asks you to confirm your choice Choose CONTINUE and press Return The server is deleted from the list Show Change NAT Server List Internal Address External Address Port Se 192 168 1 254 206 1 1 6 smtp 19 19 Ad Are you sure you want to delete this Server Sh CANCEL CONTINUE De ...

Страница 87: ...to a Connection Profile from the Main Menu go to the WAN Configuration screen then the Display Change Connection Profile screen From the pop up menu list of your Connection Profiles choose the one you want to bind your map list to Select IP Profile Parameters and press Return The IP Profile Parameters screen appears Main Menu WAN Configuration IP Profile Parameters Display Change Connection Profil...

Страница 88: ...IP Addressing Also the Local WAN IP Address and Mask fields visibility are dependent only on the IP Addressing type IP Profile Parameters NAT Map List Name Address Trans Easy PAT s IP Addressing my_map mbered None NAT Map List sy PAT NAT Server Li Local WAN IP Remote IP Add 7 0 0 2 Remote IP Mas 5 255 255 255 Filter Set tBIOS Filter Remove Filter Receive RIP th Up Down Arrow Keys to select ESC to ...

Страница 89: ...erver lists to a Connection Profile From the Main Menu go to the WAN Configuration screen then the Default Profile screen Select IP Parameters and press Return The IP Parameters Default Profile screen appears Toggle Address Translation Enabled to Yes Main Menu WAN Configuration IP Parameters WAN Default Profile IP Parameters Default Profile Address Translation Enabled Yes NAT Map List Easy PAT Lis...

Страница 90: ... will now be bound to the default profile Note There is no interdependency between NAT and IP Addressing Also the Local WAN IP Address and Mask fields visibility are dependent only on the IP Addressing type IP Parameters Default Profile NAT Map List Name Easy PAT List my_map Address Trans None s NAT Map List NAT Server Li Filter Set F Remove Filter Receive RIP th Up Down Arrow Keys to select ESC t...

Страница 91: ...twork Address Translation screen Select NAT Associations and press Return The NAT Associations screen appears You can toggle NAT On or Off for each Profile Interface name You do this by navigating to the NAT field associated with each profile using the arrow keys Toggle NAT on or off by using the Tab key You can reassign any of your map lists or server lists to any of the Profile Interfaces You do...

Страница 92: ... associated with the corresponding profile or interface NAT Associations NAT Map List Name Profile Interface Name Nat Server List Name Easy Setup Profile On Easy PAT List my_servers Profile 01 On my_first_map my_servers Profile 02 On my_second_map my_server_list Profile 03 On my_map None Profile 04 On None None Default Answer Profile On my_servers Up Down Arrow Keys to select ESC to dismiss Return...

Страница 93: ...ave a suitable subnet mask that is usable for example when using PPP or PPPoE the DHCP subnet configuration will default to a class C subnet mask Globally only one dynamically configured DHCP subnet is available If you configure multiple Connection Profiles to use IP Passthrough s DHCP option when any of these profiles is established the dynamic DHCP configuration will be overwritten In the case o...

Страница 94: ... Parameters Address Translation Enabled Yes IP Addressing Numbered NAT Map List Easy PAT List NAT Server List Easy Servers NAT Options Stateful Inspection Enabled No Local WAN IP Address 0 0 0 0 Local WAN IP Mask 0 0 0 0 Filter Set Remove Filter Set RIP Profile Options Toggle to Yes if this is a single IP address ISP account Configure IP requirements for a remote network connection here NAT Option...

Страница 95: ...ext client will get the IP passthrough address Note that there is no way to control which PC has the IP passthrough address without releasing all other DHCP leases on the LAN Note If you specify a non zeroes MAC address the DHCP Client Identifier must be in the format specified above Macintosh computers allow the DHCP Client Identifier to be entered as a name or text however Netopia routers accept...

Страница 96: ...jected by the router For example suppose you are a teleworker using an IPSec tunnel from the router and from the passthrough host Both tunnels go to the same remote endpoint such as the VPN access concentrator at your employer s office In this case the first one to start the IPSec traffic will be allowed the second one since from the WAN it s indistinguishable will fail ...

Страница 97: ...ough 206 1 1 6 255 255 255 248 subnet mask Your internal devices have IP addresses of 192 168 1 1 through 192 168 1 254 255 255 255 0 subnet mask In this example you will statically map the first five public IP addresses 206 1 1 1 206 1 1 5 to the first five corresponding private IP addresses 192 168 1 1 192 168 1 5 You will use these 1 to 1 mapped addresses to give your servers real addresses You...

Страница 98: ... SCREEN NEXT SCREEN Enter a subnet mask in decimal and dot form xxx xxx xxx xxx Enter basic information about your WAN connection with this screen IP Easy Setup Ethernet IP Address 192 168 1 1 Ethernet Subnet Mask 255 255 255 0 Domain Name ISP net Primary Domain Name Server 173 166 101 1 Secondary Domain Name Server 173 166 102 1 Default IP Gateway 206 1 1 254 IP Address Serving On Number of Clien...

Страница 99: ...ress Return This returns you to the Network Address Translation screen Select Add Public Range and press Return Type a name for this static range as shown below Enter the first and last public addresses your ISP assigned in their respective fields as shown The first five public IP addresses 206 1 1 1 206 1 1 5 in this example are statically mapped to the first five corresponding private IP address...

Страница 100: ... to bind the Map List to the profile You do this through either the NAT Associations screen or the profile s configuration screens The PAT part of this example setup will allow any user on the Netopia Router s LAN with an IP address in the range of 192 168 1 6 through 192 168 1 254 to initiate traffic flow to the outside world for example the Internet No one on the Internet would be able to initia...

Страница 101: ...er your Web server s address 192 168 1 2 and the public address for example 206 1 1 2 and then select ADD NAT SERVER Now return to Add Server choose the smtp port and enter 192 168 1 3 your Mail server s IP address for the Server Private IP Address You can decide if you want to present both your Web and Mail services as being on the same public address 206 1 1 2 or if you prefer to have your Mail ...

Страница 102: ...3 36 Firmware User Guide ...

Страница 103: ...you are creating a private network You can hold a conversation and exchange information about the happenings on opposite sides of the state or the continent that you are mutually interested in When your next door neighbor picks up the phone to call her daughter at college at the same time you are talking to your relatives your calls don t overlap but each is separate and private Neither house has ...

Страница 104: ...for tunnelling Point to Point Tunnelling Protocol PPTP Ascend Tunnel Management Protocol ATMP and IP Security IPsec The Netopia Router can use any one Point to Point Tunneling Protocol PPTP is an extension of Point to Point Protocol PPP and uses a client and server model Netopia s PPTP implementation is compatible with Microsoft s and can function as either the client PAC or the server PNS As a cl...

Страница 105: ...with the different protocols is done through the console based menu screens Each type is described in its own section About PPTP Tunnels on page 4 4 About IPsec Tunnels on page 4 7 About ATMP Tunnels on page 4 8 Your configuration depends on which protocol you and the router at the other end of your tunnel will use and whether or not you will be using the VPN client software in a standalone remote...

Страница 106: ...PTP is a Datalink Encapsulation option in Connection Profiles It is not an option in device or link configuration screens as PPTP is not a native encapsulation Consequently the Easy Setup Profile does not offer PPTP datalink encapsulation See the Creating a New Connection Profile on page 2 24 for information on creating Connection Profiles Channel 4 and higher events such as connections and discon...

Страница 107: ...e WAN the Tunnel Via Gateway field allows this path to be resolved From the pop up menu select an Authentication protocol for the PPP connection Options are PAP CHAP or MS CHAP The default is PAP The authentication protocol must be the same on both ends of the tunnel You can specify a Data Compression algorithm either None or Standard LZS for the PPTP connection Note When the Authentication protoc...

Страница 108: ...g as a PNS Tunnels are normally initiated On Demand however you can disable this feature When disabled the tunnel must be manually established or may be scheduled using the scheduled connections feature See Scheduled Connections on page 2 29 Some networks that use Microsoft Windows NT PPTP Network Servers require additional authentication information called Windows NT Domain Name when answering PP...

Страница 109: ...opia Routers support the more secure Tunnel mode Netopia Firmware Version 5 4 offers IPsec 3DES encryption over the VPN tunnel DES stands for Data Encryption Standard a popular symmetric key encryption method DES uses a 56 bit key Netopia Routers offer IPsec 3DES triple DES encryption as a standard option Some models support built in hardware acceleration of 3DES encryption at line speeds Internet...

Страница 110: ...ent data within Generic Routing Encapsulation GRE The GRE data is then routed using standard methods ATMP configuration ATMP is a Datalink Encapsulation option in Connection Profiles It is not an option in device or link configuration screens since ATMP is not a native encapsulation The Easy Setup Profile does not offer ATMP datalink encapsulation See Creating a New Connection Profile on page 2 24 ...

Страница 111: ... If the partner should be reached via an alternate port i e the LAN instead of the WAN the Tunnel Via Gateway field allows this path to be resolved You can specify a Network Name When the tunnel partner is another Netopia router this name may be used to match against a Connection Profile When the partner is an Ascend router in Gateway mode then Network Name is used by the Ascend router to match a ...

Страница 112: ...The encryption process protects the data by making it difficult for any third party to get at the original data Netopia PPTP is fully compatible with Microsoft Point to Point Encryption MPPE data encryption for user data transfer over the PPTP tunnel Microsoft Windows NT Server provides MPPE encryption capability only when Microsoft Challenge Handshake Authentication Protocol MS CHAP is enabled Ne...

Страница 113: ...ort MPPE at all the PPP session will be dropped This is done automatically and transparently ATMP PPTP Default Profile The WAN Configuration menu offers a ATMP PPTP Default Profile option Use this selection when your router is acting as the server for VPN connections that is when you are on the answering end of the tunnel establishment The ATMP PPTP Default Profile determines the way the attempted ...

Страница 114: ...ntication and press Return A pop up menu offers the following options PAP the default CHAP or MS CHAP If you chose PAP or CHAP authentication from the Data Compression pop up menu select either None the default or Standard LZS If you chose MS CHAP authentication the Data Compression option is not required and this menu item becomes hidden ATMP PPTP Default Profile Answer ATMP PPTP Connections No P...

Страница 115: ... Type Shows the data link encapsulation method PPTP or ATMP Rx Pckts Shows the number of packets received via the VPN tunnel Tx Pckts Shows the number of packets transmitted via the VPN tunnel Rx Discard Shows the number of packets discarded Remote Address Shows the tunnel partner s IP address Main Menu QuickView VPN QuickView VPN Quick View Profile Name Type Rx Pckts Tx Pckts RxDiscard Remote Add...

Страница 116: ...ndows 95 and comes standard with Windows 98 and Windows NT The VPN tunnel behaves as a private network connection unrelated to other traffic on the network Once you have installed Dial Up Networking you will be able to connect to your remote site as if you had a direct private connection regardless of the intervening network s through which your data passes You may need to install the Dial Up Netw...

Страница 117: ... have named it icon on your desktop Open the Dial Up Networking folder and then double click Make New Connection The Make New Connection wizard window appears 2 Type a name for this connection such as the name of your company or the computer you are dialing into From the pull down menu select the device you intend to use for the virtual private network connection This can be any device you have in...

Страница 118: ...he profile you created in the previous section 2 Right click the icon and from the pop up menu select Properties 3 In the Properties window click the Server Type button From the Type of Dial up Server pull down menu select the appropriate type of server for your system version Windows 95 users select PPP Windows 95 Windows NT 3 5 Internet Windows 98 users select PPP Windows 98 Windows NT Server In...

Страница 119: ...nstalled and have an established Internet connection Windows 95 VPN installation 1 From your Internet browser navigate to the following URL http www microsoft com NTServer nts downloads recommended dunl3win95 releasenotes aso Download the Microsoft Windows 95 VPN patch dun 1 3 to the Windows 95 computer you intend to use as a VPN client with PPTP Follow the installation instructions 2 From the Win...

Страница 120: ... select Settings then Control Panel and click once The Control Panel screen appears 2 Double click Add Remove Programs The Add Remove Programs screen appears 3 Click the Windows Setup tab The Windows Setup screen will be displayed within the top center box 4 Double click Communications This displays a list of possible selections for the communications option Active components will have a check in ...

Страница 121: ...ions that must cross the public network A strict firewall may not be provisioned to allow VPN traffic to pass back and forth as needed In order to ensure that a firewall will allow a VPN certain attributes must be added to the firewall s provisioning The provisions necessary vary slightly between ATMP and PPTP but both protocols operate on the same basic premise there are control and negotiation o...

Страница 122: ...lay Change Input Filter screen Select Input Filter 1 and press Return In the Change Input Filter 1 screen set the Destination Port information as shown below Select Input Filter 2 and press Return In the Change Input Filter 2 screen set the Protocol Type to allow GRE as shown below Main Menu System Filter Sets Display Change Filter Set Configuration Basic Firewall Source IP Addr Dest IP Addr Proto...

Страница 123: ...rce IP Address 0 0 0 0 Source IP Address Mask 0 0 0 0 Dest IP Address 0 0 0 0 Dest IP Address Mask 0 0 0 0 Protocol Type GRE Source IP Addr Dest IP Addr Proto Src Port D Port On Fwd 1 0 0 0 0 0 0 0 0 TCP NC 1723 Yes Yes 2 0 0 0 0 0 0 0 0 GRE Yes Yes Change Output Filter 1 Enabled Yes Forward Yes Source IP Address 0 0 0 0 Source IP Address Mask 0 0 0 0 Dest IP Address 0 0 0 0 Dest IP Address Mask 0...

Страница 124: ...inbound and outbound GRE packets Protocol 47 Internet Assigned Numbers Document RFC 1700 enabling transport of the tunnel payload From the Main Menu navigate to Display Change IP Filter Set and from the pop up menu select Basic Firewall Select Display Change Input Filter Display Change Input Filter screen Change Output Filter 2 Enabled Yes Forward Yes Source IP Address 0 0 0 0 Source IP Address Ma...

Страница 125: ...hown below Change Input Filter 1 Enabled Yes Forward Yes Source IP Address 0 0 0 0 Source IP Address Mask 0 0 0 0 Dest IP Address 0 0 0 0 Dest IP Address Mask 0 0 0 0 Protocol Type TCP Source Port Compare No Compare Source Port ID 0 Dest Port Compare Equal Dest Port ID 1723 Established TCP Conns Only No Change Input Filter 2 Enabled Yes Forward Yes Source IP Address 0 0 0 0 Source IP Address Mask ...

Страница 126: ...ow GRE as shown below Source IP Addr Dest IP Addr Proto Src Port D Port On Fwd 1 0 0 0 0 0 0 0 0 TCP NC 1723 Yes Yes 2 0 0 0 0 0 0 0 0 GRE Yes Yes Change Output Filter 1 Enabled Yes Forward Yes Source IP Address 0 0 0 0 Source IP Address Mask 0 0 0 0 Dest IP Address 0 0 0 0 Dest IP Address Mask 0 0 0 0 Protocol Type UDP Source Port Compare No Compare Source Port ID 0 Dest Port Compare No Compare D...

Страница 127: ... model router connects directly to the Internet or if it connects via an Ethernet connection through a cable or DSL modem The enabling feature is the same for both Using the Tab key toggle NetBIOS Proxy Enabled from the default No to Yes and press Return Your remote Network Neighborhood becomes accessible from your Windows desktop Note The remote IP address and subnet mask should strictly match th...

Страница 128: ...P Profile Options Enter an IP address in decimal and dot form xxx xxx xxx xxx Configure IP requirements for a remote network connection here IP Profile Parameters Address Translation Enabled No Remote IP Address 192 168 1 1 Remote IP Mask 255 255 255 0 Filter Set Remove Filter Set NetBIOS Proxy Enabled Yes RIP Profile Options Enter an IP address in decimal and dot form xxx xxx xxx xxx Configure IP...

Страница 129: ...rking traffic Make sure the NetBIOS filter is not enabled in your Internet Connection Profile Netopia includes the NetBIOS Proxy feature as an enhancement and convenience for our customers It has been lab tested and many customers use it successfully However Netopia cannot guarantee that this feature will automatically give you the networking functionality you expect There are many possible issues...

Страница 130: ...4 28 Firmware User Guide ...

Страница 131: ...reens on page 5 18 IPsec Manual Key Entry on page 5 19 Overview IPsec supports two encapsulation modes Transport and Tunnel Transport mode encrypts only the data portion payload of each packet but leaves the header untouched Tunnel mode encrypts both the header and the payload On the receiving side an IPsec compliant device decrypts each packet Netopia Routers support Tunnel mode DES stands for Da...

Страница 132: ...n the remote member specification of that tunnel is not routed using the normal routing table Instead it is forwarded using the security policy database to the remote security gateway remote tunnel endpoint specified in the IPsec tunnel configuration It is not possible to send traffic outside the tunnel by bypassing the tunnel and the remote security gateway Note To fully protect against IP addres...

Страница 133: ...figuration Add Connection Profile Add Connection Profile Profile Name Profile 1 Profile Enabled Encapsulation Type PPP Encapsulation Options HDLC Frame Relay RFC1483 IP Profile Parameters ATMP PPTP IPsec Interface Group Primary COMMIT CANCEL IPsec Tunnel Options Key Management IKE IKE Phase 1 Profile Encapsulation ESP ESP Encryption Transform DES ESP Authentication Transform HMAC MD5 96 Compressio...

Страница 134: ...s contain the information that the two ends of a tunnel use to authenticate each other and the parameters that govern the public key cryptography exchanges that are required to generate new keys periodically Make sure to add an IKE Phase 1 Profile If an IKE Phase 1 Profile is not assigned to an IKE Connection Profile all VPN traffic for that profile will be discarded Select ADD PH1 PROFILE The Add...

Страница 135: ... by a mask specified either by a slash and a bit count between 0 and 32 OR by a second dotted quad IPv4 Range Two IPv4 addresses in dotted quad notation a b c d separated by a space Host Name A fully qualified domain name FQDN E Mail Address An RFC 822 e mail address in the form user hostname Key ID ASCII An opaque string consisting of printable ASCII characters represented as a sequence of printa...

Страница 136: ...y The SA Use Policy pop up menu specifies the policy that the router will use to determine which Phase 1 SAs to use when multiple valid Phase 1 SAs are available for transmitting traffic on an IPsec tunnel Because the router normally re keys prior to the expiration of the current Phase 1 SAs multiple valid Phase 1 SAs may exist during the period of time after the router has re keyed and establishe...

Страница 137: ...ue zero specifies the absence of a secured data lifetime Note It is invalid to set both lifetime values to zero This condition is not enforced by the console in order to avoid order dependencies when configuring the items but will set defaults at runtime Send Initial Contact Message toggles whether or not the IKE negotiation process begins by sending an initial contact message The default is Yes I...

Страница 138: ...reen is identical to the Add IKE Phase 1 Profile screen shown above Selecting Delete IKE Phase 1 Profile and choosing an IKE phase 1 profile name from the pop up list displays a confirmation alert asking you to confirm that you really want to delete the specified IKE phase 1 profile IPsec Configuration IKE Phase1 Profile D IKE Profile 2 1 Profile A Arthropods D Anthropoids e Anopheles Albigensians...

Страница 139: ...e if you don t already know how to do that You can access the Key Management menus from the Change Connection Profile menu under the WAN Configuration screen for a Connection Profile you have already created or you can create a new Connection Profile with your IKE settings included as you go The IKE Key management settings are part of the Data Link Options that you specify in the Add Connection Pr...

Страница 140: ...Group pop up menu as shown below From the Encapsulation Type pop up menu select IPsec Then select Encapsulation Options and press Return The IPsec Tunnel Options screen appears Add Connection Profile Profile Name Profile 1 Profile Enabled Yes Encapsulation Type IPsec Encapsulation Options IP Profile Parameters Interface Group Primary Backup Any Port COMMIT CANCEL IPsec Tunnel Options Key Managemen...

Страница 141: ...1 Profile directly without first going to the IPsec Configuration screen and a NONE item to allow you to dissociate an existing IKE Phase 1 Profile from the IPsec tunnel The remainder of the screen allows you to configure the IKE Phase 2 parameters that control the contents of the single IKE Phase 2 proposal sent by the router These same items specify the values that must be offered by one of the ...

Страница 142: ... is not enforced by the console in order to avoid order dependencies when configuring the items but rather is enforced at runtime and will cause the IPsec profile to assume the defaults Perfect Forward Secrecy toggles whether or not Perfect Forward Secrecy will be used Enabling Perfect Forward Secrecy the default causes IKE to perform a new Diffie Hellman exchange with each Phase 2 re key Because ...

Страница 143: ...figuration screen under Advanced IP Profile Options See Add Network Configuration on page 5 15 Ping retry interval and Ping reply timeout options appear The defaults are 5 seconds and 90 seconds respectively You may adjust these to suit your network s tolerances Note ICMP Dead Peer Detection is not available when using manual re keying ICMP Dead Peer Detection does not initiate a series of phase 2...

Страница 144: ...nality This feature allows you to define many local and remote network ranges for a given IPsec VPN profile Each of these ranges has its own IPsec tunnel However each tunnel has a common tunneling endpoint and encryption policy This is useful for example for branch office management of multiple IP subnets over an encrypted VPN tunnel The following diagram illustrates this feature Advantages of Mul...

Страница 145: ...ber Last Address You supply these values Complete the Local Member 1st Address and Local Member Last Address fields If you choose Host Address you need only supply the Remote Member Address and the Local Mem ber Address the other fields are hidden Select COMMIT and press Return to add the configuration This returns you to the IP Profile Parameters screen Select COMMIT and press Return in the IP Pr...

Страница 146: ...een the same scrolling list will display When you select one of the networks and press Return a warning screen will ask you to confirm your choice IP Profile Parameters Remote Tunnel Endpoint 0 0 0 0 Add Network Display Change Network Delete Network Address Translation Enabled No Filter Set None Remove Filter Set Advanced IP Profile Options COMMIT CANCEL Enter the IP Address or hostname of the rem...

Страница 147: ...he default gateway to reach the partner If the partner should be reached via an alternate port for example the LAN instead of the WAN the Next Hop Gateway field allows this path to be resolved You can specify an Idle Timeout seconds value The idle timeout tells the router that if no traffic passes through the tunnel for the specified number of seconds no automatic SA re key should be performed Whe...

Страница 148: ...KE Phase 1 Configuration screen appears WAN Configuration Main Menu IKE Phase 1 Configuration WAN Configuration WAN Wide Area Network Setup Display Change Connection Profile Add Connection Profile Delete Connection Profile WAN Default Profile ATMP PPTP Default Profile IKE Phase 1 Configuration Scheduled Connections Accounting Configuration Establish WAN Connection Disconnect WAN Connection From he...

Страница 149: ...rmware has a redesigned layout and additional options for manual key entry If you selected Manual Key Management in the IPsec Tunnel Options screen you will need to enter your encryption keys in the IPsec Manual Keys screen IKE Phase 1 Configuration Display Change IKE Phase 1 Profile Add IKE Phase 1 Profile Delete IKE Phase 1 Profile IPsec Tunnel Options Key Management Manual Encapsulation ESP ESP...

Страница 150: ...ith Manual Keys you must manually configure identical authentication and encryption keys at both ends of the tunnel The authentication keys are either 32 for MD5 or 40 for SHA1 ascii hex characters while the encryption keys are 16 for DES or 48 for triple DES ascii hex characters VPN Quickview Statistics are displayed on the VPN Quick View screen The VPN Quick View screen has been modified slightl...

Страница 151: ...t was received and did not match any of the profiles stored in the local router IKE no matching proposal An IKE phase 1 request was received and the proposal did not match an allowed parameter or else the remote rejected the local router s proposal IKE phase 1 auth failure The phase 1 remote authentication failed IKE phase 1 resend timeout The attempt to resend the phase 1 remote authentication ti...

Страница 152: ...e local router rejected the proposals of the remote or the remote rejected the local router s IKE ph2 resend timeout The attempt to resend the phase 2 authentication timed out IKE phase 2 complete The phase 2 negotiation completed successfully Event message Meaning ...

Страница 153: ... Serving on page 6 17 More Address Serving Options on page 6 24 DHCP Relay Agent on page 6 30 Connection Profiles on page 6 32 Multicast Forwarding on page 6 34 Network Address Translation allows communication between the LAN connected to the Router and the Internet using a single or a few IP address es instead of a routed account with separate IP addresses for each computer on the network Network...

Страница 154: ... Follow these steps to configure IP setup for your Router Select Ethernet IP Address and enter the IP address for the Router s Ethernet port Select Ethernet Subnet Mask and enter the subnet mask for the Ethernet IP address that you entered in the last step If you desire multiple subnets select Define Additional Subnets If you select this item you will be taken to the IP Subnets screen This screen ...

Страница 155: ...Name and enter your network s domain name for example netopia com Netopia strongly recommends that you enter a domain name Routing Information Protocol RIP is needed if there are IP routers on other segments of your Ethernet network that the Router needs to recognize If this is the case select RIP Options and press Return This will take you to the Ethernet LAN RIP options screen where you can conf...

Страница 156: ... Setup screen This screen displays up to eight rows of two editable columns preceded by a row number between one and eight If you have eight subnets configured there will be eight rows on this screen Otherwise there will be one more row than the number of configured subnets The last row will have the value 0 0 0 0 in both the IP address and subnet mask fields to indicate that you can edit the valu...

Страница 157: ...ll the vacant fields The subnets configured on this screen are tied to the address serving pools configured on the IP Address Pools screen and that changes on this screen may affect the IP Address Pools screen In particular deleting a subnet configured on this screen will delete the corresponding address serving pool if any on the IP Address Pools screen IP Subnets IP Address Subnet Mask 1 192 128...

Страница 158: ...tatic routes are used only if they appear in the IP routing table which contains all of the routes used by the Router see IP Routing Table on page 9 7 Static routes are helpful in situations where a route to a network must be used and other means of finding the route are unavailable For example static routes are useful when you cannot rely on RIP To go to the Static Routes screen select Static Rou...

Страница 159: ... appear The table has the following columns Dest Network The network IP address of the destination network Static Routes Display Change Static Route Add Static Route Delete Static Route Configure View Delete Static Routes from this and the following Screens Dest Network Subnet Mask Next Gateway Priority Enabled 0 0 0 0 0 0 0 0 163 176 8 1 Low Yes Select a Static Route to modify ...

Страница 160: ...t to No Be sure to read the rules on the installation of static routes in the IP routing table See Rules of static route installation on page 6 9 Select Destination Network IP Address and enter the network IP address of the destination network Select Destination Network Subnet Mask and enter the subnet mask used by the destination network Select Next Gateway IP Address and enter the IP address for...

Страница 161: ...utes Select a static route from the table and go to the Change Static Route screen The parameters in this screen are the same as the ones in the Add Static Route screen see Adding a static route on page 6 8 Deleting a static route To delete a static route in the Static Routes screen select Delete Static Route to display a table of static routes Select a static route from the table and press Return...

Страница 162: ...have lifetimes defined as a start date and time and an end date and time or infinite Key management Typically you configure only one key on a given interface and all of the interfaces that interact with that interface RIP updates are sent every 30 seconds Each RIP packet is authenticated using one key and sent When the Netopia router receives an authenticated RIP packet from a device it keeps trac...

Страница 163: ...Subnet Mask 255 255 255 0 Define Additional Subnets Default IP Gateway 0 0 0 0 Backup IP Gateway 0 0 0 0 Primary Domain Name Server 0 0 0 0 Secondary Domain Name Server 0 0 0 0 Domain Name RIP Options Multicast Forwarding None Static Routes IP Address Serving Ethernet LAN RIP Options Receive RIP Off v1 Transmit RIP v2 Both v1 and v2 v2 MD5 Authentication ...

Страница 164: ...cast from the pull down menu RIP v2 Authentication Keys is visible only if v2 MD5 Authentication is enabled for either Receive or Ethernet LAN RIP Options Receive RIP v2 MD5 Authentication Transmit RIP Off RIP v2 Authentication Keys Ethernet LAN RIP Options Receive RIP n Transmit RIP Off v1 RIP v2 Authentication Keys v2 broadcast v2 multicast v2 MD5 broadcast v2 MD5 multicast ...

Страница 165: ...re immediately effective If you set the RIP Receive option to Both v1 and v2 the interface will ignore authenticated RIP packets since authenticated v1 packets do not exist Only v2 packets can be authenticated Select RIP v2 Authentication Keys The RIP v2 Authentication Keys screen appears RIP v2 Authentication Keys Display Change Key Add Key Delete Key ...

Страница 166: ...ndefinitely End Date End Time and AM or PM do not appear if the End Time Mode is set to Infinite Infinite means that the key begins when it begins but it never expires The acceptable year range is from 1904 2039 When you are satisfied with your entries select COMMIT and press Return This menu will not accept a non unique Key ID on the same interface failure to enter an authentication key or a nega...

Страница 167: ...e Valid field indicates yes otherwise it indicates no You modify the Change Key menu in the same way as in the Add Key menu see Adding a key on page 14 If you select Delete Key a pop up menu will ask you to confirm your choice RIP v2 Authentication Keys Key ID Start Date Start Time End Date End Time Valid 1 10 10 2002 12 00 AM Infinite yes 255 3 11 2000 3 17 PM 8 6 2002 1 24 AM no Delete Key Up Do...

Страница 168: ...D5 Authentication from the pull down menu For MD5 authentication you must select v2 MD5 Authentication If NAT is disabled Transmit RIP is visible Here you select Off v1 v2 broadcast v2 multicast v2 MD5 broadcast or v2 MD5 multicast from the pull down menu For MD5 authentication you must select v2 MD5 either broadcast or multicast If you chose any Transmit RIP option other than Off TX RIP Policy is...

Страница 169: ...g the UNIX operating system Addresses assigned via DHCP are leased or allocated for a short period of time if a lease is not renewed the address becomes available for use by another computer DHCP also allows most of the IP parameters for a computer to be configured by the DHCP server simplifying setup of each machine The second called BootP also known as Bootstrap Protocol is the predecessor to DH...

Страница 170: ...he first client IP address that you will allocate to your first client machine For instance on your local area network you may want to first figure out which machines are going to be allocated specific static IP addresses so that you can determine the pool of IP addresses that you will be serving addresses from via DHCP BootP and or Dynamic WAN Example Your ISP has given your Router the IP address...

Страница 171: ...ubnet the router will serve all available addresses If you explicitly configure the DHCP pool auto configuration of the DHCP pool is suppressed If you configure the router manually and you would like the router to auto configure DHCP you must explicitly set the IP Address and Subnet Mask to 0 0 0 0 and reboot If you have configured multiple Ethernet IP subnets the appearance of the IP Address Serv...

Страница 172: ...interface address on the subnet You can edit the remaining columns in each row The 1st Client Addr and Clients columns allow you to specify the base and extent of the address serving pool for a particular subnet Entering 0 0 0 0 for the first client address or 0 for the number of clients indicates that no addresses will be served from the corresponding Ethernet IP subnet The Client Gateway column ...

Страница 173: ... The client stores this address in non volatile storage for example on disk and the specific storage method location differs depending on the client operating system When requesting an address a client may provide a client identifier or if it does not the Netopia Firmware Version 5 4 may construct a pseudo client identifier for the client When the client subsequently requests an address the Router...

Страница 174: ...OS a non IBM network operating system or network interface card must offer a NetBIOS emulator Many vendors either provide a version of NetBIOS to interface with their hardware or emulate its transport layer communications services in their network products A NetBIOS emulator is a program provided by NetWare clients that allow workstations to run applications that support IBM s NetBIOS calls Select...

Страница 175: ...P NetBIOS Options To return to the IP Address Serving screen press Escape To enable BootP s address serving capability select Serve BOOTP Clients and toggle to Yes Note Addresses assigned through BootP are permanently allocated from the IP Address Serving pool until you release them To release these addresses navigate back to the Main Menu then Statistics Logs Served IP Addresses and Lease Managem...

Страница 176: ...ar Ethernet MAC address The ability to view the host name associated with a client to which the router has leased an IP address The ability for the router s Ethernet IP address es to overlap the DHCP address serving pool s The ability to serve as a DHCP Relay Agent The Netopia Firmware Version 5 4 supports reserving an IP address only for a type 1 client identifier i e an Ethernet hardware address...

Страница 177: ... still accessible in a Details pop up menu See below Note The server does not query the client for its host name Macintosh computers running versions of MacOS prior to MacOS version 8 5 OT 2 0 1 TCP IP 2 0 1 do not supply a host name option in their DHCP messages so no host name will appear in the Served IP Addresses list Served IP Statistics Logs Main Menu Addresses Served IP Addresses IP Address...

Страница 178: ...tions are Details Exclude Include Release and Reserve The action popup is context sensitive and lists only those operations that apply to the selected IP address in its current lease state Served IP Addresses IP Address Type Expires Host Name Client Identifier SCROLL UP 192 168 1 100 192 168 1 101 192 168 1 102 192 168 1 103 192 168 1 104 192 168 1 105 192 168 1 106 192 168 1 107 192 168 1 108 Det...

Страница 179: ...f the entry is not already excluded Selecting Exclude excludes the IP address from the address serving pool so the address will not be served to a client If the IP address is currently leased to or reserved for a client you will be presented with a warning dialog asking you to confirm the operation Served IP Addresses IP Address Type Expires Host Name Client Identifier SCROLL UP 192 168 1 100 192 ...

Страница 180: ...is actively being used by a client is generally not recommended Reserve is displayed if the entry is available declined excluded leased offered or reserved Reserving an IP address for a client with a particular Ethernet MAC address guarantees that a client with the specified MAC address will be offered or leased the specified IP address Moreover it prevents the specified IP address from being offe...

Страница 181: ...8 1 104 192 168 1 105 IP Address is 192 168 1 108 192 168 1 106 MAC Address 00 00 c5 45 89 ef 192 168 1 107 192 168 1 108 CANCEL OK 192 168 1 109 192 168 1 110 192 168 1 111 192 168 1 112 192 168 1 113 SCROLL DOWN Lease Management Served IP Addresses IP Address Type Expires Host Name Client Identifier SCROLL UP 192 168 1 1 Excluded for the router s IP address 192 168 1 2 Excluded 192 168 1 3 DHCP ...

Страница 182: ...nd respond to the client s request itself However if the Netopia Router is configured to act as a DHCP relay agent it does not satisfy the DHCP request itself but instead forwards the request to one or more remote DHCP servers These servers process the request assign an address from an address pool configured on the remote server and forward the response back to the Netopia Router for delivery bac...

Страница 183: ...IP address and press Return an additional field appears You can enter up to four DHCP server addresses In the example above DHCP requests from clients on the LAN will be relayed to the DHCP servers at IP addresses 10 1 1 1 20 1 1 1 and 30 1 1 1 IP Address Serving IP Address Serving Mode Disabled DHCP Server Number of Client IP Addresses DHCP Relay Agent 1st Client Address Client Default Gateway 19...

Страница 184: ...tional profiles may be useful for creating VPNs Connection Profiles define the line and networking protocols necessary for the router to make a remote connection A connection profile is like an address book entry describing how the router is to get to a remote site or how to recognize and authenticate a remote user connecting to the router To create a new Connection Profile you navigate to the WAN...

Страница 185: ...mation on NAT see Multiple Network Address Translation beginning on page 3 1 The Local WAN IP Address is displayed for numbered or NAT profiles The Local WAN IP Mask is displayed for numbered profiles The Remote IP Address and Remote IP Mask are displayed for unnumbered profiles IP Profile Parameters Address Translation Enabled Yes IP Addressing Numbered NAT Map List Easy PAT List NAT Server List ...

Страница 186: ...u see and hear the channel you are interested in but not the others Since a router should not be used as a passive forwarding device Netopia routers use a protocol for forwarding multicasting This protocol is Internet Group Management Protocol IGMP Two versions of IGMP are available V1 and V2 Netopia routers can use either one however Multicast Forwarding will only work if your service provider su...

Страница 187: ... select V1 otherwise allow the default V2 Navigate to the IP Profile Parameters screen IP System Configuration Main Menu Setup IP Setup Ethernet IP Address 192 168 1 1 Ethernet Subnet Mask 255 255 255 0 Define Additional Subnets Default IP Gateway 0 0 0 0 Backup IP Gateway 0 0 0 0 Primary Domain Name Server 0 0 0 0 Secondary Domain Name Server 0 0 0 0 Domain Name Receive RIP Both Transmit RIP Mult...

Страница 188: ...ng is turned off None on Connection Profiles until you enable a specific Connection Profile to receive multicast data You enable it by selecting Rx from the pull down menu IP Profile Parameters Address Translation Enabled Yes IP Addressing Numbered NAT Map List Easy PAT List NAT Server List Easy Servers Local WAN IP Address 0 0 0 0 Local WAN IP Mask 0 0 0 0 Remote IP Address 0 0 0 0 Remote IP Mask...

Страница 189: ...sing Scheduled Connections with Backup on page 7 8 Management Statistics on page 7 10 QuickView on page 7 12 Event Logs on page 7 12 SNMP Support on page 7 13 Backup Default Gateway on page 7 13 The purpose of backup is to provide a recovery mechanism in the event that the primary connection fails A failure can be either line loss for example by central site switch failure or physical cable breaka...

Страница 190: ...t to be used for a modem the Backup Configuration menu under WAN Configuration Advanced Connection Options Here you select Backup is Automatic and Recovery is Automatic the Add Connection Profile menus under the WAN Configuration menus Here you choose Encapsulation Type PPP fill out the correct IP information select Backup as the interface group and fill out the Telco Options the Backup IP Gateway...

Страница 191: ...onnection Profile Add Connection Profile Delete Connection Profile WAN Default Profile ATMP PPTP Default Profile IKE Phase 1 Configuration Scheduled Connections Backup Configuration Frame Relay Configuration Frame Relay DLCI Configuration Establish WAN Connection Disconnect WAN Connection Return Enter to create a new Connection Profile From here you will configure yours and the remote sites WAN in...

Страница 192: ...connection attached to the serial console port A console connection is detected at the connection speed defined on the Console Configuration menu see Console Configuration on page 2 43 A modem will be detected at the data rate you specify in the following menu It will not auto detect the Console baud rate in Modem Auto mode Serial Port Configuration Serial Port Mode Console Only Modem Auto Serial ...

Страница 193: ...e WAN Configuration screen and select Advanced Connection Options then Backup Configuration shown on page 7 5 Backup Configuration screen This screen is used to configure the conditions under which backup will occur if it will recover and how the Console port is configured For a modem connected to the Console port the Backup Configuration screen appears as follows Select Backup is and from the pop ...

Страница 194: ... menu allows you to choose among 30 Sec onds 1 Min ute 2 Min utes 5 Min utes 10 Min utes or 15 Min utes This allows you to be sure that the primary WAN connection is well re established before the router switches back to it from the backup mode You can toggle Auto Recovery on loss of Layer 2 to Yes or No the default This setting determines whether the router should try to Auto Recover when the bac...

Страница 195: ...n Profile on page 2 24 To associate this Connection Profile with your backup port interface choose Backup from the Interface Port pop up menu and press Return If you choose Backup Telco Options becomes visible The Telco Options screen allows you to set the parameters for the modem connection Add Connection Profile Profile Name Profile 1 Profile Enabled Yes Data Link Encapsulation PPTP Data Link Op...

Страница 196: ...ections with Backup The backup link is a PPP dial up connection and only connects to the Internet service provider when traffic is initiated from the LAN If you want to use the backup link to provide redundancy for services such as a Web service that you provide to the outside world you must force the connection to stay up You do this by creating a scheduled connection entry that will be a permane...

Страница 197: ... press Return The Set Weekly Schedule screen appears Scheduled Connections Display Change Scheduled Connection Add Scheduled Connection Delete Scheduled Connection Return Enter to add a Scheduled Connection Navigate from here to add modify change delete Scheduled Connections Add Scheduled Connection Scheduled Connection Enable On How Often Weekly Schedule Type Forced Up Set Weekly Schedule Use Con...

Страница 198: ...link fails the backup link will become active and remain active until the primary link recovers For more information about Scheduled Connections see Scheduled Connections on page 2 29 Management Statistics The Statistics Logs menu offers a Backup Management Statistics option To view the Backup Management Statistics from the Main Menu select Statistics Logs Set Weekly Schedule Monday Yes Tuesday Ye...

Страница 199: ...cause for the current state of Backup or Recovery Time Since Detection is a display only field that is only visible if backup or recovery is in progress It displays the elapsed time since detection of either primary WAN line failure or re establishment of the Statistics Logs WAN Event History Device Event History IP Routing Table Served IP Addresses Backup Management Statistics General Statistics ...

Страница 200: ...AN Event History Quick View Default IP Gateway 0 0 0 0 CPU Load 4 Unused Memory 387 KB Domain Name Server 0 0 0 0 Current WAN Port Console Port Domain Name happyinternet com WAN Event History Current Date 8 17 02 10 57 12 AM Date Time Event SCROLL UP 08 17 02 10 39 37 Line Failure Switching to backup port 08 17 02 10 38 51 Line Recovery Switching to primary port 08 17 02 10 37 42 Line Failure Swit...

Страница 201: ...nternet and designating the second router as the backup gateway Should the primary WAN connection fail traffic would be automatically redirected through your alternate gateway device to maintain Internet connectivity Two menus control the backup gateway feature the Backup Configuration screen in the WAN Configuration menu Here you enable the backup feature and set some parameters the IP Setup scre...

Страница 202: ...loss is a Layer 2 loss Select Recovery to WAN_name where WAN_name is the type of WAN connection you have such as ADSL and press Return Choose either Manual or Automatic to determine how the system will return to the WAN link when it becomes available again If you choose Automatic the next two menu items become visible Note Automatic recovery only works upon loss of WAN connectivity If you chose Au...

Страница 203: ...reen appears The IP Setup screen permits entry of a backup IP gateway address This field is always visible even if the Default IP Gateway field is not filled out as in the case of a DHCP acquired IP address and default gateway on the WAN interface For more information on IP Setup see the IP Setup on page 6 2 Note Backup and Recovery have resolutions of five seconds This is how often the router eva...

Страница 204: ...sible if backup or recovery is in progress It displays the elapsed time since detection of either primary WAN line failure or re establishment of the connection Switchover Time is a display only field that is only visible if backup or recovery is in progress It displays the time until either automatic Backup or Recovery The FORCE BACKUP FORCE RECOVERY option is a selectable option that depending o...

Страница 205: ...ickView The QuickView screen now has an information element to indicate which gateway is in use Quick View 1 29 2002 01 05 35 PM Default IP Gateway 0 0 0 0 CPU Load 5 Unused Memory 5582 KB Primary DNS Server 0 0 0 0 Gateway installed Backup Secondary DNS Server 0 0 0 0 Domain Name happyinternet com ...

Страница 206: ...7 18 Firmware User Guide ...

Страница 207: ...t telephone extensions and up to eight derived voice lines The 4700 Series IAD family includes the Netopia data routing engine for any number of attached computers or other network devices connected to a single 10 100 Ethernet port Key features include Fax Modem Configurable Voice port for incoming fax or modem calls This is another term for echo cancellation support Voice Gateway Interoperability...

Страница 208: ...PBX Local Switching mode In this mode you have the ability to pick up the phone receive local dial tone and proceed to program the phone w local speed dial options In addition taking the phone off hook and pressing speed dial numbers will cause the stored speed dial digits to be sent out This is independent of the previous mode Configuring the Voice Features This section describes how to configure ...

Страница 209: ...perCom Ring Cadence 20 Hz Port Configuration Voice Coding mu law LES Profile Number Profile 9 Port Configuration Port 1 Echo Cancellation Enabled Yes Compression is G726 ADPCM 32K Port 2 Echo Cancellation Enabled Yes Compression is G726 ADPCM 32K Port 3 Echo Cancellation Enabled Yes Compression is G726 ADPCM 32K Port 4 Echo Cancellation Enabled Yes Compression is G726 ADPCM 32K Port 5 Echo Cancell...

Страница 210: ...Your service provider must supply you with the correct provisioning information The reason is that in those gateway types the voice gateway expects this type of provisioning to be done prior to making any voice calls If the voice gateway is not LES compliant the pop up menus are not available and these fields are for information only Once you have made your settings for each voice port press Escap...

Страница 211: ...s This section covers the following topics Quick View Status Overview on page 9 1 Statistics Logs on page 9 4 Event Histories on page 9 4 IP Routing Table on page 9 7 General Statistics on page 9 7 System Information on page 9 9 Simple Network Management Protocol SNMP V2c on page 9 10 Quick View Status Overview You can get a useful overall status report from the Netopia Firmware Version 5 4 in the...

Страница 212: ...ed an IP address as your primary default gateway it is shown here Secondary DNS Server If you are using the router s defaults DHCP and NAT this value will be 0 0 0 0 If you have assigned an IP address as a secondary gateway it is shown here Domain Name The domain name you have assigned typically the name of your ISP MAC Address The Router s hardware address for those interfaces that support DHCP I...

Страница 213: ...Status lights This section shows the current real time status of the Router s status lights LEDs It is useful for remotely monitoring the router s status The Quick View screen s arrangement of LEDs corresponds to the physical arrangement of LEDs on the router These LEDs and the corresponding display in the console menu screen will vary by model Each LED representation can report one of four states...

Страница 214: ...roblem occurs You can view two different event histories one for the router s system and one for the WAN Some Netopia Routers have a built in battery backup which prevents loss of event history from a shutdown or reset The router s event histories are structured to display the most recent events first and to make it easy to distinguish error messages from informational messages Error messages are ...

Страница 215: ...he dialog box To clear the event history select Clear History at the bottom of the history screen and press Return Device Event History The Device Event History screen lists a total of 128 port and system events giving the time and date for each event as well as a brief description The most recent events appear at the top WAN Event History Current Date 10 11 2001 03 02 23 PM Date Time Event SCROLL...

Страница 216: ...t the selected event appears Press Return or Escape to dismiss the dialog box To clear the Device Event History select Clear History and press Return Device Event History Current Date 10 11 2001 03 02 23 PM Date Time Event SCROLL UP 01 22 02 02 03 11 IP address server initialization complete 01 22 02 02 03 11 BOOT Warm start v5 3 01 22 02 02 02 32 IP address server initialization complete 01 22 02...

Страница 217: ...ful for monitoring and troubleshooting your LAN Note that the counters roll over at their maximum field width that is they restart again at 0 Statistics Logs Main Menu IP Routing Table IP Routing Table Network Address Subnet Mask via Router Port Type SCROLL UP 0 0 0 0 255 0 0 0 0 0 0 0 Other 127 0 0 1 255 255 255 255 127 0 0 1 Loopback Local 192 168 1 0 255 255 255 240 192 168 1 1 Ethernet Local 1...

Страница 218: ...Rx Bytes The number of bytes received Tx Bytes The number of bytes transmitted Rx Packets The number of packets received Tx Pkts The number of packets transmitted Rx Err The number of bad Ethernet packets received Tx Err The number of errors occurring when Ethernet packets are transmitted simultaneously by nodes on the LAN General Statistics Physical I F Rx Bytes Tx Bytes Rx Pkts Tx Pkts Rx Err Tx...

Страница 219: ...rmation screen appears The information display varies by model firmware version feature set and so on You can tell at a glance your particular system configuration System Information Serial Number ff 70 00 16740352 Firmware Version 5 4 ModelNumber 4541200 Processor Speed Mhz 50 Flash Rom Capacity MBytes 2 DRAM Capacity MBytes 16 Hardware Acceleration Not Installed Ethernet Single 10 100 Port WAN I...

Страница 220: ...s an SNMP OID The router will reboot if the value is changed These changes have been added to the SNMP MIB file NETOPIA MIB This MIB is available by anonymous ftp from the Netopia ftp server MIBs are available in a variety of formats Load this MIB into your SNMP management software Follow the instructions included with your SNMP manager on how to load MIBs The Netopia Firmware Version 5 4 supports...

Страница 221: ... Trap Version and choose either SNMP V1 or SNMP V2c SNMP V2c is a more feature rich version but is not supported by all vendors Consult with your service provider System Name System Location and System Contact set the values returned by the Router SNMP agent for the SysName SysLocation and SysContact objects respectively in the MIB II system group Although optional the information you enter in the...

Страница 222: ...ests and Get Next Requests will still be honored using the Read Only community string assuming that is not the empty string Setting only the Read Only community string to the empty string will not block Get Requests or Get Next Requests since those operations and Set Requests are still allowed using the non empty Read Write community string Even if you decide not to use SNMP you should change the ...

Страница 223: ...Display Change IP Trap Receiver in the IP Trap Receivers screen Modifying IP trap receivers 1 To edit an IP trap receiver select Display Change IP Trap Receiver in the IP Trap Receivers screen 2 Select an IP trap receiver from the table and press Return 3 In the Change IP Trap Receiver screen edit the information as needed and press Return Deleting IP trap receivers 1 To delete an IP trap receiver...

Страница 224: ...9 14 Firmware User Guide ...

Страница 225: ...ilters and Filter Sets on page 10 26 Policy based Routing using Filtersets on page 10 34 Firewall Tutorial on page 10 37 Configuration Management on page 10 44 Call Filtering on page 10 48 Suggested Security Measures In addition to setting up user accounts Telnet access and filters all of which are covered later in this chapter there are other actions you can take to make the Router and your netwo...

Страница 226: ...d passwords are specified in the Security Options screen From the Main Menu select System Configuration then Security The Security Options screen appears UPnP Support UPnP Enabled Universal Plug and Play UPnP is a set of protocols that allows a PC to automatically discover other UPnP devices anything from an internet gateway device to a light switch retrieve an XML description of the device and it...

Страница 227: ...ruser account are not modifiable It is possible however to control who can log in as Superuser You can limit this to serial console only Select Superuser Configuration and press Return The Superuser Configuration screen appears Assign a Superuser Name It can be up to 19 characters long It is good practice not to use any easily guessed combination such as your birthday Assign a Password Keep this p...

Страница 228: ...n Select Access Privileges and from the pull down menu choose which access privilege you want this user to have All LAN WAN or for IADs only VOX If you assign any of these privileges limited users will have full access to privileges associated with these interfaces You can customize these privileges further in order to limit access to only certain portions of those interfaces configuration by sele...

Страница 229: ...ptions screen select Advanced Security Options The Advanced Security Options screen appears Access Privilege Default WAN Data Configuration No Connection Profile Configuration No Circuit PVC DLCI Configuration No LAN Data Configuration Yes LAN Subnet Configuration Yes NAT Filters Configuration Yes Preferences Global Configuration Yes Voice Configuration IADs only Yes Access Privileges Custom WAN D...

Страница 230: ...er is by definition authentication of remote users the WAN related defaults are preset to Yes Toggle any that should be changed Advanced Security Options Security Databases Local only RADIUS Server Addr Name RADIUS Server Secret Alt RADIUS Server Addr Name Alt RADIUS Server Secret RADIUS Identifer RADIUS Server Authentication Port RADIUS Access Privileges All LAN WAN Telnet Server Port VOX Custom ...

Страница 231: ...ayed is Change Access Password Selecting this option displays the Change Access Password screen When changing a password you will be challenged to enter it again to be sure you have entered it correctly System Configuration IP Setup Filter Sets IP Address Serving Network Address Translation NAT Date and Time Console Configuration Change Access Password Upgrade Feature Set Logging Use this screen i...

Страница 232: ...nfiguration access is forbidden are usually hidden The Quick Menus screen reflects the security access level of the user Menus to which configuration access is forbidden are hidden Main Menu The following is an example comparison of the Main Menu as seen by the Superuser and by a Limited user Netopia Router Easy Setup WAN Configuration System Configuration Utilities Diagnostics Statistics Logs Qui...

Страница 233: ...he following diagram Netopia Router Easy Setup WAN Configuration System Configuration Utilities Diagnostics Statistics Logs Quick Menus Quick View Return Enter goes to Easy Setup minimal configuration You always start from this main screen User Access Level Superuser WAN Conn Profiles PVC All All Global Voice All All WAN Configuration WAN Wide Area Network Setup ATM Circuits Configuration Display ...

Страница 234: ...ity after creating a Connection Profile or a limited user in the Change Connection Profile screen Advanced Connection Options Configuration Changes Reset WAN Connection No IKE Phase 1 Configuration Scheduled Connections Accounting Configuration Backup Configuration User Access Level WAN Connection Profiles Connection Profiles Connection Profiles WAN Add Connection Profile Profile Name Profile 1 Pr...

Страница 235: ...es access to the associated menu described previously IP Setup menu In the IP Setup menu users that do not have LAN Subnet Configuration access will see a screen similar to the following System Configuration IP Setup Filter Sets IP Address Serving Network Address Translation NAT Date and Time Console Configuration SNMP Simple Network Management Protocol Security Upgrade Feature Set Change Device t...

Страница 236: ...s supported by the firmware Substantial differences exist among screens on a given router or IAD Here all selection options are shown Utilities Diagnostics Ping Trace Route Telnet Log off Serial Console Session Trivial File Transfer Protocol TFTP X Modem File Transfer Restart System Revert to Factory Defaults Send ICMP Echo Requests to a network host User Access Level Global Global Global All Glob...

Страница 237: ...gs WAN Event History Device Event History Voice Log Voice Accounting Log Voice Error Log IP Routing Table Served IP Addresses Served IP Addresses Accounting Statistics Backup Management Statistics General Statistics System Information User Access Level Global Global Voice Global Voice Voice Global Global Global Global Global Global ...

Страница 238: ...e Connection Profiles Fr Relay DLCI Config IP Filter Sets Delete Connection Profiles Backup Config Static Routes WAN Default Profile Telephone Setup Network Address Translation ATMP PPTP Default Profile IKE Phase 1 Config Scheduled Connections Add Scheduled Connection Change Scheduled Connection MacIP Setup Delete Scheduled Connection X Modem File Transfer AURP Setup TFTP Console Configuration SNM...

Страница 239: ...s you can protect the most sensitive screens from unauthorized access User accounts are composed of name password combinations that can be given to authorized users Caution You are strongly encouraged to add protection to the configuration screens Unprotected screens could allow an unauthorized user to compromise the operation of your entire network Once user accounts are created users who attempt...

Страница 240: ...account passwords Protecting the configuration screens You can protect the configuration screens with user accounts You can administer the accounts from the Security Options screen You can create up to four accounts To display a view only list of user accounts select Show Users in the Security Options screen Security Options Enable Telnet Console Access Yes Enable Telnet Access to SNMP Screens Yes ...

Страница 241: ...counts Select an account from the list and press Return to delete it To exit the list without deleting the selected account press Escape Telnet Access Telnet is a TCP IP service that allows remote terminals to access hosts on an IP network The Netopia Firmware Version 5 4 supports Telnet access to its configuration screens Caution You should consider password protecting or restricting Telnet acces...

Страница 242: ...Typically you use filters to selectively admit or refuse TCP IP connections from certain remote networks and specific hosts You will also use filters to screen particular types of connections This is commonly called firewalling your network Before creating filter sets you should read the next few sections to learn more about how these powerful security tools work What s a filter and what s a filter ...

Страница 243: ...pects data packets like a customs inspector scrutinizing packages Filter priority Continuing the customs inspectors analogy imagine the inspectors lined up to examine a package If the package matches the first inspector s criteria the package is either rejected or passed on to its destination depending on the first inspector s particular orders In this case the package is never seen by the remaini...

Страница 244: ...rd or reject it and so on Because of this hierarchical structure each filter is said to have a priority The first filter has the highest priority and the last filter has the lowest priority How individual filters work As described above a filter applies criteria to an IP packet and then takes one of three actions Forwards the packet to the local or remote network Blocks discards the packet Ignores ...

Страница 245: ...onfigured to match the following The source port number the port on the sending host that originated the packet The destination port number the port on the receiving host that the packet is destined for By matching on a port number a filter can be applied to selected TCP or UDP services such as Telnet FTP and World Wide Web The following tables show a few common services and their associated port ...

Страница 246: ... For the filter to match the packet s port number must be less than or equal to the port number specified in the filter Equal For the filter to match the packet s port number must equal the port number specified in the filter Greater Than For the filter to match the packet s port number must be greater than the port number specified in the filter Greater Than or Equal For the filter to match the p...

Страница 247: ...h This is the port on the sending host that originated the packet D Port The destination port to match This is the port on the receiving host for which the packet is intended On Displays Yes when the filter is in effect or No when it is not Fwd Shows whether the filter forwards Yes a packet or discards No it when there s a match Protocol Number to use Full name N A 0 Ignores protocol type ICMP 1 I...

Страница 248: ...n anything The mask for Source IP Addr must be 255 255 255 255 since an exact match is desired Source IP Addr 199 211 211 17 Source IP address mask 255 255 255 255 Dest IP Addr 0 0 0 0 Destination IP address mask 0 0 0 0 3 Using the tables on page 10 21 find the destination port and protocol numbers the local Telnet port Proto TCP or 6 D Port 23 4 The filter should be enabled and instructed to blo...

Страница 249: ...ity will affect the set s actions Test the set on paper by determining how the filters would respond to a number of different hypothetical packets Consider the combined effect of the filters If every filter in a set fails to match on a particular packet the packet is Forwarded if all the filters are configured to discard not forward Discarded if all the filters are configured to forward Discarded ...

Страница 250: ...at you take the latter and safer approach to all of your filter set designs Working with IP Filters and Filter Sets This section covers IP filters and filter sets To work with filters and filter sets begin by accessing the filter set screens Note Make sure you understand how filters work before attempting to use them Read the section About Filters and Filter Sets beginning on page 10 18 The proced...

Страница 251: ...eturn The Add Filter Set screen appears Naming a new filter set All new filter sets have a default name The first filter set you add will be called Filter Set 1 the next filter will be Filter Set 2 and so on To give a new filter set a different name select Filter Set Name and enter a new name for the filter set To save the filter set select ADD FILTER SET The saved filter set is empty contains no f...

Страница 252: ...tween the two involves their reference to source and destination From the perspective of an input filter your local network is the destination of the packets it checks and the remote network is their source From the perspective of an output filter your local network is the source of the packets and the remote network is their destination To add a filter select Display Change Filter Set in the Filt...

Страница 253: ...it to Yes If Enabled is toggled to No the filter can still exist in the filter set but it will have no effect Display Change Filter Set Filter Set Name Filter Set 3 Add Input Filter to Filter Set Display Change Input Filter Delete Input Filter Move Input Filter Add Output Filter to Filter Set Display Change Output Filter Delete Output Filter Move Output Filter Add Input Filter Enabled Yes Forward ...

Страница 254: ...23 Note If Protocol Type is set to TCP or UDP the settings for port comparison that you configure in steps 8 and 9 will appear These settings only take effect if the Protocol Type is TCP or UDP 9 Select Source Port Compare and choose a comparison method for the filter to use on a packet s source port number Then select Source Port ID and enter the actual source port number to match on see the tabl...

Страница 255: ... filter set all of the filters it contains are deleted as well To reuse any of these filters in another set before deleting the current filter set you ll have to note their configuration and then recreate them To delete a filter set select Delete Filter Set in the Filter Sets screen to display a list of filter sets Select a filter set from the list and press Return Select CONTINUE and press Return...

Страница 256: ...Input filter 3 This filter explicitly forwards all WAN originated ICMP traffic to permit devices on the WAN to ping devices on the LAN Ping is an Internet service that is useful for diagnostic purposes Input filters 4 and 5 These filters forward all TCP and UDP traffic respectively when the destination port is greater than 1023 This type of traffic generally does not allow a remote host to connect...

Страница 257: ...ions are not intended to be combined Each modification is to be the only one used with Basic Firewall The results of combining filter set modifications can be difficult to predict It is recommended that you take special care if you are making more than one modification to the sample filter set Trusted host To allow unlimited access by a trusted remote host with the IP address a b c d corresponding...

Страница 258: ...ion profiles to which it was added Policy based Routing using Filtersets Previous firmware versions routed IP packets only by destination IP address Netopia Firmware Version 5 4 offers the ability to route IP packets using criteria other than the destination IP address This is called policy based routing You are now able to route IP traffic based on the following source IP address source and or de...

Страница 259: ...ield of the IP header This means that if such packets are not received rapidly the quality of service degrades If you expect to route significant amounts of such traffic you can configure your router to route this type of traffic to a gateway other than your normal gateway using this feature The TOS field matching check is consistent with source and destination address matching Example You want pa...

Страница 260: ... other packets Management IP traffic If the Force Routing filter is applied to source IP addresses it may inadvertently block communication with the router itself You can avoid this by preceding the Force Routing filter with a filter that matches the destination IP address of the router itself Add Input Filter Enabled Yes Forward Yes Call Placement Idle Reset No Change Force Routing Yes Gateway IP...

Страница 261: ...er information is what the packet filter uses to make filtering decisions It is important to note that a packet filter does not look into the IP data stream the User Data from above to make filtering decisions Basic protocol types TCP Transmission Control Protocol TCP provides reliable packet delivery and has a retransmission mechanism so packets are not lost RFC 793 is the specification for TCP U...

Страница 262: ...er rule ordering is critical If a packet is forwarded through a series of filter rules and then the packet matches a rule the appropriate action is taken The packet will not forward through the remainder of the filter rules For example if you had the following filter set Allow WWW access Allow FTP access Allow SMTP access Deny all other packets and a packet goes through these rules destined for FT...

Страница 263: ... are as follows 0 AND 0 0 0 AND 1 0 1 AND 0 0 1 AND 1 1 For example Filter rule Deny IP 163 176 1 15 BINARY 10100011 10110000 00000001 00001111 Mask 255 255 255 255 BINARY 11111111 11111111 11111111 11111111 Incoming Packet IP 163 176 1 15 BINARY 10100011 10110000 00000001 00001111 If you put the incoming packet and subnet mask together with AND the result is 10100011 10110000 00000001 00001111 wh...

Страница 264: ...the local network Example filter set screen This is an example of the Netopia filter set screen Filter basics In the source or destination IP address fields the IP address that is entered must be the network address of the subnet A host address can be entered but the applied subnet mask must be 32 bits 255 255 255 255 The Netopia Firmware Version 5 4 has the ability to compare source and destinatio...

Страница 265: ...eater Than or Equal Matches the port or any port greater Greater Than Matches anything greater than the port defined Filter Rule 200 1 1 0 Source IP Network Address 255 255 255 128 Source IP Mask Forward No What happens on match IP Address Binary Representation 200 1 1 28 00011100 Source address in incoming IP packet AND 255 255 255 128 10000000 Perform the logical AND Data Internet IP 200 1 1 Inp...

Страница 266: ...4 This rule will forward this packet because the packet does not match Example 3 Incoming packet has the source address of 200 1 1 184 00000000 Logical AND result Filter Rule 200 1 1 0 Source IP Network Address 255 255 255 128 Source IP Mask Forward No What happens on match IP Address Binary Representation 200 1 1 184 10111000 Source address in incoming IP packet AND 255 255 255 128 10000000 Perfo...

Страница 267: ...rded Example 5 Incoming packet has the source address of 200 1 1 96 255 255 255 240 11110000 Perform the logical AND 10110000 Logical AND result Filter Rule 200 1 1 96 Source IP Network Address 255 255 255 240 Source IP Mask Forward No What happens on match IP Address Binary Representation 200 1 1 104 01101000 Source address in incoming IP packet AND 255 255 255 240 11110000 Perform the logical AN...

Страница 268: ... the current configuration Whenever you choose you can reboot into one of these configurations the copy of which becomes the current configuration You name the saved configurations giving you a reference for identifying each one The naming operation occurs when you decide to save a configuration or when downloading a configuration via TFTP or X Modem The configurations that are saved will persist ...

Страница 269: ...ent screen If you choose to run one of your stored configurations you can select it from a pop up menu If you select Boot from a Configuration and select a different one you can reboot the router with your selected configuration Configuration Management Save Current Configuration as Replace Existing Conifiguration Boot from a Configuration Delete a Configuration Save Current Configuration Configur...

Страница 270: ...een will ask you to confirm your choice Configuration Management Save Current Configuration as Configuration Name Type Replace Existing Configuration Boot from a Configuration Backup Config Binary Delete a Configuration HappyInternet Binary ...

Страница 271: ...le Name Get Configuration Destination Current Configuration GET CONFIG FROM SERVER Backup Config HappyInternet Send Configuration Empty Type Name SEND CONFIG TO SERVER TFTP Transfer State Idle TFTP Current Transfer Bytes 0 Up Down Arrow Keys to select ESC to dismiss Return Enter to Edit X Modem File Transfer Send Firmware to Netopia Get Configuration Destination Current Configuration Send Config t...

Страница 272: ...sec The call filtering mechanism is useful if you have a time limited type of connection Such a connection may time out during a period of inactivity and may you want it to be re established or maintained automatically for certain types of traffic You manage Filters and Filter Sets in the Filter Sets management screen under the System Configuration menus The Add Output Filter menu appears as follo...

Страница 273: ...ion will be taken If the connection is up the connection s idle timer will be refreshed and the packet forwarded as usual If the connection is down the packet is queued until a connection is established If you set the Call Placement Idle Reset to Disabled the call filtering attribute associated with the packet will be set such that the packet will be dropped if the connection is down and forwarded...

Страница 274: ...10 50 Firmware User Guide ...

Страница 275: ...ts on page 11 6 Transferring Configuration and Firmware Files with TFTP on page 11 6 Transferring Configuration and Firmware Files with XMODEM on page 11 9 Restarting the System on page 11 12 T1 Line Statistics and Diagnostics on page 11 12 Note These utilities and tests are accessible only through the console based management screens See the Getting Started Guide chapter Console Based Management ...

Страница 276: ...4 967 295 3 Select Data Size to change the default setting This is the size in bytes of each Ping packet sent The default setting is adequate in most cases but you can change it to any value from 0 only header data to 1664 4 Select Delay seconds to change the default setting The delay in seconds determines the time between Ping packets sent The default setting is adequate in most cases but you can...

Страница 277: ...age Description Resolving host name Finding the IP address for the domain name style address Can t resolve host name IP address can t be found for the domain name style address Pinging Ping test is in progress Complete Ping test was completed Cancelled by user Ping test was cancelled manually Destination unreachable from w x y z Ping test was able to reach the router with IP address w x y z which ...

Страница 278: ...an traverse Ping packets that reach their TTL value are dropped and a destination unreachable notification is returned to the sender see the table on the previous page This ensures that no infinite routing loops occur The TTL value can be set and retrieved using the SNMP MIB II ip group s ipDefaultTTL object Trace Route You can count the number of routers between your Netopia Router and a given de...

Страница 279: ...hat is you can initiate a Telnet client session when using a Telnet console session To activate the Telnet client select Telnet from the Utilities Diagnostics menu The Telnet client screen appears Enter the host name or the IP address in dotted decimal format of the machine you want to Telnet into and press Return Either accept the default control character Q used to suspend the Telnet session or ...

Страница 280: ...n using the Reset switch Note Reset to factory defaults with caution You will need to reconfigure all of your settings in the router If you lose your password and are unable to access the console screens you can manually reset the router in an emergency See Appendix A Troubleshooting Transferring Configuration and Firmware Files with TFTP Trivial File Transfer Protocol TFTP is a method of transferr...

Страница 281: ...Netopia website To update the router s firmware follow these steps Select TFTP Server Name and enter the server name or IP address of the TFTP server you will use The server name or IP address is available from the site where the server is located Select Firmware File Name and enter the name of the file you will download The name of the file is available from the site where the server is located Y...

Страница 282: ...ed by downloading a configuration file using TFTP Once downloaded the file reconfigures all of the router s parameters as if someone had manually done so through the console port To download a configuration file follow these steps Select TFTP Server Name and enter the server name or IP address of the TFTP server you will use The server name or IP address is available from the site where the server...

Страница 283: ...ile Name and enter a name for the file you will upload The file will appear with the name you choose on the TFTP server You may need to enter a file path along with the file name for example Mypc Netopia myfile 3 Select SEND CONFIG TO SERVER and press Return Netopia will begin to transfer the file 4 The TFTP Transfer State item will change from Idle to Writing Config The TFTP Current Transfer Byte...

Страница 284: ...itiate an XMODEM transfer of the firmware file If you fail to initiate the transfer in that time the dialog box will disappear and the terminal emulation software will inform you of the transfer s failure You can then try again The system will reset at the end of a successful file transfer to put the new firmware into effect While the system resets the LEDs will blink on and off X Modem File Trans...

Страница 285: ...terminal emulation software will inform you of the transfer s failure You can then try again The system will reset at the end of a successful file transfer to put the new configuration into effect Uploading configuration files A file containing a snapshot of the Router s current configuration can be uploaded from the router to disk The file can then be downloaded by a different Router to configure i...

Страница 286: ...restart the system whenever you reconfigure the Router and want the new parameter values to take effect Under certain circumstances restarting the system may also clear up system or network malfunctions Some configuration processes automatically restart the system to apply the changes you have made T1 Line Statistics and Diagnostics For T1 models the Utilities and Diagnostics menu includes an opti...

Страница 287: ...hifting the counted total to the next column to its right Utilities Diagnostics Ping Trace Route Telnet Trivial File Transfer Protocol TFTP X Modem File Transfer Restart System Revert to Factory Defaults T1 Line Statistics Diagnostics T1 Line Statistics Diagnostics Condition 00 16 00 27 00 12 1 57 1 42 24 hours Errored Seconds 007 000 000 000 000 00000 Unavailable Seconds 006 000 000 000 000 00000...

Страница 288: ...e Payload Loopback sends an ANSI BPM payload loopback request to the remote CSU This pattern tells the remote device usually the CSU at the other end of the circuit that it should go into a looped state Use this pattern for putting up a loop to do testing from a remote portion of the circuit either by the Telco or by the CPE at the remote end of the circuit This test makes the remote CSU go into a...

Страница 289: ... encounter problems during your initial configuration process review the following suggestions before calling for technical support There are four zones to consider when troubleshooting initial configuration 1 The computer s connection to the router 2 The router s connection to the telecommunication line s 3 The telecommunication line s connection to your ISP 4 The ISP s connection to the Internet...

Страница 290: ... The default values are 9600 N 8 and 1 Characters are missing from some of the configuration screens Try changing the Router s default speed of 9600 bps and setting your terminal emulation software to match the new speed Network problems Problems communicating with remote IP hosts Verify the accuracy of the default gateway s IP address entered in the IP Setup or Easy Setup screen Use the Netopia Fi...

Страница 291: ...r clip size Reset Switch slot 3 Carefully insert the larger end of a standard size paper clip until you contact the internal Reset Switch No need to unwind the paper clip 4 Press this switch 5 This will reset the unit to factory defaults and you will now be able to reprogram the router Power Outages If you suspect that power was restored after a power outage and the Router is connected to a remote...

Страница 292: ...er Serial number Firmware version What kind of local network s do you have with how many devices Ethernet TCP IP How to reach us We can help you with your problem more effectively if you have completed the environment profile in the previous section If you contact us by telephone please be ready to supply Netopia Technical Support with the information you used to configure the Router Also please b...

Страница 293: ...mation that surrounds the actual data being transmitted In e mail a header is usually the address and routing information found at the top of messages Note This guide uses the term IP in a very general and inclusive way to identify all of the following Networks that use the Internet Protocol along with accompanying protocols such as TCP UDP and ICMP Packets that include an IP header within their s...

Страница 294: ...ess but never less than the class requires The following section gives more information on subnetting Class A networks have a small number of possible network numbers but a large number of possible host numbers Conversely Class C networks have a small number of possible host numbers but a large number of possible network numbers Thus the InterNIC assigns Class A addresses to large organizations th...

Страница 295: ...t address The following table shows the proper subnet masks to use for each class of network when no subnets are required To know whether subnets are being used or not you must know what subnet mask is being used you cannot determine this information simply from an IP address Subnet mask information is configured as part of the process of setting up IP routers and gateways such as the Router Note ...

Страница 296: ...255 128 mask 192 168 1 2 via router Usable IP Addresses available to Customer Site A 192 168 1 1 192 168 1 126 Router A IP Address 192 168 1 2 Subnet Mask 255 255 255 128 Remote IP 192 168 1 129 Remote Sub 255 255 255 128 Gateway 192 168 1 1 Usable IP Addresses available to Customer Site A 192 168 1 1 192 168 1 126 PC 1 IP Address 192 168 1 3 Subnet Mask 255 255 255 128 Gateway 192 168 1 1 PC 2 IP...

Страница 297: ... to access Customer Site A but not the Internet If it is not possible to define a static route on Router B RIP could be enabled to serve the same purpose To use RIP instead of a static route enable Transmit RIP on Router A and Transmit and Receive RIP on Router B This will allow the route from Customer Site B to propagate on Router B and Customer Site A Example Working with a Class C subnet Suppos...

Страница 298: ... information is helpful in determining dynamic address allocation for a network The term lease describes the action of a workstation requesting and using an IP address The address is dynamic and can be returned to the address pool at a later time The term renew refers to what the workstations do to keep their leased IP address At certain intervals the workstation talks to the DHCP or MacIP server ...

Страница 299: ...and renews its lease every half hour The Mac workstation relinquishes its address upon shutdown in all but one case If the TCP IP control panel is set to initialize at startup and no IP services are used or the TCP IP control panel is not opened the DHCP address will NOT be relinquished upon shutdown However if the TCP IP control panel is opened or if an IP application is used the Mac WILL relinqu...

Страница 300: ...manually distributed addresses are called static addresses Static addresses are useful in cases when you want to make sure that a host on your network cannot have its address taken away by the address server Appropriate candidates for a static address include a network administrator s computer a computer dedicated to communicating with the Internet and routers Using address serving The Router prov...

Страница 301: ...e s IP Setup screen This method requires a static value to be used Thus any user dialing in can obtain the same IP address for every connection to the profile If you want to serve addresses statically define the address in the Connection Profile Notes The addresses that are to be served cannot be used elsewhere For example you wouldn t want to define a static address in a Connection Profile to be ...

Страница 302: ...as the network address Address 199 1 1 47 is reserved as the broadcast address This leaves 14 addresses to allocate from 199 1 1 33 through 199 1 1 46 If you want to allocate a sub block of 10 addresses using DHCP enter 10 in the DHCP Setup screen s Number of Addresses to Allocate item Then in the same screen s First Address item enter the first address in the sub block to allocate so that all 10 ...

Страница 303: ...address a b c 0 to be distributed among three networks This network address can be used on your main network while portions of it can be subnetted to the two remaining networks Note The IP address a b c 0 has letters in place of the first three numbers to generalize it for this example The figure shows a possible network configuration following this scheme The main network is set up with the Class...

Страница 304: ...s for Routers B and C create entries in its IP routing table One entry points to the subnet a b c 128 while a second entry points to the subnet a b c 248 The IP routing table might look similar to the following Connection profile Remote IP address Remote IP mask Bits available for host address For Router B a b c 128 255 255 255 192 7 For Router C a b c 248 255 255 255 248 3 Internet Router A Route...

Страница 305: ...he list and works up until there s a match or the route to the default gateway is reached When a b c 249 is masked by the first route s subnet mask it yields a b c 248 which matches the network address in the route The Router uses the connection profile associated with the route to connect to Router C and then forwards the packet Router C delivers the packet to the host on its local network IP Rou...

Страница 306: ...kets as well as to packets addressed to their specific individual host addresses Depending on the age and type of IP equipment you use broadcasts will be addressed using either all zeros or all ones but not both If your network requires zeros broadcasting you must configure this through SNMP Packet header types As previously mentioned IP works with other protocols to allow communication over IP ne...

Страница 307: ...0 104 1101000 9 1001 41 101001 73 1001001 105 1101001 10 1010 42 101010 74 1001010 106 1101010 11 1011 43 101011 75 1001011 107 1101011 12 1100 44 101100 76 1001100 108 1101100 13 1101 45 101101 77 1001101 109 1101101 14 1110 46 101110 78 1001110 110 1101110 15 1111 47 101111 79 1001111 111 1101111 16 10000 48 110000 80 1010000 112 1110000 17 10001 49 110001 81 1010001 113 1110001 18 10010 50 1100...

Страница 308: ...173 10101101 205 11001101 237 11101101 142 10001110 174 10101110 206 11001110 238 11101110 143 10001111 175 10101111 207 11001111 239 11101111 144 10010000 176 10110000 208 11010000 240 11110000 145 10010001 177 10110001 209 11010001 241 11110001 146 10010010 178 10110010 210 11010010 242 11110010 147 10010011 179 10110011 211 11010011 243 11110011 148 10010100 180 10110100 212 11010100 244 111101...

Страница 309: ...iguring with console based management 1 2 2 1 configuring terminal emulation software 1 4 configuring the console 2 43 Connection profiles 2 24 console configuring 2 43 connection problems A 2 console configuration 2 43 console based management configuring with 1 2 2 1 Constant Bit Rate CBR 2 18 D D port 10 23 Data Encryption Standard DES 4 10 date and time setting 2 42 dead peer detection 5 12 De...

Страница 310: ... 24 filters actions a filter can take 10 20 adding to a filter set 10 28 defined 10 18 deleting 10 31 disadvantages of 10 25 input 10 28 modifying 10 30 output 10 28 using 10 26 viewing 10 30 firewall 10 31 firmware files updating with TFTP 11 7 updating with XMODEM 11 10 FTP sessions 10 34 G G SHDSL Line Configuration 2 6 general statistics 9 7 H how to reach us A 4 I IDSL Line Configuration 2 5 ...

Страница 311: ...dding server lists 3 15 defined 6 1 Easy Setup Profile 3 6 IP profile parameters 3 21 IP setup 3 7 map lists 3 8 modifying map lists 3 13 outside ranges 3 8 server lists 3 8 navigating Easy Setup 1 7 NCSA Telnet 1 4 nested IP subnets B 11 NetBIOS 6 22 NetBIOS scope 6 23 Netopia distributing IP addresses 6 17 B 5 models 1 3 monitoring 9 1 security 10 1 system utilities and diagnostics 11 1 Network ...

Страница 312: ...measures to increase 10 1 telnet 10 17 user accounts passwords 10 15 security options screen 10 15 protecting 10 16 Security Policy Database SPD 5 2 Simple Network Management Protocol see SNMP SNMP community strings 9 12 MIBs supported 9 10 setup screen 9 11 traps 9 12 SNMP V2c 9 10 src port 10 23 Stateful inspection 2 37 static IP addresses B 8 static route rules of installation 6 9 static routes...

Страница 313: ...ed Bit Rate UBR 2 18 updating firmware with TFTP 11 7 with XMODEM 11 10 updating Netopia s firmware 11 7 upgrade 1 3 uploading configuration files 11 9 with TFTP 11 9 with XMODEM 11 11 user accounts 10 15 utilities and diagnostics 11 1 V viewing scheduled connections 2 30 Virtual Private Networks VPN 4 1 VPN 4 1 allowing through a firewall 4 19 ATMP tunnel options 4 8 default answer profile 4 11 e...

Страница 314: ...Index 6 ...
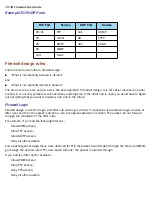
Отзывы: