Quick Installation Guide
DSL-2740U
Wireless ADSL2+ Router with Ethernet WAN Support
Страница 1: ...Quick Installation Guide DSL 2740U Wireless ADSL2 Router with Ethernet WAN Support...
Страница 2: ...ernet cable Splitter Quick Installation Guide brochure If any of the items are missing please contact your reseller The User Manual and Quick Installation Guide documents are available on D Link websi...
Страница 3: ...n Guide Default Settings IP address of wireless router 192 168 1 1 Username login admin Password admin Name of wireless network SSID DSL 2740U Network key PSK see WPS PIN on the barcode label on the b...
Страница 4: ...er to access the web based interface of the router Apple Safari 8 and later Google Chrome 48 and later Microsoft Internet Explorer 10 and later Microsoft Edge 20 10240 and later Mozilla Firefox 44 and...
Страница 5: ...the ADSL IN port of the splitter 4 To connect the router to an Ethernet line run the Initial Configuration Wizard and select the router s LAN port that will be used as the WAN port Then connect the Et...
Страница 6: ...el Network and Internet Connections Network Connections window 2 In the Network Connections window right click the relevant Local Area Connection icon and select the Properties line in the menu displa...
Страница 7: ...the Obtain an IP address automatically and Obtain DNS server address automatically radio buttons Click the OK button 5 Click the button in the connection properties window Now your computer is configu...
Страница 8: ...ist in the top right corner of the window choose the View network status and tasks line under the Network and Internet section 3 In the menu located on the left part of the window select the Change ad...
Страница 9: ...he Obtain an IP address automatically and Obtain DNS server address automatically radio buttons Click the OK button 7 Click the OK button in the connection properties window Now your computer is confi...
Страница 10: ...selected Ethernet port located on the back panel of the router and the Ethernet line 3 Connect the power cord to the power connector port on the back panel of the router then plug the power adapter i...
Страница 11: ...n window select the wireless network DSL 2740U and click the Connect button 5 In the opened window enter the network key see WPS PIN on the barcode label on the bottom panel of the device in the Netwo...
Страница 12: ...ow choose the View network status and tasks line under the Network and Internet section 3 In the menu located on the left part of the window select the Change adapter settings line 4 In the opened win...
Страница 13: ...e bottom panel of the device in the Security key field and click the OK button 8 Wait for about 20 30 seconds After the connection is established the network icon will be displayed as the signal level...
Страница 14: ...the error The page cannot be displayed or Unable to display the page Could not connect to remote server occurs upon connecting to the web based interface of the router make sure that you have properly...
Страница 15: ...er the username admin in the Username field and the password you specified in the Password field then click the LOGIN button The web based interface of the router is multilingual You can select the ne...
Страница 16: ...DSL 2740U Quick Installation Guide The Summary page displays general information on the router and its software 16...
Страница 17: ...links to the most frequently used pages with device s settings Other settings of the router are available in the menu in the left part of the page Go to the relevant section and select the needed page...
Страница 18: ...restored Then click the START button If the device has not been configured previously or the default settings have been restored the Initial Configuration Wizard starts automatically upon access to th...
Страница 19: ...and set your own password for access to the web based interface of the device In order to connect your device to an Ethernet line on the Device mode page from the Connection method list select the Eth...
Страница 20: ...ation Guide Selecting Ethernet WAN Port This configuration step is available for the Ethernet connection method 1 On the Device connection page select a LAN port that will be used as the WAN port 2 Cl...
Страница 21: ...essary information prior to configuring your connection Otherwise contact your ISP 1 On the Internet connection type page from the Connection type list select the connection type used by your ISP and...
Страница 22: ...e Password field Click the Show icon to display the entered password If authorization is not required select the Without authorization checkbox 2 If your ISP uses MAC address binding select the Clone...
Страница 23: ...y information prior to configuring your connection Otherwise contact your ISP 1 On the Internet connection type page from the Connection type list select the connection type used by your ISP and fill...
Страница 24: ...ded by your ISP the username login in the Username field and the password in the Password field Click the Show icon to display the entered password If authorization is not required select the Without...
Страница 25: ...network or leave the value suggested by the router 2 In the Password field specify your own password for access to the wireless network or leave the value suggested by the router WPS PIN of the devic...
Страница 26: ...your own name for the guest wireless network or leave the value suggested by the router 6 If you want to create a password for access to the guest wireless network deselect the Open network checkbox...
Страница 27: ...ce checkbox 2 Select a free LAN port for connecting your set top box 3 For the Ethernet connection method If the IPTV service is provided via a VLAN channel select the Use VLAN ID checkbox and fill in...
Страница 28: ...elect a free LAN port for connecting your IP phone 8 For the Ethernet connection method If the VoIP service is provided via a VLAN channel select the Use VLAN ID checkbox and fill in the VLAN ID field...
Страница 29: ...s of the router only after restoring the factory default settings via the hardware RESET button This procedure wipes out all settings that you have configured for your router Click the NEXT button On...
Страница 30: ...this click the IPv4 tab and specify needed values in the IP address and Subnet mask fields in the Local IP Address section 3 If needed specify your own IPv6 address of the router s LAN interface To d...
Страница 31: ...sign IPv6 addresses to themselves the Stateless value is selected from the Mode of dynamic IPv6 address assignment drop down list in the Dynamic IPv6 Addresses section on the IPv6 tab If the devices o...
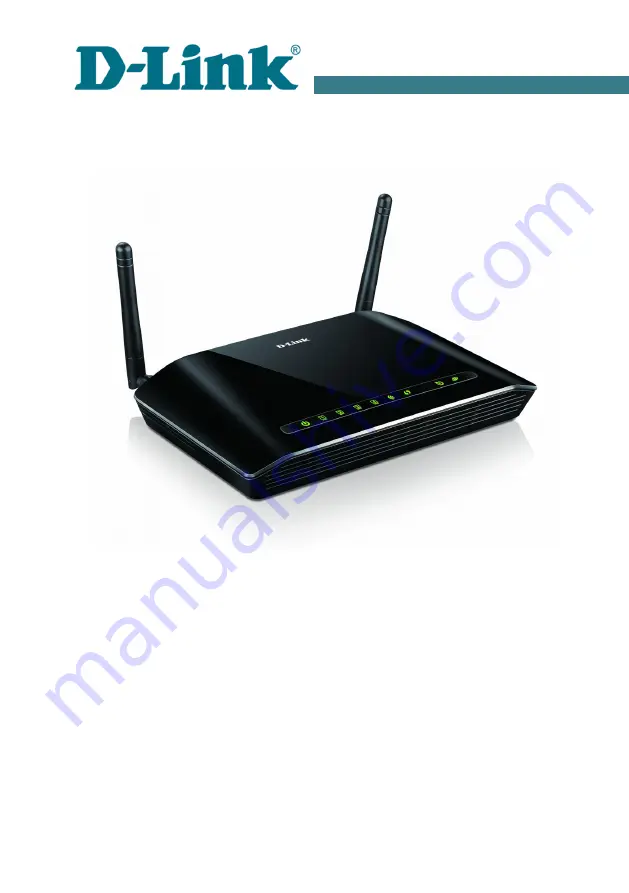
Страница 32: ...er on power off RESET button to restore factory default settings WPS button to set up wireless connection WIRELESS ON OFF button to enable disable wireless network Antenna Two external non detachable...
Страница 33: ...1 4 0 PVC up to 8 PVCs ATM Adaptation Layer Type 5 AAL5 ITU T I 610 OAM F4 F5 loopback ATM QoS PPP over ATM RFC 2364 PPP over Ethernet PPPoE Keep alive for PPP connections Software WAN connection type...
Страница 34: ...ed interface for configuration and management Firmware update via web based interface Automatic notification on new firmware version Saving restoring configuration to from file Support of logging to r...
Страница 35: ...ns applied in your country 802 11b typical at room temperature 25 C 16 5 18dBm 802 11g typical at room temperature 25 C 13 5 16 5dBm 802 11n typical at room temperature 25 C 13 5 16 5dBm Receiver sens...
Страница 36: ...l Parameters Dimensions L x W x H 175 x 133 x 29 mm 6 89 x 5 24 x 1 14 in Weight 210 g 0 46 lb Operating Environment Power Output 12V DC 0 5A Temperature Operating from 0 to 40 C Storage from 20 to 70...
Страница 37: ...s on the device Do not obstruct the ventilation openings of the device The environmental temperature near the device and the temperature inside the device s cover should be within the range from 0 to...
Страница 38: ...on on our website D Link provides its customers with free support within the product s warranty period Customers can contact the technical support group by phone or by e mail Internet FOR TELEPHONE NU...