


Apex Classic Setup and Programming Guide v2.2
Page
85
2.
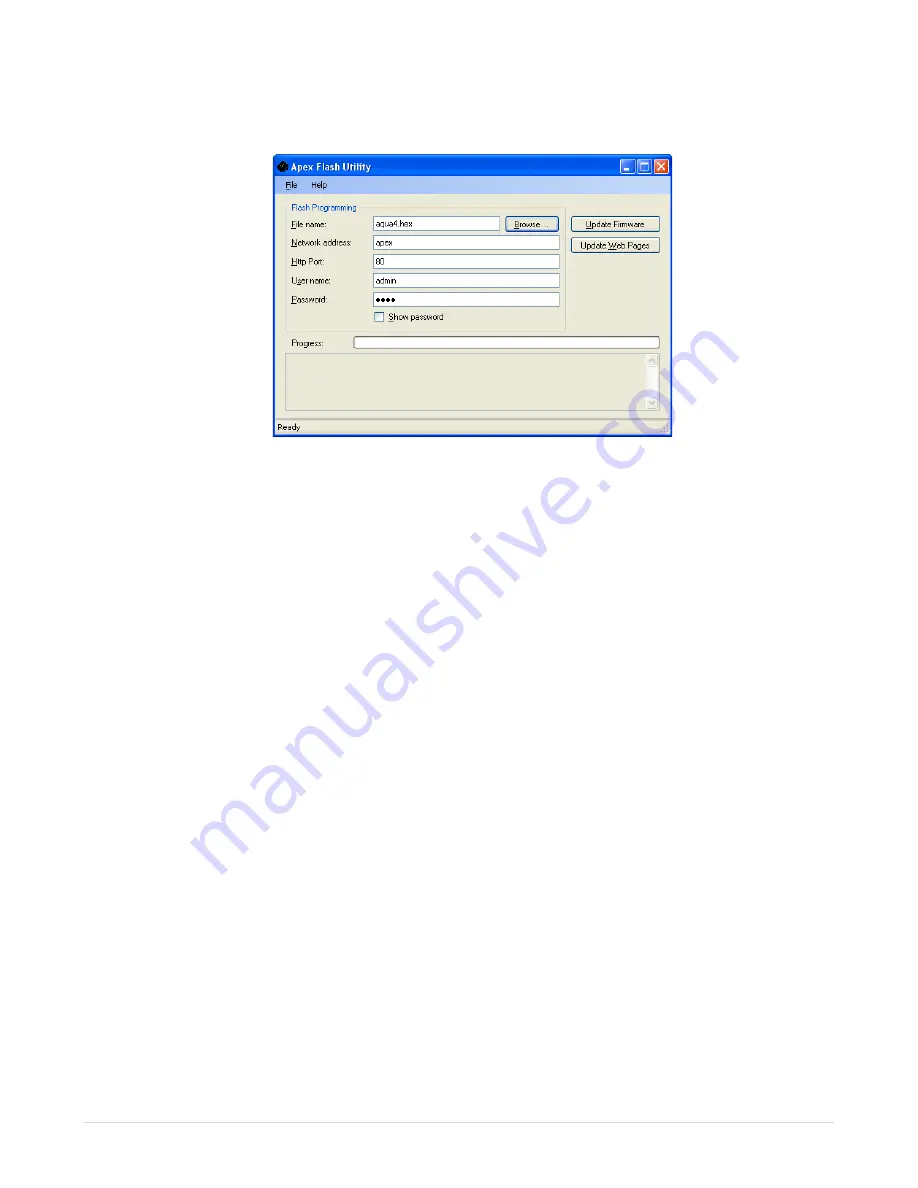
Double-click Apex Flash Utility.exe the Apex Flash Utility should open as
shown in Figure 13 - The Apex Flash Utility.
Figure 13 - The Apex Flash Utility
3.
The File name field contains the name of the firmware file you are about to
flash to the Apex Base Module. It defaults to the file that came with the
downloaded package. If you would like to change the file to flash, type the
file name in the box or click the Browse button to select the file.
4.
Enter the Network Address to the Apex controller you wish to update.
a.
Accept the default of Apex if you have not renamed the
AquaController Apex.
b.
If you have changed the host name, enter the new host name.
c.
Alternately, you can simply enter the IP address that is assigned to
the Apex Base Module (current IP address assigned can be viewed
from the Apex Display at System – Net Setup – IP Address).
NOTE: For best results, use the IP address of the AquaController Apex in
the Apex Flash utility, not the host name. This is especially important if you
are using automatic IP address assignment (DHCP) as the IP address for
the device can change when the AquaController Apex re-boots after
updating the firmware.
5.
Enter HTTP Port that your AquaController is configured to use for the Web
Interface.
a.
Accept the default of 80 if you have not changed it
b.
If you have changed the HTTP Port on the Apex, enter the current
HTTP Port (current HTTP Port can be viewed from the Apex Display at
System – Net Setup – HTTP Port
.
6.
Enter the Apex Administrator User name and Password
a.
Defaults are admin and 1234


