Release 6.0
62
Chapter 2 Workflow - Installation to Operation
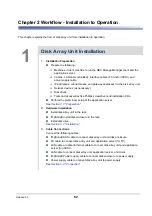
This chapter explains the flow of disk array unit from installation to operation.
1
Disk Array Unit Installation
1.
Installation Preparation
Prepare the following:
Machines - Client machine to run the NEC Storage Manager client and the
application server.
Cables - LAN cable (shielded), interface cables (FC and/or iSCSI), and
power supply cable.
IP addresses, subnet masks, and gateway addresses for the disk array unit.
Network devices (as necessary).
Disk drives.
Tools and accessories like Phillips screwdriver and installation CDs.
Perform the preliminary setup of the application server.
See
2.
Hardware Installation
Install disk array unit in the rack.
(
Optional
) Install disk enclosure in the rack.
Install disk drive.
See
3.
Cable Connections
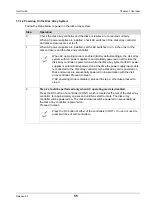
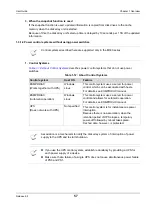
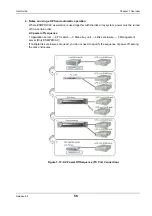
Connect the following cables:
(
Optional
) SAS cable to connect disk array unit and disk enclosure.
FC cable to connect disk array unit and application server (for FC).
LAN cable or optical Ethernet cable to connect disk array unit and application
server (for iSCSI).
LAN cable to connect disk array unit, application server, and client.
(
Optional
) Power supply cable to connect disk enclosure to power supply.
Power supply cable to connect disk array unit to power supply.
See
Содержание M100
Страница 25: ...Release 6 0 25 User Guide About Warning Labels Power Supply AC Power Supply ...
Страница 27: ...Release 6 0 27 User Guide About Warning Labels Battery ...
Страница 29: ...Release 6 0 29 User Guide About Warning Labels Power Cable AC Power Supply ...
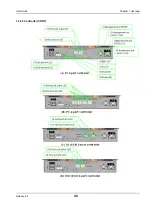
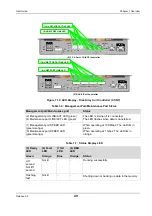
Страница 40: ...Release 6 0 40 User Guide Chapter 1 Overview 1 2 1 4 Controller CONT ...
Страница 48: ...Release 6 0 48 User Guide Chapter 1 Overview 1 2 3 3 Controller CONT ...
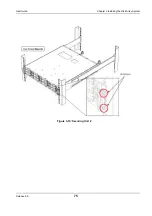
Страница 75: ...Release 6 0 75 User Guide Chapter 3 Installing the Disk Array System Figure 3 10 Securing Unit 2 ...
Страница 88: ...Release 6 0 88 User Guide Chapter 4 NEC Storage Manager Figure 4 1 Example of Recommended Configuration ...
Страница 125: ...Release 6 0 125 User Guide Chapter 4 NEC Storage Manager d Click Login to open the main screen Figure 4 26 Main Screen ...
Страница 194: ...Release 6 0 194 User Guide Chapter 6 Initializing a Disk Array iSCSI Figure 6 16 Hot Spare Bind View Display ...
Страница 260: ...Release 6 0 260 User Guide Chapter 8 Installing Optional Parts Figure 8 12 Removing the DIMMs ...
Страница 388: ...Release 6 0 388 User Guide Appendix F How to Set Check Application Server Linux iSCSI Figure F 3 Configuration Example ...
Страница 459: ...NEC Corporation 7 1 Shiba 5 chome Minato ku Tokyo 108 8001 Japan URL http www necstorage com ...

