5-126 Installing and Using Utilities
5.
Click
Add
to accept the custom action. (If the
Add
button is inactive, ensure that you typed the
File
path name and executable name correctly. The executable file must exist to be added.)
You can view the custom actions you have created at the bottom of the
Custom Actions
page. If
you want to remove a custom action from the list, select it and click
Remove
.
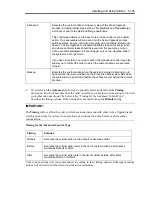
When you have finished specifying custom actions to run, or if you have no custom actions to
specify, you can click
Next
to proceed with the next configuration step.
TIPS:
Programming Notes for Custom Actions, page 5-126
Selecting Application Services to Control, page 5-119
Managing Critical Applications During the Upgrade Process, page 5-95
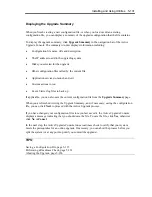
Displaying the Upgrade Summary, page 5-131
Programming Notes for Custom Actions
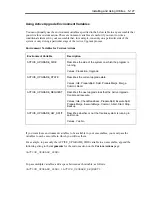
The following topics describe some of the features available for programming and monitoring
custom actions:
•
“Starting and stopping applications” on this page
•
“Using Active Upgrade Environment Variables” on page 5-127 “Generating Exit Values” on
page 5-128
•
“Viewing Standard Output and Error Stream” on page 5-128
•
“Executing Visual Basic Scripts” on page 5-129
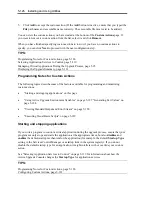
Starting and stopping applications
If you write a program to control a critical application during the upgrade process, ensure that your
program not only stops and starts the application at the appropriate times, but also
disables
and
enables
the default startup mechanism for the application (for example, the default
Startup Type
setting in the Services Control Manager or a startup item in the system registry). If you do not
disable the default startup type for an application, it might interfere with or override your custom
action.
See “Selecting Application Services to Control” on page 5-119 for information about how the
Active Upgrade Console changes the
Startup Type
for application services.
TIPS:
Programming Notes for Custom Actions, page 5-126
Configuring Custom Actions, page 5-123
Содержание Express5800/320Fd-MR
Страница 13: ...v Appendix B I O Port Addresses This appendix lists factory assigned I O port addresses...
Страница 19: ...xi THIS PAGE IS INTENTIONALLY LEFT BLANK...
Страница 43: ...2 10 General Description Rear View...
Страница 47: ...2 14 General Description CPU IO Module CPU IO module...
Страница 67: ...2 34 General Description This page is intentionally left blank...
Страница 79: ...3 12 Windows Setup and Operation 3 Confirm that RDR of the disk is cancelled...
Страница 80: ...Windows Setup and Operation 3 13 4 Cancel the disk of the corresponding slot in the same manner...
Страница 106: ...Windows Setup and Operation 3 39 This page is intentionally left blank...
Страница 198: ...4 92 System Configuration This page is intentionally left blank...
Страница 233: ...Installing and Using Utilities 5 35 DIMM Allows the information of DIMM on the CPU modules to be viewed...
Страница 370: ......
Страница 371: ...This page is intentionally left blank...
Страница 389: ...6 18 Maintenance 3 Stop of PCI module 1 4 Start of PCI module 1...
Страница 391: ...6 20 Maintenance This page is intentionally left blank...
Страница 465: ...System Upgrade 8 31 board must not be mixed with N8804 005 or N8803 035...
Страница 480: ......
Страница 483: ......

