background image

4-58  System Configuration 

Logout 

 
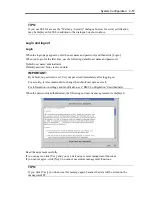
Click the File menu and select Exit to logout. When you log out, the main window closes and you 
will return to the login page on the browser.       

Содержание Express5800/320Fd-MR

Страница 1: ...NEC Express5800 Series N8800 122F EXP320J NEC Express5800 320Fd LR N8800 123F EXP320K NEC Express5800 320Fd MR User s Guide...

Страница 2: ...N8800 122F EXP320J NEC Express5800 320Fd LR N8800 123F EXP320K NEC Express5800 320Fd MR User s Guide 1st Edition 4 2008 856 127506 101 A...

Страница 3: ...Warranty Statement accompanying each product However actual performance of each such product is dependent upon factors such as system configuration customer data and operator control Since implementa...

Страница 4: ...This guide uses the following three types of symbols to give indications and precautions against a danger They are defined as follows Indicates that there is a risk of danger Each image symbolizes a p...

Страница 5: ...er beam Indicates a risk of an explosion Indicates a risk of a personal injury Prohibited actions Indicates a general prohibition that is not defined herein Do no touch the indicated area There is a r...

Страница 6: ...Mandatory actions Unplug the server There is a risk of an electric shock or fire Indicates a general action to take that is not defined herein Make sure to follow the instructions...

Страница 7: ...wn expense This class A digital apparatus meets all requirements of the Canadian Interference Causing Equipment Regulations Cet appareil num rique de la classe A respecte toutes les exigences du R gle...

Страница 8: ...m or Microsoft Windows Server 2003 Enterprise x64 Edition operating system are called Windows Server 2003 x64 Edition for short Microsoft Windows Server 2003 R2 32 bit Standard Edition operating syste...

Страница 9: ...US The patent numbers for the DVC technology of AVOCENT US US Patent Number 5 732 212 5 937 176 6 633 905 6 681 250 6 701 380 other patents pending Taiwanese Patent Number 173784 European Patent Numb...

Страница 10: ...ut prior written permission of NEC Corporation 4 All efforts have been made to ensure the accuracy of all information in this manual If you find any part unclear incorrect or omitted in this manual co...

Страница 11: ...he system to instantaneously isolate the failed parts to assure non stop running operation will be moved smoothly from one module to the other minimizing damage to it You can use this NEC Express5800...

Страница 12: ...rvice support etc Chapter 2 General Description This chapter describes what you should know about the product its component names functions operating procedures as well as handling of devices and othe...

Страница 13: ...v Appendix B I O Port Addresses This appendix lists factory assigned I O port addresses...

Страница 14: ...and check the individual items If some component is missing or damaged contact your sales agent Keep the accessories in a safe place You will need them when you perform setup addition of options or r...

Страница 15: ...OW THE OPERATING SYSTEM SEES THE CPU MODULES 2 6 How CPU modules appear on Task Manager 2 6 NAMES AND FUNCTIONS OF COMPONENTS 2 7 Front View 2 8 Rear View 2 10 DVD ROM drive 2 13 CPU IO Module 2 14 Mo...

Страница 16: ...47 HOW TO CLEAR THE BMC CONFIGURATION 4 48 REMOTE MANAGEMENT FUNCTION 4 49 Network Default Values 4 49 Settings on the Server 4 50 Initial Settings on the Server 4 50 Setting a Management PC 4 52 Usin...

Страница 17: ...1 Problems with NEC Express5800 ft series 7 11 Event Log 7 24 Problems with NEC EXPRESSBUILDER 7 29 Problems with Master Control Menu 7 30 Problems with Parameter File Creator 7 31 Problems with NEC E...

Страница 18: ...ROCESSOR CPU 8 25 Installing CPU 8 26 Removing CPU 8 28 PCI BOARD 8 29 Installing PCI Board 8 32 Removing PCI Board 8 36 Replacing PCI Board 8 36 Setup of Optional PCI Board 8 37 APPENDIX A SPECIFICAT...

Страница 19: ...xi THIS PAGE IS INTENTIONALLY LEFT BLANK...

Страница 20: ...Chapter 1 Precautions for Use This chapter includes information necessary for proper and safe operation of the server...

Страница 21: ...certain part of the system so that the user stays alert to possible risks Do not remove or damage the label If this label is missing about to peel off or illegible contact your sales agent The figure...

Страница 22: ...or or noise If the equipment emits smoke odor or noise immediately flip off the POWER switch unplug the cord and contact your sales agent There is a risk of a fire Do not insert a wire or metal object...

Страница 23: ...tlet If the rated current is exceeded there is a risk of overheating that could lead to a fire Do not plug the cord insecurely Insert the plug firmly into an outlet There is a risk of heat or fire due...

Страница 24: ...ingers on the rail when you mount dismount the equipment into from the rack Do not use or store this product in corrosive environment Avoid the usage or storage of this product in an environment which...

Страница 25: ...ce cable or connector may cause an electric shock or a fire resulted from a short circuit Do not use any non designated interface cable Use only interface cables designated by NEC identify which compo...

Страница 26: ...not disassemble replace or recharge the battery yourself Disconnect the power plug before cleaning the server Make sure to power off the server and disconnect the power plug from a power outlet befor...

Страница 27: ...emove a device while it works There is a risk of malfunction and injuries Do not touch the equipment when it thunders Unplug the equipment when it threatens to thunder If it starts to thunder before y...

Страница 28: ...zers or install two or more racks It may fall down to cause injuries Do not assemble parts alone It takes at least two people to mount doors and trays to a rack You may drop some parts to cause a brea...

Страница 29: ...ause voltage sag As a preventive measure it is recommended to use UPS uninterruptible power supply This equipment does not support the connection through an UPS serial port RS 232C or the control usin...

Страница 30: ...that could lead to a breakdown of the equipment even if you could attach and connect Make sure that your options are compatible with the system If you attach any incompatible option there is a risk of...

Страница 31: ...reused by a 3rd party You need to exercise sufficient care to protect privacy and confidential information Some of the system components have limited lifetime e g cooling fans built in batteries buil...

Страница 32: ...m isn t solved by the above actions stop using the server and consult with your sales agent In this case check LED indications of the server and alarm indications on the display which will serve as he...

Страница 33: ...ustment it is difficult to maintain a good work posture and may get tired soon Be sure to adjust the angle before using the display Adjust Brightness and Contrast Displays allow you to adjust brightne...

Страница 34: ...apter 2 General Description This chapter describes what you need to know to use the NEC Express5800 ft series Refer to this chapter when you want to know about certain components and how to operate th...

Страница 35: ...USB interface High reliability Various Features Graphic accelerator ES1000 supported DVD Combo Self diagnosis Memory monitoring feature 1 bit error correction 2 bit error detection Bus parity error d...

Страница 36: ...ion of server data on an independent storage system These features eliminate server downtime that is usually caused by network disconnection or trouble with the I O controller Ethernet adapter or disk...

Страница 37: ...rdware No need to modify applications You can run Windows Server 2003 compliant applications on NEC Express5800 ft series Thus unlike other highly fault tolerant products special API or scripts are no...

Страница 38: ...C Express5800 ft series events use unique IDs they are easy to distinguish In service repairing You can repair or replace a failed module even if NEC Express5800 ft series is operating Partition struc...

Страница 39: ...S On NEC Express5800 ft series the CPU modules are redundantly configured and all processors installed on this server are shown How CPU modules appear on Task Manager CPUs are displayed as many as the...

Страница 40: ...2 7 NAMES AND FUNCTIONS OF COMPONENTS Names and functions of components are shown below 1 LEDs For more information see the description on the front view page 2 8 2 Front bezel The cover to protect d...

Страница 41: ...ED off cannot be used If the switch is pressed once the server is powered on If the switch is pressed again the server is powered off If the switch is pressed for more than 4 seconds the server is for...

Страница 42: ...1 CPU IO module status LED 1 amber This LED indicates the status of the CPU IO module When the module is successfully running the LED is powered off If a module has a problem the LED illuminates in am...

Страница 43: ...2 10 General Description Rear View...

Страница 44: ...odel 6 1 AC inlet A connector A power cord is connected to this socket for the CPU IO module 0 If you want make the CPU IO module 0 primary connect a power cord to this inlet first 6 2 AC inlet B conn...

Страница 45: ...operating the LED blinks in green or is powered off 12 CPU IO module POWER LED green This LED illuminates in green when the system is powered on 13 CPU IO module 1 This is a module with a set of CPU p...

Страница 46: ...tatus LED The LED that illuminates while accessing the loaded DVD CD ROM 2 Tray eject button The button to eject the tray 3 Manual release hole When the eject button does not work insert a metal pin i...

Страница 47: ...2 14 General Description CPU IO Module CPU IO module...

Страница 48: ...M CH0 Slot 1 2 3 DIMM CH0 Slot 2 2 4 DIMM CH1 Slot 0 2 5 DIMM CH1 Slot 1 2 6 DIMM CH1 Slot 2 3 Processor 0 socket CPU0 4 Processor 1 socket CPU1 5 Jumper switch for clearing CMOS password 6 Jumper swi...

Страница 49: ...port can t be connected to phone line The port is also used when managing the server with the management software NEC DianaScope attached on this device IMPORTANT Communication mode on the management...

Страница 50: ...off When the system is starting the initialization process is performed Wait for a while the LED will illuminate in green Blinking in green If the OS is running duplex configuration is not made for o...

Страница 51: ...t status LED 2 of the other CPU IO module is on the device is successfully running in the Duplex mode Not on White If the PCI slot status LED 2 of the other CPU IO module is blinking the cable may be...

Страница 52: ...ontact a maintenance service company Blinking in amber Illuminate in green when accessing the disk The mirror of the disk is disconnected Perform mirroring Blinking in green and amber in turn The hard...

Страница 53: ...port sends or receives data ACT When the LED does not illuminate during LINK check the condition and connection of network cables If there is nothing wrong with the cables a defect is suspected in th...

Страница 54: ...or LED Amber LED illuminates when electric voltage failure occurs in CPU IO module MEM0 Memory slot 0 error LED Amber LED illuminates when failure occurs on the memory slot 0 of CPU IO module MEM1 Mem...

Страница 55: ...dule FAN1 Fan 1 error LED Amber LED illuminates when failure occurs on the cooling fan for CPU1 of CPU IO module FAN2 Fan 2 error LED Amber LED illuminates when failure occurs on the disk cooling fan...

Страница 56: ...ont bezel IMPORTANT The front bezel can only be removed by unlocking the lock with the security key attached 1 Insert the product accessory security key into the key slot and push lightly Turn the key...

Страница 57: ...el 3 Press the power switch located on the front of the front panel After a while the NEC logo will appear on the screen IMPORTANT Do not turn off the power before you see the NEC logo and a character...

Страница 58: ...ECC memory modules CPU IO modules keyboard mouse etc It also shows startup messages for various BIOS setup utilities According to the factory default settings the NEC logo appears on the display while...

Страница 59: ...pears together with an error message you do not need to start the utility to modify the configuration If you wait for a few seconds POST will go on automatically To start the SETUP utility press F2 wh...

Страница 60: ...r messages see Chapter 7 Troubleshooting POST Error Messages When the server detects an error during POST it will notify you of the occurrence in the following manners Displays an error message on the...

Страница 61: ...e letter may change from A to B by switching CPU IO modules Changing of the drive letter does not affect the operation of the server If the drive letter is changed access the floppy disk drive with th...

Страница 62: ...rive is then raised slightly CHECK You cannot use 1 2 MB formatted disks If you insert an unformatted disk you will see a message that the disk cannot be read or that needs formatting To format a flop...

Страница 63: ...event data from being erased accidentally the floppy disk has a write protect notch When the disk is write protected you can read data but you cannot write the data or format the disk It is recommenda...

Страница 64: ...leave the DVD ROM drive tray ejected Insert Remove DVD ROM Follow the steps below to set an optical disk 1 Before you insert an optical disk make sure that the server is powered on When the server is...

Страница 65: ...ROM When you cannot eject the optical disk from the server even by pressing the eject button follow the steps below to eject it 1 Press the POWER switch to power off this server i e the POWER LED is o...

Страница 66: ...al side blank side Place the optical disk gently on the tray with the printed side up Do not scratch or use a pencil or ballpoint pen to write on the optical disk Keep away from cigarette smoke Do not...

Страница 67: ...2 34 General Description This page is intentionally left blank...

Страница 68: ...cribes setup procedures to make NEC Express5800 ft series ready for use CPU IO module has a processor function part and IO function part In utilities in this chapter the processor function part is ref...

Страница 69: ...by making disks duplexed per disk Duplexing disks by the RDR function enables the disks to be resynchronized in a short period of time when their mirror has been broken due to causes such as PCI modu...

Страница 70: ...refer to SAS BIOS in Chapter 4 and perform Format Disk using Disk Utilities 5 If the system is shut down or restarted while the mirror is broken or a long time 30 minutes or longer has passed after t...

Страница 71: ...sks created by RDR Right click a disk on the tree to display the menu for setting RDR By looking at the tree you can know which disk corresponds to which disk of the Windows Disk Management and whethe...

Страница 72: ...cribes the procedure to set duplex configuration to disks by RDR In this example the disks of the Slot 2 of the PCI modules 0 and 1 are duplexed 1 Insert a new disk to a built in slot In this example...

Страница 73: ...hile The display of RDR Utility is not updated automatically Therefore update it every time after you perform disk operations described below 4 On the left tree of RDR Utility right click a disk to se...

Страница 74: ...popup window asking for rebooting the system may be displayed but there is no need to reboot it Select No and close the popup window For a disk to be inserted use a new or physically formatted disk w...

Страница 75: ...3 8 Windows Setup and Operation 6 On the left tree of RDR Utility right click a disk to set RDR and click Add physical Disk To RDR Virtual Disk...

Страница 76: ...nking Syncing RDR Virtual Disk Simplex Resync x percent x 0 4 8 96 IMPORTANT The time required for synchronization varies depending on the partition size on the disk For 18GB partition it takes about...

Страница 77: ...g Duplex RDR Virtual Disk Duplex None IMPORTANT When a new partition is created on the disk where RDR is configured the created partition area is synchronized automatically When the system is halted w...

Страница 78: ...command RDR settings will be cancelled but other data will remain You cannot release the duplex setting of the following disks Disk containing page files Dynamic disk The display of RDR Utility is not...

Страница 79: ...3 12 Windows Setup and Operation 3 Confirm that RDR of the disk is cancelled...

Страница 80: ...Windows Setup and Operation 3 13 4 Cancel the disk of the corresponding slot in the same manner...

Страница 81: ...d execute Virtual Disk Service vds 3 Open Disk Management A partition on the disk where the RDR setting is removed is not assigned a drive letter To use the partition assign a drive letter using Disk...

Страница 82: ...OK Clear Hard MTBF When a hardware failure occurs to a disk the mean time between failures MTBF is counted and the value is saved In RDR Utility the value is displayed at MTBF HardCurrent and MTBF Har...

Страница 83: ...ynchronize This Physical Disk From RDR Virtual Disk dialog box click OK 3 Confirm that the resynchronization starts and the status of disks changes as shown below Resynchronizing RDR Utility DISK ACCE...

Страница 84: ...Balancing of RDR Virtual Disk is off 1 Start RDR Utility and right click a target disk in the left pane and click Set As Active RDR Disk 2 In the Set As Active RDR Plex dialog box click OK Active RDR...

Страница 85: ...lick RDR Virtual Disk x in the left pane and click Stop Verify RDR Virtual Disk 2 In the Stop Verify RDR Virtual Disk dialog box click OK Set Resync Priority Priority of synchronization by RDR can be...

Страница 86: ...Windows Setup and Operation 3 19 click Set RDR LUN Load Balancing 2 When a dialog box appears select On or Off a default is On and click OK 3 In the Set RDR LUN Load Balancing dialog box click OK...

Страница 87: ...when no error has occurred If either of the values is different from the normal value the disk has an error Procedures to Replace Failed Disks This section describes a procedure for replacing a disk...

Страница 88: ...indow Insert the replacement disk after waiting for 15 seconds or more after removing a disk Inserted disk may not be configured to RDR automatically If this occurs right click on the inserted disk in...

Страница 89: ...may complete in a short period of time and the disk may become synchronized after RDR is set If the system is rebooted during synchronization the process cannot be completed Do not restart the system...

Страница 90: ...n Remove IMPORTANT NEC Express5800 ft series specific precautions When connecting an optional floppy disk drive drive letters may change from A to B by switching CPU IO modules This does not affect th...

Страница 91: ...Tolerance SFT Switch Fault Tolerance SFT is a feature that provides the network availability because the fail over target standby adapter takes over the MAC address L3 address when failure occurs on...

Страница 92: ...ilding duplex configuration be sure to use at least one adapter of CPU IO module 0 and of 1 individually Example1 Configure the duplex network which enhances the service life by using all adapters Exa...

Страница 93: ...gure duplex dual LAN regarding to the example shown in Rules of Duplex Configuration on NEC Express5800 ft series IMPORTANT Log on as Administrator or a member of the group Administrators 1 Start Devi...

Страница 94: ...Windows Setup and Operation 3 27 3 Select the Teaming tab on the properties dialog box Select the Team with other adapters and then click the New Team button 4 Enter the team name and click Next...

Страница 95: ...Operation 5 Select the adapters to include in the team and click Next 6 Select Adapter Fault Tolerance or Adaptive Load Balancing or Switch Fault Tolerance as a team mode Usually select Adapter Fault...

Страница 96: ...9 7 Click Finish 8 Start Command prompt to check the physical MAC address set on ipconfig all 9 Select the Team Adapter you have set Right click on it and select Properties from the menu displayed to...

Страница 97: ...ation 10 Select the Advanced tab on the properties dialog box Select Locally Administered Address from the Settings list box and then enter the MAC address of a Team Adapter which you have checked in...

Страница 98: ...move duplex dual LAN IMPORTANT Log on as Administrator or a member of the group Administrators 1 Start Device Manager 2 Select the Team Adapter of which you want to remove duplex dual LAN Right click...

Страница 99: ...3 32 Windows Setup and Operation 3 Select the Settings tab in the properties dialog box and click the Remove Team button 4 The confirmation dialog box appears Click Yes button...

Страница 100: ...how to confirm the continuous system operation by failover after stopping the primary PCI module 1 Check which is the primary PCI module The PCI module with the POWER switch illuminated is the primary...

Страница 101: ...following events or changes occur when stopping the primary PCI module and the module fails over z The screen temporarily blacks out and then displayed again z The following message will appear from t...

Страница 102: ...elow Indications of the status LEDs Immediately after the PCI module startup until the completion of diagnosis LED Secondary Primary 1 CPU IO module status LED1 2 CPU IO module status LED2 Green blink...

Страница 103: ...g CPU module 1 Operating 1 CPU IO module status LED1 2 CPU IO module status LED2 Green Green 3 DISK ACESSS LED Green blinking Green blinking 2 Use the ft server utility to stop the operation of a CPU...

Страница 104: ...ed and the duplication process is completed Note that the system is paused temporarily for copying memory during memory synchronization Indications of status LEDs during diagnosis LED CPU module 0 Sta...

Страница 105: ...k Service vds The above programs are necessary for the NEC Express5800 ft series operation Do not stop these services When minimizing the number of operating service programs temporarily is required t...

Страница 106: ...Windows Setup and Operation 3 39 This page is intentionally left blank...

Страница 107: ...chapter describes Basic Input Output System BIOS configuration When you install the NEC Express5800 ft series for the first time or install remove optional devices thoroughly read this chapter for bet...

Страница 108: ...MPORTANT The SETUP utility is intended for system Administrator use only The SETUP utility allows you to set a password The server is provided with two levels of password Supervisor and User With the...

Страница 109: ...n POST terminates Press F1 to resume F2 to SETUP Press F2 to start the SETUP utility and display its Main menu If you have previously set a password with the SETUP utility the password entry screen ap...

Страница 110: ...nu or chooses the selected parameter Esc Displays the previous screen F1 Press F1 when you need help on SETUP operations The help screen for SETUP operations appears Press Esc to return to the Shows t...

Страница 111: ...values If you select No and then press either the Enter or Esc key the status before pressing the F9 key is restored Shows the following If you select Yes and then press the Enter key the setup will...

Страница 112: ...ect Server AC LINK Last State To keep the server off powered even when power is supplied from the UPS Select Server AC LINK StayOff Keyboard To set Num Lock Select Advanced I O Device Configuration Nu...

Страница 113: ...ction and make necessary settings Remote Wakeup To enable remote wake on LAN Select from LAN Advanced Advanced Chipset Control Wake on LAN Enabled Memory To check the installed memory DIMM status Sele...

Страница 114: ...h menu Main Start the SETUP utility to display the Main menu When you select a menu with the mark and press the Enter key its submenu appears Example Main Advanced Security Server Boot Exit ftServer S...

Страница 115: ...ble AHCI mode factory default IMPORTANT Check and adjust the system clock before operation in the following conditions After transporting the equipment After storing the equipment After the equipment...

Страница 116: ...menu screen Select an option with the mark and press Enter to display its submenu See the table below for setup options on the screen Option Parameter Description Boot time Diagnostic Screen Disabled...

Страница 117: ...Virtualization Tech Enabled Disabled Specify whether or not to enable Intel Virtualization Technology feature PECI Interface Enabled Disabled Specify whether or not to enable Platform Environment Cont...

Страница 118: ...ecify whether or not to enable Serial Port 2 Base I O address 3F8 IRQ4 2F8 IRQ3 3E8 IRQ4 2E8 IRQ3 Specify the I O address and IRQ of Serial Port 2 Serial Port 2 Sharing Enabled Disabled Specify whethe...

Страница 119: ...System Configuration 4 13 Keyboard Features Display only NumLock AUTO On Off Specify whether or not to enable NumLock at system startup factory default...

Страница 120: ...his option is displayed only when a PCI card is installed PCI Slot 3 upper Option ROM Enabled Disabled If Enabled is selected the extended ROM of the PCI card installed on PCI Slot 3 is initialized No...

Страница 121: ...Option ROM Enabled Disabled If Enabled is selected the extended ROM of LAN 1 embedded in the motherboard is initialized Embedded PXE 2 Option ROM Enabled Disabled If Enabled is selected the extended R...

Страница 122: ...Current supply is stopped the Wake On LAN function becomes unavailable on the next system launch after the electricity supply starts You need to connect the cables to both equipments to supply the ele...

Страница 123: ...tServer Setup F1 Help Select Item Change Values F9 Setup Defaults Esc Exit Select Menu Enter Select Sub Menu F10 Save and Exit Supervisor Password Is Unset User Password Is Unset Set Supervisor Passwo...

Страница 124: ...tatus view only User Password is Unset Set Indicates User password setup status view only Set Supervisor Password Enter Press Enter to display the supervisor password entry screen This option is avail...

Страница 125: ...p User password setup is required beforehand factory default IMPORTANT If you have logged in SETUP by using the Supervisor Password you can check and change all settings If you have logged in SETUP by...

Страница 126: ...On Specify the AC LINK feature by selecting the status of the power supply unit of the server when the AC power supply restarts See the following table for details Power ON Delay Time 180 255 s Config...

Страница 127: ...Displays the board information Board Serial Number Displays the board information System Part Number Displays the system information System Serial Number Displays the system information Chassis Part...

Страница 128: ...ion of SDR sensor device information PIA Revision Displays the PIA plat form information revision ASIC Rev Displays the firmware information of the fault tolerant chipset SMM Rev Displays the firmware...

Страница 129: ...T100 VT UTF8 Select a console type Flow Control None XON XOFF CTS RTS Select a flow control method Console Connection Direct Via modem Select a connector Continue C R after POST Off On Specify whether...

Страница 130: ...ng module press the Enter key and select Yes Clear Offline Event Logs Press Enter To clear event logs of the stand by module press the Enter key and select Yes Main Advanced Security Server Boot Exit...

Страница 131: ...to enable the function to monitor OS boot up If you are starting up from an OS with no NEC ESMPRO Agent installed disable this option If you use Disaster Recovery Option for ARCServe select Disabled O...

Страница 132: ...4 26 System Configuration Option Parameter Description POST Pause Monitoring Time out 60 180 1200 Set the time for POST monitoring during boot pause unit second factory default...

Страница 133: ...PORTANT Move to set CD ROM Drive above Hard Drive when you boot the NEC EXPRESSBUILDER Main Advanced Security Server Boot Exit ftServer Setup F1 Help Select Item Change Values F9 Setup Defaults Esc Ex...

Страница 134: ...Server Boot Exit ftServer Setup F1 Help Select Item Change Values F9 Setup Defaults Esc Exit Select Menu Enter Select Sub Menu F10 Save and Exit Exit Saving Changes Exit Discarding Changes Load Setup...

Страница 135: ...ow Select Yes to save the current configuration data into the CMOS non volatile memory and exit the SETUP utility The server will automatically restart the system Main Advanced Security Server Boot Ex...

Страница 136: ...exit SETUP without saving the changes you have made If you select Yes in the dialogue box you can exit SETUP with the changes you have made saved in CMOS The server reboots automatically Main Advanced...

Страница 137: ...rs If you select Yes in the dialogue box default values are restored If you select No you will see the Exit menu screen Main Advanced Security Server Boot Exit ftServer Setup Space Select Enter Accept...

Страница 138: ...ettings are restored IMPORTANT The default value and the factory default value differ partially If you want to bring the value back to the default verify all the value you want to make changes Main Ad...

Страница 139: ...dialogue box as shown below If you select Yes in the dialogue box changes you have made are saved in CMOS non volatile memory Main Advanced Security Server Boot Exit ftServer Setup Space Select Enter...

Страница 140: ...tility select Server Monitoring Configuration Option ROM Scan Monitoring and Disabled If Enabled is selected system may reboot while you are making settings However set Option ROM Scan Monitoring to E...

Страница 141: ...f you want to format or verify the hard disk drive connected to the adapter select Disk Utility For more information see the explanation below 4 To quit press the Esc key until you see the closing mes...

Страница 142: ...at can be set in each menu and factory settings displayed on the screen SerialSelect Utility The following screen is displayed when you select SerialSelect Utility in the Options menu Select an item u...

Страница 143: ...AS controller Interrupt IRQ Channel Displays the interrupt I O Port Address Displays the I O port device Device ID Displays the device ID Controller Serial Number Displays the controller serial number...

Страница 144: ...on is selected in the menu Adaptec SAS SATA Controller 0 Controller Interface Definitions Runtime BIOS Enabled BBS Support Device POST Banner Display Enabled CTRL A Message Display Enabled Physical Dr...

Страница 145: ...abled If Enabled is selected the message Press CTRL A for Adaptec SAS SATA Configuration Utility is displayed in SAS controller BIOS during the POST Even if this option is set to Disabled the utility...

Страница 146: ...using a globally unique worldwide name WWN identifier factory default 1 Press F6 to return to the initial value 2 To quit press Esc until you see the closing message If any changes have been made the...

Страница 147: ...ptec SAS SATA Controller 0 Device Box Slot Model FW Rev 0 FF FF HITACHI HUS151436VLS300 A340 1 00 FF No device 2 00 FF No device 3 00 FF No device 4 00 FF No device 5 00 FF No device 6 00 FF No device...

Страница 148: ...he data transfer rate of disk drive The initial value is set to Auto You do not need to change it Set Bootable Enabled Disabled Set the disk drive to the bootable disk drive You do not need to change...

Страница 149: ...t Forced Shutdown Use this function when an OS command does not shut down the server the POWER switch does not turn off the server or resetting does not work Press and hold the POWER switch on the pri...

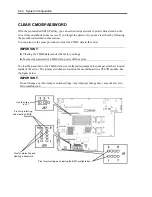
Страница 150: ...ata restores the factory settings To clear the password or CMOS data power off the server To clear the password or the CMOS data use configuration jumper pins jumper switches located inside of the ser...

Страница 151: ...tions to use the server safely There are risks of death or serious personal injury See PRECAUTIONS FOR SAFETY in Chapter 1 Do not disassemble repair or alter the server How to Clear CMOS 1 Power off t...

Страница 152: ...module 0 on the server 9 Reconnect only the power cord of the CPU IO module 0 and press the POWER switch to power on 10 After the startup press the F2 key during POST to start BIOS SETUP 11 Make setti...

Страница 153: ...Installing CPU IO Module on page 8 14 5 Connect the power cord of CPU IO module 0 only and then press the POWER switch to power on 6 When POST is completed after the startup press the POWER switch to...

Страница 154: ...ies see Installing CPU IO Module on page 8 14 5 Connect the power cord of CPU IO module 0 only and then press the POWER switch to power on 6 When POST is completed after the startup press the POWER sw...

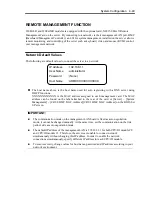
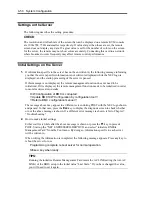
Страница 155: ...The MAC address can be found on the label attached to the rear of the card or Server System Management CRU0 BMC MAC Address CRU1 BMC MAC Address on the BIOS Set UP screen IMPORTANT The communication m...

Страница 156: ...on needs to be initialized in order to monitor devices into details H W Configuration of BMC is corrupted Update BMC H W Configuration by configuration tool Refer to BMC configuration manual The messa...

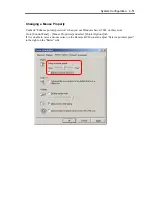
Страница 157: ...nce pointer precision when you use Windows Server 2003 on this server Go to Control Panel Mouse Properties and select Pointer Options tab If it is unable to move a mouse curser on the Remote KVM conso...

Страница 158: ...va2 Runtime Environment and set the NEC EXPRESSBUILDER DVD 2 By the auto startup function the master control menu of NEC EXPRESSBUILDER appears Click Software Setup and then NEC DianaScope and then ru...

Страница 159: ...4 2_09 6 Set the path to JRE For bash export PATH JAVA_HOME bin PATH For tcsh setenv PATH JAVA_HOME bin PATH IMPORTANT For the Mozilla browser create a symbolic link to the Java Plug in in the Mozill...

Страница 160: ...owed by a colon and http port number If the http port number is 80 the default value you can omit the port number When connecting to network which supports DHCP protocol The default host name of BMC i...

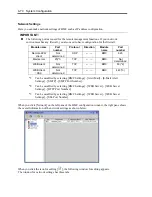
Страница 161: ...n set IP addresses of the managed LAN ports on the BMC Configuration menu LAN1 CPU IO Module 0 management LAN port LAN2 CPU IO Module 1 management LAN port The following is a configuration screen for...

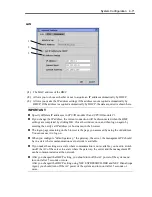
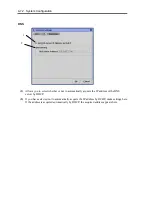
Страница 162: ...gement Card LAN1 LAN2 Select Disable on Remote Management Console and register the setting Obtain an IP address automatically DHCP HostName DomainName and IP Address are display only The image below s...

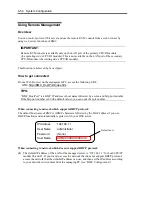
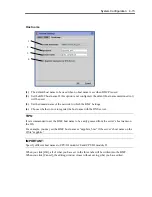
Страница 163: ...nter no data IMPORTANT By default no password is set Set your password immediately after logging on For security it is recommended to change the default user name as well For information on settings a...

Страница 164: ...4 58 System Configuration Logout Click the File menu and select Exit to logout When you log out the main window closes and you will return to the login page on the browser...

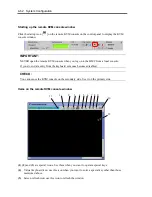
Страница 165: ...Click Exit to quit this applet 2 Click this to show the Window menu From the Window menu you can open windows including the KVM console window 3 Main frame A window is shown here 4 Click this to show...

Страница 166: ...the same as pressing the DUMP switch of the server 6 Makes the Unit ID lamp of the server blink 7 Starts up the remote KVM console 8 Starts up the BMC configuration 9 Stats up the firmware update 10...

Страница 167: ...Set the resolution of the device to one of these values If any value other than these values nothing will be shown on the remote KVM console The mouse cannot be used on the remote KVM console on the o...

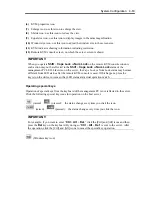
Страница 168: ...e If you do so data entry from the keyboard or mouse becomes disabled CHECK You cannot use the KVM console on the secondary side Use it on the primary side Items on the remote KVM console window 1 2 a...

Страница 169: ...e on the server the Caps Lock or Num Lock status may become different from LED status after the remote KVM console is used If this happens press the key s on the device in issue so that LED status and...

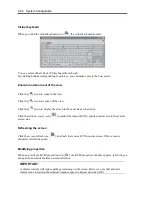
Страница 170: ...e same size as the device Click the window resize icon to adjust the remote KVM console window size to the remote screen size Refreshing the screen Click the screen refresh icon to refresh the remote...

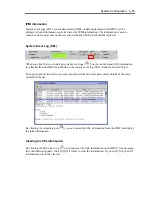
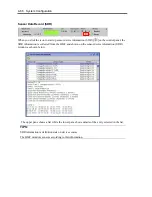
Страница 171: ...ol panel SEL information is collected from the BMC and shown on the system event log SEL window as shown below The upper pane shows a list of system event logs while the lower pane shows details of th...

Страница 172: ...panel the SDR information is collected from the BMC and shown on the sensor device information SDR window as shown below The upper pane shows a list while the lower pane shows details of the entry sel...

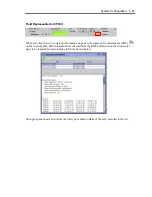
Страница 173: ...mation on parts to be replaced for maintenance FRU on the control panel FRU information is collected from the BMC and shown on the window for parts to be replaced for maintenance FRU as shown below Th...

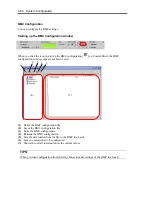
Страница 174: ...ndow appears as shown below 1 Reads the BMC configuration file 2 Saves the BMC configuration file 3 Edits the BMC configuration 4 Reloads the BMC configuration 5 Sets the data loaded from the file to...

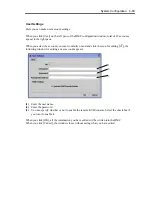
Страница 175: ...ant to modify or add and click the icon for editing the following window for editing a user account appears 1 Enter the user name 2 Enter the password 3 You can specify whether or not to enable the re...

Страница 176: ...EB client Not determined TCP BMC 80 2 WEB client SSL Not determined TCP BMC 443 3 1 Can be modified by selecting BMC Settings Alert Mail E Mail Alert Settings SMTP SMTP Port Number 2 Can be modified b...

Страница 177: ...or host name in the browser The logon page remaining on the browser is the page you accessed by using the old address You cannot use it to log on When you configure default gateway the gateway the ser...

Страница 178: ...her or not to automatically acquire the IP address of the DNS server by DHCP 2 If you have selected not to automatically acquire the IP address by DCHP make settings here If the address is acquired au...

Страница 179: ...ister the host name with the DNS server TIPS It is recommended to set the BMC host name to be easily guessed from the server s host name on the OS For example you may set the BMC host name as sapphire...

Страница 180: ...erall information of the web server settings IMPORTANT When you change the HTTP port number settings of SSL enable disable or SSL port number the current connection will be temporarily disconnected Cl...

Страница 181: ...fic reason such as SSL cannot be used This option is disabled by default 3 Specify the SSL port number 4 Specify the logon trial period during which you can try logging on again if you have failed to...

Страница 182: ...BMC When you click Cancel the editing window closes without saving what you have edited Alert Mail Configuration This allows you to make alert mail settings for BMC When you click Alert Mail on the l...

Страница 183: ...test mail IMPORTANT Perform the mail test after you have completely configured E Mail Alert Settings described in the following pages Making entries in the editing window does not complete settings Yo...

Страница 184: ...o be given to alert mail 4 Select whether or not to enable the body messages for all alert mail which is configured in the next step 5 Enter the body message to be used in all alert mail If you do not...

Страница 185: ...e number of send retry if sending a mail has failed 4 Specify the time in seconds before the next mail send retry If you click Default the default values for SMTP port number number of retries and ret...

Страница 186: ...roduct name code number of the server IP Address IP address of the BMC Event Time Time that the event occurred SEL Dump Data Data representing system event logs SEL in the hexadecimal format BMC URL U...

Страница 187: ...g up the firmware update window When you click the icon to start up firmware update on the control panel each pieces of revision information is loaded from the BMC to display the following firmware up...

Страница 188: ...gins Wait for file loading to complete TIPS You can update in a batch If there are more than one update targets all the information of the update targets must be loaded You can select more than one fi...

Страница 189: ...Selecting what to be upgraded Select check boxes of update targets CHECK Only those selected here will be written in Items with no check box selected will not be written in even if files have been loa...

Страница 190: ...he Status column displays the result for each target CHECK To apply updates for targets other than applet reboot the server or power off and then on the server When you rebooted or power on the server...

Страница 191: ...privilege to perform the operation Try performing the operation with administrator s privileges Consult your administrator Network errors No Error message Action 1 The HTTP communication failed Check...

Страница 192: ...2 Received bad response from BMC Check the server A failure may have occurred in BMC If you do not find any problem contact your service representative 3 BMC does not support IPMI 2 0 functions Contac...

Страница 193: ...Check the network environment and server If you do not find any problem contact your service representative System event log SEL display errors No Error message Action 1 Failed to clear session event...

Страница 194: ...s sign and underscore _ for a user name A user name should be 31 characters or less 8 The user name is too long A user name should be 31 characters or less 9 The password is too long Use 16 or less ch...

Страница 195: ...to open the file The specified file may not exist Check the file name 32 Failed to close the file The specified file may be corrupted 33 Can t open the file The specified file may not exist Check the...

Страница 196: ...e update files may be corrupted Obtain update files again 17 Invalid segment information Some update files may be corrupted Obtain update files again 18 Invalid data length Some update files may be co...

Страница 197: ...gth Some update files may be corrupted Obtain update files again 32 Unexpected EOF is detected Some update files may be corrupted Obtain update files again 33 Unexpected token is detected Some update...

Страница 198: ...4 92 System Configuration This page is intentionally left blank...

Страница 199: ...ESSBUILDER DVD that comes with your server and to install the utilities stored on the NEC EXPRESSBUILDER CPU IO module has a processor function part and IO function part In utilities in this chapter t...

Страница 200: ...o setup with the NEC EXPRESSBUILDER should have the same configuration as that for operation Start Menu When you insert the EXPRESSBUILDER disk into the optical disk drive and reboot the system the fo...

Страница 201: ...the below functions for maintenance Maintenance Utility Starts up the Offline Maintenance Utility BIOS FW Updating Updates the system BIOS ROM DOS Startup FD Creates Startup FD is used for starting t...

Страница 202: ...MC 1ST exe From the Master Control Menu you can install various software which runs on Windows or view online documents TIPS Some online documents are provided in the PDF format Acrobat Reader of Adob...

Страница 203: ...to several utilities automatically except for a few key input to verify the specification Also you can install the system with the same specification as before when re installing the system We recomme...

Страница 204: ...specifying setup information that is necessary for OS installation and creating Parameter file Follow the procedure below NOTE Do not remove NEC EXPRESSBUILDER DVD from drive during a parameter file c...

Страница 205: ...Installing and Using Utilities 5 7 3 Right click on the screen or left click Setup Windows The menu will appear 4 Click Parameter File Creator Parameter File Creator will appear...

Страница 206: ...d Using Utilities 5 Load Parameters step is displayed Select Do not load parameters from the menu click Next 6 Select the installing Operating System Select Install the Windows 32bit editions from the...

Страница 207: ...y the installing medium and the Windows system partition Specify medium Partition steps are displayed Confirm the parameters modify if necessary and then click Next NOTE About partition size Specify t...

Страница 208: ...re partitions See the figure below You can not re install the system with the existing partition that is upgraded to Dynamic Disk remained Do not select Use existing partitions at Windows system drive...

Страница 209: ...n or workgroup name to be used Enter domain account steps are displayed Retain the default value and click Next 12 Enter the installing components Select Windows components steps are displayed Verify...

Страница 210: ...nstalling and Using Utilities 13 Select the installing applications Select applications steps are displayed Retain the default value and click Next 14 Save the parameters Save parameters steps are dis...

Страница 211: ...ters set the free formatted floppy disk Select Save parameters enter the file path of the parameters files into the text box and click Next If not select Do not save parameters 15 Save to a floppy dis...

Страница 212: ...Parameter File Creator NOTE If you modify existing information file parameter file click Load Parameters at Road Parameters screen Refer to help to modify information file If you cancel operation on...

Страница 213: ...management Stable operation of server Shutdown of a server immediately leads the customer to lose business opportunities and profits This requires servers to always operate in their perfect state If a...

Страница 214: ...server fault NEC ESMPRO Agent includes the preventive maintenance function predicting the occurrence of a fault in advance as countermeasures for preventing faults from occurring It can previously de...

Страница 215: ...pical faults reported by NEC ESMPRO Agent Component Reported information CPU CPU load is over the threshold CPU degrading etc Memory ECC 1 bit error detection etc Power supply Voltage lowering Power f...

Страница 216: ...tilization This function shows memory s logical information and monitors the status Available This function shows information about I O devices such as Floppy disk serial port parallel port keyboard m...

Страница 217: ...operation but the components used to update F W or BIOS is suspended and the suspension of a specific component The table below lists the NEC Express5800 ft series management tasks using NEC ESMPRO a...

Страница 218: ...xpress5800 ft series alert is immediately sent to the NEC ESMPRO Manager When the NEC ESMPRO Manager receives the alert a popup message appears The alert contains the detailed information of the fault...

Страница 219: ...en is designed in the Explorer format to indicate the components in a server hierarchically for effective server management NEC ESMPRO Manager manages servers by using the following three types of GUI...

Страница 220: ...t In addition it changes the status color of the failed server component This enables you to identify the failed portion AlertViewer The AlertViewer manages fault reports sent from servers together A...

Страница 221: ...SLOT 2 on CPU module 0 DIMM CH0 CH1 SLOT 3 on CPU module 0 DIMM CH0 CH1 SLOT 4 on CPU module 0 DIMM CH0 CH1 SLOT 5 on CPU module 0 CPU0 on CPU module 0 CPU1 on CPU module 0 0 0 0 0 1 0 2 0 3 0 4 0 5 0...

Страница 222: ...Using Utilities Device name Device ID SCSI slot 3 on SCSI enclosure 0 10 40 3 SCSI enclosure 1 SCSI slot 1 on SCSI enclosure 1 SCSI slot 2 on SCSI enclosure 1 SCSI slot 3 on SCSI enclosure 1 11 40 11...

Страница 223: ...t to use maintenance related functions of the NEC Express5800 ft series contact your maintenance personnel CPU Information If you select CPU Module CPU in the ft tree of the DataViewer unknown or inco...

Страница 224: ...n to abnormal but when the mirror is created successfully it will return normal Total Status of the PCI Module When each module s status is simplex the total status of the PCI module displayed on the...

Страница 225: ...ettings of authority are different To enable the remote shutdown and threshold change functions via NEC ESMPRO Manager make settings of community and set its authority to READ CREATE or READ WRITE Har...

Страница 226: ...dvanced and Properties dialog boxes Now you can see the correct information from Manager too Disk Maintenance while NEC ESMPRO Agent is Running The following works to disks hard disk drive or magneto...

Страница 227: ...ule may be registered when you install some software that uses SNMP Service If you start SNMP Service SNMP Extended Agent is also loaded at the initialization However if the initialization is not comp...

Страница 228: ...m configuration of the host may have been changed Do you wish to reconstruct the tree Floppy Disk Drive Name After unplugging and plugging the PCI module of the primary side the floppy disk drive name...

Страница 229: ...es is operating When only one of the PCI modules IO modules is operating non dual configuration the SCSI enclosure or mirror disk status cannot be displayed normally To check if the dual configuration...

Страница 230: ...ataViewer To monitor the state of the NEC Express5800 ft series on a management computer with installation of NEC ESMPRO Manager the DataViewer is used If you click each of the modules and items to be...

Страница 231: ...e You can see the following information on the modules and the components on the CPU modules in the CPU Module tree General Allows the configuration and other information on the CPU modules to be view...

Страница 232: ...the CPU modules to be updated See Maintenance of NEC Express5800 ft series described later for the update of BIOS of the CPU modules The detailed device identification information can be checked by se...

Страница 233: ...Installing and Using Utilities 5 35 DIMM Allows the information of DIMM on the CPU modules to be viewed...

Страница 234: ...ee select the target PCI module from PCI Module in the ft tree You can see the following information on the PCI modules and the components on the PCI modules of the PCI Module tree This section descri...

Страница 235: ...See Maintenance of NEC Express5800 ft series described later for the start stop and MTBF information clear of the CPU modules Update Allows the device identification information of the PCI modules to...

Страница 236: ...the PCI slot tree select PCI Module PCI module containing PCI slot to be seen PCI slot of the ft tree You can see the following information on the PCI slot and the devices on the PCI slot in the PCI s...

Страница 237: ...s function is not supported in the current version PCI Bridge General Allows the information of bridges on the PCI bus to be viewed This function is not supported in the current version PCI Bridge Bus...

Страница 238: ...t version Monitoring Ethernet adapter on PCI module To monitor the Ethernet adapters on the PCI modules see the Ethernet adapter tree To see the information on the Ethernet adapter tree select PCI Mod...

Страница 239: ...the ft tree You can see the following information of the SCSI enclosure from the SCSI enclosure tree General Allows the configuration and other information of the SCSI enclosure to be viewed IMPORTAN...

Страница 240: ...lows the MTBF information of the SCSI enclosure to be viewed or cleared This function is not supported in the current version Update Allows the firmware of the SCSI enclosure to be updated However thi...

Страница 241: ...is function is not supported in the current version SCSI Slot General Allows the configuration and other information of the SCSI slot to be viewed IMPORTANT You need to be aware of the status of hard...

Страница 242: ...5 44 Installing and Using Utilities SCSI Slot Maintenance Allows the MTBF information of the SCSI slot to be viewed or cleared This function is not supported in the current version...

Страница 243: ...e mirror disk components see the Mirror Disk tree To view information on Mirror Disk tree select Mirror Disk under ft tree You can see the redundancy status of the mirrors and the device IDs of the SC...

Страница 244: ...describes how to maintain hard disk drives 1 Verification of HDD failure If NEC ESMPRO Agent detects some problem with a HDD it will report an alert of the problem to NEC ESMPRO Manager Please check...

Страница 245: ...r Disk IMPORTANT The mirroring redundancy status will change depending on the status of the two hard disks that make up a mirror as follows Status of hard disk drive 1 Status of hard disk drive 2 Stat...

Страница 246: ...ese hard disks the information on the volumes will not be displayed If multiple volumes are created within a single disk The screen shows information on a pair of hard disks that make up a mirror It d...

Страница 247: ...hard disk failure above 2 Removing the hard disk Disconnect the hard disk with the problem At this time NEC ESMPRO Agent reports the following alert to manager And icons related to the hard disk with...

Страница 248: ...e redundant status of mirrored disks is changed to Warning Mirror Disk 3 Connect a new hard disk Next connect a new hard disk to the same SCSI Slot At this time NEC ESMPRO Agent reports the following...

Страница 249: ...stalling and Using Utilities 5 51 When the hard disk is connected SCSI Slot changes the status to Normal SCSI Slot General Also at this time the state of the mirrored disks changes to Normal Mirror Di...

Страница 250: ...common to all components those specific to particular components and general system settings The maintenance functions common to all components are operated in the same way basically the operation pr...

Страница 251: ...L Local Executable on local server by using ft server utility Supported Not supported The table below shows the support of the whole system setup functions Quick dump Auto firmware update Auto module...

Страница 252: ...LED 1 is amber and the status LED 2 is off Only the status LED illuminates amber when the module is in one of the following states Removed Broken Shot Firmware Update Complete Diagnostics Passed When...

Страница 253: ...omponent screen The result of the start operation is reported by the NEC Express5800 ft series as an alert Stop Perform the procedure below before replacing a component 1 Select the target component i...

Страница 254: ...5 56 Installing and Using Utilities Sample screen of NEC ESMPRO Manager 1 Maintenance screen of PCI module CPU Module CPU Module Maintenance...

Страница 255: ...Installing and Using Utilities 5 57 Sample screen of NEC ESMPRO Manager 2 Maintenance screen of PCI module PCI Module Maintenance...

Страница 256: ...y the LEDs on the target component The result of the start operation is registered in the event log Stop 1 Stop before replacing components 2 Select the target component by using the ft server utility...

Страница 257: ...mation MTBF clear Component Remote Local CPU Module To start the module forcibly after replacing a module or if MTBF became lower than the threshold due to malfunction and disabled the module Executab...

Страница 258: ...acement of a component 1 Select the target component in the ft tree 2 Check the current state with the State display on the target component screen 3 Click the MTBF Clear button in the Maintenance scr...

Страница 259: ...ft server utility 2 Check the current state of the target component with the LEDs and event log 3 Click the Clear button in MTBF Clear of the target component The MTBF clearing result can be verified...

Страница 260: ...occurs or a phenomenon supposed to be a malfunction occurs Executable in any of the following module states this can be viewed on manager screen Removed Broken Shot Firmware Update Complete To diagnos...

Страница 261: ...the target component The diagnosis result can be verified by Result of the diagnosis on the target component screen The result of the diagnosis is reported by the NEC Express5800 ft series as an alert...

Страница 262: ...target component with the LEDs If the component is operating stop the component 3 Click the Diagnostics button in the Diagnosis Information on the target component The diagnosis result can be verifie...

Страница 263: ...ware image file for update The table below shows the potential cases in which the firmware of a component is to be updated Firmware update Component Remote Local CPU Module When BIOS must be updated t...

Страница 264: ...ite down the path to the directory in which the image data is saved 2 Select the target component in the ft tree 3 Check the current state with the State display on the target component screen If the...

Страница 265: ...ngle CPU module is completed click the Jump Switch button The module completely updated is started and the active module is stopped 7 Start the other module stopped Starting the module causes the firm...

Страница 266: ...below to update the firmware 1 Start the system using the module of the firmware copy source See the current status by the Status indication on the target component screen of the copy destination and...

Страница 267: ...e the image data in some manner Write down the path to the directory in which the image data is saved 2 Select the target component with the ft server utility 3 Check the current state of the target c...

Страница 268: ...Select Specify new firmware for update enter the directory in which the updated firmware specified in the input box in step 1 is saved and click the Activate button Perform the firmware update 6 Check...

Страница 269: ...mware Update dialog box and click the Activate button 4 Start the module Even if you do not have the image data of firmware for update the firmware can be copied from the other module By starting the...

Страница 270: ...g dump of stopped module Saving dump of component under system operation Component Remote Local Remote Local CPU Module When a fault or malfunction occurs in the system Save the dump if requested by m...

Страница 271: ...ith the State display on the target component screen 3 Click the Dump button in the Maintenance screen for the target component A certain time is required for the dump saving The dump is stored as Sys...

Страница 272: ...rget CPU module with the LEDs 3 Select the dump acquisition method with Dump of the target CPU module and click the Harvest button A certain time is required for the dump acquisition The dump is store...

Страница 273: ...If this property is disabled the module is not started automatically The initial setup value is Enable IMPORTANT In the NEC Express5800 ft series with ft control software over 3 0 it is always necess...

Страница 274: ...r utility in the following procedure The system cannot be configured using the NEC ESMPRO Manager 1 Select General in the ft tree 2 Check the property of carrying out the modification with System Sett...

Страница 275: ...recognize changes in NEC Agent By using this function the time lag can be reduced However it may consume a little bit more network band width since each state change will be notified to NEC ESMPRO Man...

Страница 276: ...he pass of the image file of the firmware to be updated IMPORTANT Contact your maintenance engineer for the update of the BMC firmware BMC firmware update Component Remote Local BMC When update to new...

Страница 277: ...Installing and Using Utilities 5 79 2 Enter the location to store the new firmware and click Activate Verification dialog box appears 3 Click OK Execute the firmware update...

Страница 278: ...en servers ft remote management card comes with one license of NEC DianaScope Notes The online document provides general descriptions of overall severs to be remotely managed by NEC DianaScope but thi...

Страница 279: ...ure and prerequisites necessary for preparing the system for the upgrade process and configuring and performing the upgrade process with Active Upgrade Console It also describes the troubleshooting wh...

Страница 280: ...n you are finished installing updates as your critical applications are restarted on the upgraded software Test the latest software updates in your environment before making the updates permanent Afte...

Страница 281: ...ut any applications or services that require special handling during the upgrade process 3 You run a readiness check in the Active Upgrade Console to verify that your system meets the prerequisites fo...

Страница 282: ...e retains access to system resources and continues to run your applications uninterrupted 5 After the system successfully enters split mode you establish a remote connection to the Upgrade Side of the...

Страница 283: ...e system disk Depending on the complexity of your applications and the upgrade you performed your applications may be backed up and running in under a minute 7 After the system is successfully merged...

Страница 284: ...ning in duplex mode and the Active Upgrade process is complete You do not need to restart the system and because your application is already running on the upgraded software there is no additional dow...

Страница 285: ...itiates a system restart The Active Upgrade Console shuts down the Upgrade Side and restarts the system from the Production Side which automatically restarts your applications from the Production Side...

Страница 286: ...eets the prerequisites of the Active Upgrade process 2 When you start an upgrade session the Active Upgrade Console switches to the PrepareSplit state during which it runs a final readiness check and...

Страница 287: ...he Idle state The upgrade session is complete If necessary you can abort the Active Upgrade process from the PrepareSplit Split PrepareMerge and Merge states When you abort the upgrade session the Act...

Страница 288: ...ts Starting the Active Upgrade Console Understanding the Active Upgrade Console Software Upgrade Support Active Upgrade technology supports the installation or upgrade of application software that mee...

Страница 289: ...e Internet as the upgrade progresses If possible you must download the complete installer to the system prior to initiating split mode BIOS BMC firmware updates that can be performed while the system...

Страница 290: ...e Console will display a warning for each unteamed Ethernet PCI adapter but the warnings will not prevent you from proceeding with the Active Upgrade process IMPORTANT If you need to modify Ethernet t...

Страница 291: ...C updates Furthermore the Active Upgrade process has the following storage requirements All internal hard disks must be configured with Rapid Disk Resync RDR and must be duplexed synchronized before t...

Страница 292: ...pgrade Process on page 5 98 If Windows Firewall is running and the exception for Active Upgrade Console is not enabled communication between the Production Side and Upgrade Side might fail during the...

Страница 293: ...rocess you must configure the Active Upgrade Console itself to control the applications Active Upgrade Console provides two methods for controlling your critical applications during the upgrade proces...

Страница 294: ...e prerequisites to use Remote KVM Console and configure if required 8 Prepare the IP address to allocate to the Upgrade Side s system 9 Install the Active Upgrade Console as described in Installing th...

Страница 295: ...Remote KVM Console function is used in order to display the console of the Upgrade side on the Production Side during Split status You need to execute Server Initial Configuration and Managing PC Conf...

Страница 296: ...cense Agreement and click Next 4 Click Install to install the files 5 Click Finish to close the wizard The setup process installs the Active Upgrade Console and associated files in C Program Files fts...

Страница 297: ...Windows Firewall exceptions This entry is disabled by default To configure Windows Firewall 1 Open the Windows Firewall control panel 2 Click the Exceptions tab to display the list of exceptions see...

Страница 298: ...ctive Upgrade process If you are copying these to the system from a network resource you need to do so before initiating split mode Do any of these installer programs require access to the network or...

Страница 299: ...__________________________________ _______________________________________ Disks that cannot be upgraded _______________________________________ _______________________________________ _______________...

Страница 300: ...________________ _______________________________________ _______________________________________ TIPS Pre Upgrade Tasks page 5 96 Software Upgrade Support page 5 90 Prerequisites page 5 92 Recommendat...

Страница 301: ...images for example msi files to the system put them on one of the disks you want to upgrade before you split the system You might want to do so even before you run the Active Upgrade Console Make not...

Страница 302: ...figure below is divided into four major parts a title bar a navigation bar a main window and a status bar Active Upgrade Console 1 Title bar 2 Navigation bar 3 Main window 4 Status bar TIPS Starting...

Страница 303: ...Active Upgrade Process page 5 110 Navigation Bar The navigation bar displays your current location in the Active Upgrade Console If you are creating or editing a configuration file the navigation bar...

Страница 304: ...split mode are lost when you commit the upgrade Custom Actions Allows you to specify executables that the Active Upgrade Console can use to stop and start your applications or to perform special tasks...

Страница 305: ...rface page 5 104 Pre Upgrade Tasks page 5 96 Configuring the Active Upgrade Process page 5 110 Main Window The main window contains controls associated with the configuration and execution of the Acti...

Страница 306: ...interpreting items in the activity log see Viewing Active Upgrade Process Status on page 5 158 TIPS Starting and Exiting the Active Upgrade Console page 5 126 Understanding the Active Upgrade Console...

Страница 307: ...iguration file name 4 Operational State 2 Hardware State 5 Partner State 3 Upgrade State For more information about interpreting items in the status bar see Viewing Active Upgrade Process Status on pa...

Страница 308: ...u can create multiple configuration files each with different system settings to prepare the system for a particular type of system or application software upgrade In addition you can call one or more...

Страница 309: ...uration page click Create Configuration File 2 In the Create Configuration File dialog box specify a file name for the new file When you save the file a config extension is automatically appended to t...

Страница 310: ...onfiguration File dialog box type the full path name and file name for the configuration file next to Configuration File You must include the Config file extension Click Browse to locate the file usin...

Страница 311: ...cate Configuration File dialog box type the full path name and file name for the configuration file next to Configuration File Click Browse to locate the file using a file browser The browser displays...

Страница 312: ...ration file before For example if you have only one system disk and you just want to split the system briefly to test how a hotfix would affect the operating system without committing the changes you...

Страница 313: ...in the navigation bar 2 On the Upgrade Summary page do one of the following Click Save to save the configuration file with the name and path name you previously specified Your file is saved Click Sav...

Страница 314: ...they will be available to the Upgrade Side of the system when the system is in split mode When you open the Disk Selection page the Active Upgrade Console scans for and displays the disks in your sys...

Страница 315: ...tem disk Red Disk is currently simplexed because it is being resynchronized with RDR For more information about any volume move your cursor over the volume to display ToolTip help To select system and...

Страница 316: ...e as necessary in your parent configuration You create a configuration file for an application that runs on several of your systems and call that file into a parent configuration file that is specific...

Страница 317: ...Services to Control Use the Application Services page to select the critical application services you want the Active Upgrade Console to automatically stop and restart during the upgrade process If yo...

Страница 318: ...tion file but you cannot deselect it without editing the child configuration To select a service for the Active Upgrade Console to control 1 On the Application Services page find a service you want to...

Страница 319: ...e newer Upgrade Side disks which contain your newly upgraded software Because the event log files on the Production Side are lost during this process you might want to preserve them for future referen...

Страница 320: ...tion Side while the system is split either a data disk or an external disk Do not save the files to a system disk or network disk 2 There is no default directory You must specify a directory otherwise...

Страница 321: ...when the RDR mirrors are resynchronized If applicable you can write a program to save copies of important files before you commit an upgrade For example you can save a copy of an application specific...

Страница 322: ...r Control type select the option that best describes when the Active Upgrade Console will execute your custom action as discussed in the below table Control Types for Custom Actions Control Type Purpo...

Страница 323: ...Side system disk while the system was in split mode before these files are lost during the commit process 4 If you selected the Advanced control type optionally select an item from the Timing drop do...

Страница 324: ...r programming and monitoring custom actions Starting and stopping applications on this page Using Active Upgrade Environment Variables on page 5 127 Generating Exit Values on page 5 128 Viewing Standa...

Страница 325: ...current upgrade state Values Idle PrepareSplit Split PrepareMerge Merge Commit Abort ACTIVE_UPGRADE_REQUEST Describes the next upgrade task that the Active Upgrade Console will execute Values Idle Ch...

Страница 326: ...5 123 Viewing Standard Output and Error Stream After your program executes you can view standard output and error output from the program in the Active Upgrade Console as follows 1 In the activity log...

Страница 327: ...to Arguments type the full path name and file name of the executable For instance C bin myvbscript vbs If applicable you can type additional arguments that are specific to your script file or options...

Страница 328: ...ext to Comments For Comments you might want to include information such as Purpose of the configuration file type of upgrade System s to which the file applies Special setting required before using th...

Страница 329: ...wer log files to back up If applicable you can also save the current configuration file from the Upgrade Summary page When you are finished viewing the Upgrade Summary and if necessary saving the conf...

Страница 330: ...r the Active Upgrade process For example the readiness check ensures that The system is currently running in the duplex mode The disks you selected as the system disks are present and are mirrored wit...

Страница 331: ...Icon Text Color Severity Description Green Success Task completed without error Black Pending Task is in progress Black Information Task information no action necessary Black Warning A problem that sh...

Страница 332: ...See Splitting the System If one of the readiness tests fails you must resolve the problem then click Retry to run the readiness test again When the problem is resolved you can click Split to proceed w...

Страница 333: ...e Upgrade Side until the system is merged You can split a system only if it meets the prerequisites for the Active Upgrade process and has passed the readiness check IMPORTANT 1 When in split mode the...

Страница 334: ...tility 2 Verify if Status of the Upgrade Side s PCI module is Terminate 3 Select Boot to start the Upgrade Side s PCI module 4 Select Retry on the Active Upgrade console to finish the interruption pro...

Страница 335: ...o Verifying the Status of Application Services on page 5 165 TIPS Managing Upgrade Tasks on the Upgrade Side page 5 137 Managing Your Applications on the Productions Side this page Verifying the Upgra...

Страница 336: ...the Active Upgrade Console runs on the Production Side of the system To perform upgrade tasks you must establish a remote connection to the Upgrade Side You can access the Upgrade Side using one of t...

Страница 337: ...this kind of trouble occurs you need to take following procedures When operation is unavailable because of the error execute the same operation again from the Active Upgrade Console of the Production...

Страница 338: ...tasks To terminate a Remote KVM session with the Upgrade Side 1 Verify that the install processing is completed as well as the install program is all finished 2 Select X on the upper right hand side o...

Страница 339: ...to the Active Upgrade Help file while you are using the Upgrade Side desktop click Start on the Upgrade Side desktop then click All Programs ftSys and Active Upgrade Help to open the Help viewer If yo...

Страница 340: ...ter the merge you will be using the Upgrade Side desktop Running Software Installers The following topics describe how to run software installers on the Upgrade Side while the system is split Windows...

Страница 341: ...or Custom Install and click Next The next page displays a list of the updates you downloaded and allows you to select which ones will be installed at this time 3 Select only the updates that you previ...

Страница 342: ...software on the Production Side Some installers might require you to restart the operating system on the Upgrade Side You can allow these installers to restart the Upgrade Side automatically or you ca...

Страница 343: ...t Del key sequence necessary for login use a virtual keyboard If you are using Remote Desktop Connection the connection to the Upgrade Side is terminated and the Production Side desktop is displayed W...

Страница 344: ...operating system is up it might take another minute or two for all services to finish loading and for login to be possible TIPS Running Software Installers page 5 142 Viewing Active Upgrade Process S...

Страница 345: ...reboot properly When the remote connection from Production Side to the Upgrade Side does not set up properly When the Upgrade Side hangs up 2 If you reset the hardware while the Upgrade Side is worki...

Страница 346: ...e Production Side desktop and the remote connection to the Upgrade Side desktop When you resume software installation or restart the system always ensure that you are on the Upgrade Side TIPS Managing...

Страница 347: ...ade Side for final verification If there are any problems you can abort the upgrade to return the system to its original state Aborting the upgrade while the system is in split mode will not incur dow...

Страница 348: ...nd application data disks become available to the Upgrade Side Restarts your applications including the Active Upgrade Console from the Upgrade Side IMPORTANT If you execute the Active Upgrade under B...

Страница 349: ...terrupt the Active Upgrade during the merge The disk may not be recognized from the OS When the disk isn t recognized from the OS go to Disc Management then execute Disk Rescan If the disk status beco...

Страница 350: ...he Upgrade page 5 152 Committing the Upgrade page 5 154 Viewing Active Upgrade Process Status page 5 158 Aborting the Upgrade page 5 156 Troubleshooting page 5 164 Verifying the Upgrade Side Before Co...

Страница 351: ...on If you are satisfied that everything is working correctly you can commit the upgrade to make the changes permanent If there are any problems you can abort the upgrade to return the system to its or...

Страница 352: ...TION You cannot abort the upgrade process after you commit an upgrade because the original state of the system is lost overwritten as a result of completing the upgrade process Ensure that your system...

Страница 353: ...stalling and Using Utilities 5 155 TIPS Finishing the Upgrade page 5 157 Viewing Active Upgrade Process Status page 5 158 Verifying If RDR Disks Are Resynchronizing page 5 168 Troubleshooting page 5 1...

Страница 354: ...e reestablishes the mirror of any internal RDR data disk by overwriting the stale partner disk with its newer live partner disk the disk to which your applications have been writing data throughout th...

Страница 355: ...ve Upgrade process you can Click Exit to close the Active Upgrade Console Click Save Log to sage the activity log to a file Click Active Upgrade in the navigation bar to initiate another readiness tes...

Страница 356: ...e activity log shown below which reports details about each upgrade operation is displayed in the main window of the Active Upgrade Console after you have initiated a readiness test or upgrade session...

Страница 357: ...roduction Side Table below describes the general meaning of activity log entries that appear in the local and remote activity logs Activity Log Entries Icon Text Color Severity Description Green Succe...

Страница 358: ...nd Next buttons to review other items of the same severity For example if you are viewing an error you can click Next to see the next error item To change the severity level of the items you want to r...

Страница 359: ...stem is duplexed Production Side The system is currently running in split mode and your applications are running from the Production Side the original copy of your software The Upgrade Side is availab...

Страница 360: ...ational states Table 3 Status Operational State Operational State Description Ready The previous operation has been completed successfully The Active Upgrade process is ready to enter the next upgrade...

Страница 361: ...However the system might not be available for use until other system resources finish loading Hung OS Up The partner operating system is hung OS Rebooting The partner operating system is rebooting Hun...

Страница 362: ...ou can save the contents of the activity log to a file for later viewing To save the activity log to a file 1 Right click on the activity log and select Save to File in the shortcut menu 2 Next to Sav...

Страница 363: ...u Computer Management is displayed 3 If necessary click Services and Applications to expand it 4 Click Services to display the below shown Service Control Manager in the right pane of the window 5 Sea...

Страница 364: ...e you are running in split or merge mode or after you have finished the Active Upgrade process you might want to verify the status of the software packages that you installed If necessary you can view...

Страница 365: ...iew the Add or Remove Programs control panel on the Upgrade Side The same control panel on the Production Side will not list the new software you installed on the Upgrade Side TIPS Running Software In...

Страница 366: ...and the activity log will display errors indicating that the disks are not ready Verify the disks on the Disk Selection page Any volume that is in red is simplexed and thus probably still resynching...

Страница 367: ...information Embedded NIC not teamed Use the PROset utility to configure your Ethernet PCI adapters into teams All embedded Ethernet PCI adapters must be teamed See Prerequisites on page 5 92 and Reco...

Страница 368: ...ns successfully If possible test and debug the executable outside of the Active Upgrade process Ensure that it terminates with exit value 0 and that it completes in a timely manner Troubleshooting Mis...

Страница 369: ...e SANsurfer service and restart the upgrade process The underlying connection was closed Unable to connect to the remote server If your system is running a network firewall solution check the firewall...

Страница 370: ......

Страница 371: ...This page is intentionally left blank...

Страница 372: ...Chapter 6 Maintenance This chapter describes the daily maintenance of NEC Express5800 ft series and precautions when relocating or storing the server...

Страница 373: ...ager on the management PC Check whether any alert is reported on the Operation Window Data Viewer or Alert Viewer of NEC ESMPRO Manager Viewers of NEC ESMPRO Operation Window Alert Viewer Data Viewer...

Страница 374: ...the DVD ROM drive Disconnect the power plug before cleaning the server Cleaning the NEC Express5800 ft series For daily cleaning wipe the external surfaces of the server with a dry soft cloth Follow t...

Страница 375: ...little dust Follow the steps below to clean the mouse regularly 1 Disconnect the mouse from the USB port of the keyboard while the server remains powered on 2 Turn the mouse upside down and rotate th...

Страница 376: ...e front of the DVD ROM drive The tray comes out 3 Hold the DVD CD ROM lightly and take it out from the tray IMPORTANT Do not touch the signal side of the DVD CD ROM with your hand 4 Wipe the tray with...

Страница 377: ...ead may be a cause of unsuccessful backup and damage to tape cartridge Clean the tape head regularly using a cleaning tape For procedure and interval of cleaning as well as lifetime of a tape cartridg...

Страница 378: ...N cable Executing the system diagnostics with the LAN cable connected the network may be influenced TIPS On checking the hard disk drive no data is written into the disk Startup and Exit of System Dia...

Страница 379: ...the diagnostics Guideline Shows the details of the keys to operate window Test summary window Shows the results of each test that executed the diagnostics Move the cursor and press the Enter key on t...

Страница 380: ...y disk insert a formatted floppy disk to the floppy disk drive and select Save F Option Optional features can be used from this menu Reboot Reboots the system 8 Select Reboot in the Enduser Menu above...

Страница 381: ...t the Off line Maintenance Utility from the maintenance partition 1 Boot peripheral devices at first then power on the Express server 2 Load the EXPRESSBUILDER DVD into the optical disc drive of the E...

Страница 382: ...y operation for five second after Language menu appears Japanese starts automatically 5 Select English When English is selected following tool menu appears 6 Select one of the tool and start Japanese...

Страница 383: ...intenance Utility For further information ask your service representative The Off line Maintenance Utility provides the following features IPMI Information Viewer Provides the functions to view the sy...

Страница 384: ...RTANT Do not turn off the server while the update program is running If the update processing is discontinued the system becomes unable to start ROM DOS startup FD Create a support disk for starting t...

Страница 385: ...due to a change in the floor layout to a great extent contact the sales agent Make sure to make a backup copy of your valuable data in the hard disk if any When moving the server with hard disks make...

Страница 386: ...ort time condensation will occur and cause malfunctions and breakdown when these are used in such state When you start operating these equipments again after the transportation or the storage make sur...

Страница 387: ...not occur Check whether the following error log is added If the error log is added perform the following procedure If it is not hard error you can recover If this procedure is failed contact your Admi...

Страница 388: ...or reduce the access 1 Clear MTBF by PCI module and stop start of PCI module by ft server utility Procedure 1 Cancel the procedure or wait for finish of the procedure 2 Clear of MTBF by PCI module 1 I...

Страница 389: ...6 18 Maintenance 3 Stop of PCI module 1 4 Start of PCI module 1...

Страница 390: ...Maintenance 6 19 Procedure to Check Check whether the following error is added on system event log If following events are added the procedure is performed correctly...

Страница 391: ...6 20 Maintenance This page is intentionally left blank...

Страница 392: ...Chapter 7 Troubleshooting This section covers some of the issues that can occur with this server and provides the trouble shooting steps you can refer to...

Страница 393: ...the occurrence of fault during the system operation Especially take note on whether any alert is reported to NEC ESMPRO Manager on the management PC Check whether any alert is reported on the Operatio...

Страница 394: ...panels of the NEC Express5800 ft series and near the handles of hard disks inform the user of the various server statuses by the colors and the patterns of going on going off and flashing If trouble s...

Страница 395: ...ect the keyboard and connect it back again Replace the keyboard 0211 Keyboard error Keyboard is faulty Disconnect the keyboard and connect it back again Replace the keyboard If restarting does not hel...

Страница 396: ...COM B configuration is faulty 0616 COM B config error device disable Device constructing COM A is faulty If restarting does not help after resetting the setting to default by using BIOS setup replace...

Страница 397: ...9A BMC not responding BMC device is faulty Replace ft Remote Management Card In the case ft Remote Management Card is not mounted or in the case the failure still remains after replacing the card repl...

Страница 398: ...Error detected in DIMM group 2 DIMM is faulty Replace the DIMM Slot1 2 DIMMs 8102 Memory Error detected in DIMM group 3 DIMM is faulty Replace the DIMM Slot3 2 DIMMs 8120 Unsupported DIMM detected in...

Страница 399: ...is detected on memory implementation Check supported DIMMs and replace the DIMM If replacing the DIMM does not help replace the CPU IO module 9006 HW Memory Test failed Memory is faulty Replace the DI...

Страница 400: ...ndicating that virtual memory is insufficient when you restart the system after a STOP or system error has occurred Ignore the message and start the system If an error such as a stop error of the OS o...

Страница 401: ...tool such as NEC ESMPRO Agent or NEC ESMPRO Manager has been installed in the NEC Express5800 ft series or management PC you can obtain the error information from the display unit of the server or man...

Страница 402: ...or bent plugs Make sure the power breaker for the connected power outlet is on If the power cord is plugged to a UPS make sure the UPS is powered and it supplies power See the manual that comes with...

Страница 403: ...of Setup select Disabled If Option ROM Scan Monitoring is enabled the system may reboot while using the SCSISelect utility Change back the setting after you finish using the utility Fail to access to...

Страница 404: ...operly connected Make sure that the cable is connected to the correct connector on the rear of the server Are the keyboard and mouse are compliant with NEC Express5800 ft series Operation of the serve...

Страница 405: ...he floppy disk formatted Use a formatted floppy disk or format the floppy disk in the floppy disk drive Refer to the manual that comes with the OS for formatting a floppy disk Fail to access to the CD...

Страница 406: ...r with the blue screen displayed Keep pressing the POWER switch for about 4 seconds Pressing the POWER switch quickly does not turn off the power in this case The server is not found on the network Is...

Страница 407: ...ails see page 4 24 Monitoring Configuration After completion of CHKDSK restart the machine and change the above setting back to Enable and continue the operation CHKDSK is executed in the following co...

Страница 408: ...ESMPRO Manager the CPU load ratio of SNMP Service on the NEC ESMPRO Agent side may increase at every monitoring interval default 1 minute NEC ESMPRO Manager and NEC ESMPRO Agent exchange information t...

Страница 409: ...le storage space on a storage location Specify the drive in which there is an available storage space of more than a memory size on the server plus 12 MB more than 2048 plus 12MB if a memory size is m...

Страница 410: ...d from its main menu to write the sensor information specific to the server to the card A CPU IO module cannot be integrated When a componet fails and is reintegrated the following message may be reco...

Страница 411: ...ng The screen will return to normal if you wait awhile Duplexed status is not displayed properly When one CPU IO module is reintegrated after the other CPU IO module is removed due to the failure or r...

Страница 412: ...erver Monitor from System tab then click the check box Unmonitored is selected by default After changing the setting the server monitoring starts automatically You do not have to reboot the server but...

Страница 413: ...select Change name Wake On LAN does not function Does this happen to be right after the Alternate Current AC power supply started When you disconnect either or both of the AC cables on the server and...

Страница 414: ...00M Check the following configurations Set the Hub as Auto Negotioation Set the Client as Auto negotiate best speed IMPORTANT For both Hub Client you cannot function Wake On LAN from standby with the...

Страница 415: ...s of the source iANSMiniport are the logs about the duplex of the network The following logs may be recorded in the system event log after starting the system or after setting duplex but there is no p...

Страница 416: ...s no measurement is required Source EvntAgnt Event ID 1003 Description TraceFileName parameter not located in registry Default trace file used is Source EvntAgnt ID 1015 Description TraceLevel paramet...

Страница 417: ...ed busses were reset in an effort to clear the condition If this error is recorded many times the hard disk drive may be faulty Contact your service representative Event log which warn CPU load monito...

Страница 418: ...checks whether the events are stored by date any events out of the date order is shown as Past Event Detected Note that even when this event is recorded the event log function continues to function pr...

Страница 419: ...O module was detached This does not affect the system operation Source srae1e51 Type Error Event ID 805 Description Stratus emb EB 2 Port Gigabit Adapter n PROBLEM Unexpected adapter removal detected...

Страница 420: ...action according to the error codes listed in the table below Message Cause and Remedy This EXPRESSBUILDER version was not designed for this computer Insert the correct version and click OK When you c...

Страница 421: ...colors or more Set the display unit to display 256 colors or more The master control menu fails to appear Is your system Windows NT 4 0 or later or Windows 95 or later The DVD Autorun feature is suppo...

Страница 422: ...Parameter File Creator must be executed with Microsoft HTMLApplication host If this does not launch follow the below procedure to associate Parameter File Creator with Microsoft HTML Application host...

Страница 423: ...EC ESMPRO Manager to receive traps from NEC ESMPROAgent properly both community names must be matched Alert is redundantly reported to NEC ESMPRO Manager When NEC ESMPRO Manager s IP address or host n...

Страница 424: ...nknown or illegal information is displayed in CPU information If you select CPU Module CPU in the ft tree of the data viewer unknown or incorrect information appear in some information items The CPU i...

Страница 425: ...high line impedance may have occurred Hence there is no problem Threshold value of LAN monitoring does not reflect Because the NEC Express5800 ft series detects hardware faults on the network in the d...

Страница 426: ...ered in the monitoring event tree on the setting tool of alert function Alert Manager is not alerted to the manager if Alert Manager Main Service does not operate Even when the service is operating if...

Страница 427: ...MPRO Agent is running z To format or delete a partition by Disk Administrator or by other means z To request programmatically to remove media from removable disks such as MO Zip and PD Please conduct...

Страница 428: ...ormation on status current values rpm threshold etc Therefore if you view such a sensor on NEC ESMPRO Manager it may be displayed as follows The status becomes Unknown grayed out on the data viewer Th...

Страница 429: ...ch prompts you to reconstruct a Data Viewer appears click OK The Data Viewer will be reconstructed and the tree and the status will be displayed correctly The information on the floppy disk appears in...

Страница 430: ...Result in Maintenance of SCSI Enclosure Type Reassign Block Count Reassign Block threshold and Path Information in General of SCSI Slot Type Threshold Current Faults and Time of last fault in Maintena...

Страница 431: ...the simplex mode non duplexed mode the data viewer cannot display the status of the SCSI enclosure and mirror disk To check if the duplex mode is changed to the simplex mode check the event log or al...

Страница 432: ...you collect all the logs of Application Log Security Log and System log by the following procedure IMPORTANT If a STOP error or system error has occurred or the system has stalled restart the system...

Страница 433: ...Click Start All Programs Accessories System Tools System Information 2 Select the Save from the File menu 3 Enter the name of the target file in the File name box 4 Click Save Collection of Diagnosti...

Страница 434: ...m again may result in dumping improper data Press the DUMP switch on the primary CPU IO module whose POWER LED has been blinking for four to eight seconds Use something sharp such as curved clips to p...

Страница 435: ...t assume any liability for damage to optional devices or the server or malfunctions of the server resulted from installation by the user NEC recommends you ask your sales agent to install or remove an...

Страница 436: ...or alter the server Do not look into the DVD ROM drive Do not remove the lithium battery Disconnect the power plug before working with the server CAUTION Observe the following instructions to use the...

Страница 437: ...uitable workspace Work with the server on the anti static or concrete floor When you work with the server on a carpet where static electricity is likely to be generated make sure take anti static meas...

Страница 438: ...onfirm the required ft server control software s version Refer to the sever accessory User s Guide check the NEC website or contact your sales representative 2 Verify the version of the ft control sof...

Страница 439: ...the CPU IO module during the continuous operation disable the intended module place the module off line by using the ftServer Utility of the NEC ESMPRO Agent or the NEC ESMPRO Manager from the managem...

Страница 440: ...optimum for your server You can install 25 4mm 1 inch high hard disk drives to six 3 5 inch hard disk drive bays on the server The hard disk drives installed on the slot 1 2 and 3 of the CPU IO module...

Страница 441: ...2003 The system turns off automatically 2 Remove the front bezel 3 Identify the slot to which you want to install the hard disk drive Install a hard disk in an empty slot in the group starting from t...

Страница 442: ...rd disk with the lever unlocked 8 Slowly close the lever When the lever is locked you will hear a click sound IMPORTANT Be careful not to pinch your finger s between the lever and handle TIPS Check th...

Страница 443: ...he system turns off automatically 2 Remove the front bezel 3 Push the lever of the hard disk to unlock the handle 4 Hold the handle and hard disk to pull them off 5 Install the dummy tray in an empty...

Страница 444: ...1 and Removing 3 5 inch Hard Disk Drive on page 8 9 No need to shut down Windows Server 2003 3 Refer to the steps in Installing 3 5 inch Hard Disk Drive to install a new hard disk CHECK The hard disk...

Страница 445: ...ing may cause unexpected trouble Use the management software e g ftServer Utility or NEC ESMPRO Manager to identify the module to be removed so that the module is removed when it is stopped without fa...

Страница 446: ...Maintenance of NEC Express5800 ft series in Chapter 5 NEC ESMPRO Manager Select ft CPU Module CPU Module to be removed Maintenance Bring Up Bring Down Bring Down ftServer Utility Select FTServer CPU...

Страница 447: ...out the CPU IO module in the next step 4 Loosen the screws securing the CPU IO module handle to press down the handle IMPORTANT Before you pull out a CPU IO module check the rear of the server to make...

Страница 448: ...it against parts in the device when you remove it 6 The CPU IO module is locked on the way and cannot be pulled out Lower the lock on the side of CPU IO module and unlock it and then pull it out 7 Pu...

Страница 449: ...ws tightly Be careful not to cause a shock to the device at this time 1 Firmly hold the CPU IO module with both hands and insert it into the rack Hold the CPU IO module in such a way that its back pan...

Страница 450: ...integration does not take place when the module is connected In such a case check the status by using the ftServer Utility or NEC ESMPRO Manager data viewer and then start up the CPU IO modules 3 Conn...

Страница 451: ...e IMPORTANT The DIMM is extremely sensitive to static electricity Make sure to touch the metal frame of the server to discharge static electricity from your body before handling the DIMM Do not touch...

Страница 452: ...ould be installed to the slot with the same number in another CH This rule is applied to the case of removal The linked DIMMs between CHs should be of the same product with the same performance DIMMs...

Страница 453: ...OS The sever turns off automatically 2 Disconnect the power cords from the outlets 3 Remove the CPU IO module referring to page 8 12 4 Remove the screw and remove the top cover of the CPU IO module 5...

Страница 454: ...Pay attention to the orientation of the DIMM The terminal of the DIMM has a cutout to prevent misinsertion After the DIMM is completely inserted into the socket the levers are automatically closed 9 A...

Страница 455: ...grade 8 21 15 After starting the OS set the paging file size to at least the recommended value 1 5 times the installed memory size See Size of the Partition to be Created in Chapter 4 of the User s Gu...

Страница 456: ...er works only when there are at least two DIMMs installed 1 Shutdown OS The system turns off automatically 2 Disconnect the power cords from the outlets 3 Remove the CPU IO module referring to page 8...

Страница 457: ...h the memory duct 8 Attach the top cover of the CPU IO module and secure it with screws 9 Refer to page 8 15 and install the CPU IO module 10 Connect the power cords 11 Press the POWER switch to power...

Страница 458: ...ailed DIMM 1 Identify the failed DIMM using the Data Viewer of NEC ESMPRO Manager 2 Remove the CPU IO module referring to page 8 12 3 Replace the DIMM 4 Install the CPU IO module referring to page 8 1...

Страница 459: ...nd or place the CPU directly on the desk For more information on static electricity see ANTI STATIC MEASURES Do not use the system before checking to see it works correctly Make sure to use the CPU sp...

Страница 460: ...O module referring to page 8 12 4 Remove the cable connected to the CPU duct cover IMPORTANT Remove the cable without adding pressure to the bases of the fan cable 5 Remove the CPU duct cover 6 Check...

Страница 461: ...nsertion Check the pin marks of the CPU and the socket and insert the CPU correctly 11 After pressing the CPU softly against the socket place the CPI socket holder back to its original place 12 Return...

Страница 462: ...llowing The CPU is not attached correctly Screws are not secured tightly enough Do not move around the heat sink fastened 15 Connect the duct cover 16 Fasten the cable to the duct cover 17 Refer to pa...

Страница 463: ...the PCI board directly on the desk For more information on static electricity see ANTI STATIC MEASURES on page 8 3 Make sure to read ANTI STATIC MEASURES and PREPARING YOUR SYSTEM FOR UPGRADE Note the...

Страница 464: ...each CPU IO module 0 1 Up to 1 board when N8804 005 or N8803 035 is already mounted N8804 005 1000BASE T 2ch board set Up to 1 board Mount exactly the same board into the same slot on each CPU IO mod...

Страница 465: ...System Upgrade 8 31 board must not be mixed with N8804 005 or N8803 035...

Страница 466: ...eferring to the page 8 12 The following steps explain how to install a PCI board on the PCI board slot PCI X slot 2 PCI X slot 3 of the riser card Go to step 10 to install a PCI board on the PCI board...

Страница 467: ...optional PCI boards into the two PCI slots of the riser card 7 Remove the bracket cover for two slots from the PCI bracket IMPORTANT Carefully keep the removed PCI bracket 8 Install the riser card on...

Страница 468: ...Secure the PCI brackets with 3 screws 11 Connect the disconnected cable to the connector of the riser card IMPORTANT Connect the cable to the connector on the lower part 12 Loosen the fixed screw on...

Страница 469: ...System Upgrade 8 35 13 Install the optional PCI board to another PCI slot hidden behind the riser card 14 Secure the PCI board with a fixed screw...

Страница 470: ...board 1 Check the failed board from the event log 2 Remove the CPU IO module referring to the page 8 12 3 Remove the PCI bracket then remove the PCI board 4 Replace the board and fasten it 5 Install...

Страница 471: ...removed easily List of slots to install optional PCI boards Refer to List of option PCI boards and installable slots on page 8 30 Driver installation procedure TIPS To perform this procedure you have...

Страница 472: ...as one of the services Network monitor can monitor frames or packets sent and received a computer that installs Network monitor This is a useful tool to analyze network failure Refer to Setup for fai...

Страница 473: ...RESSBUILDER DVD into the DVD ROM drive and run the following command after starting the command prompt Run either of the below command depending on the OS 32bit Optical disc drive 001 win has w2k3 HAS...

Страница 474: ...strative Tool Computer Management and check if Fibre Channel Controller appears under the Other devices as many as mounted 3 Load NEC EXPRESSBUILDER DVD on the optical disc drive then open command pro...

Страница 475: ...Slot n Storport Miniport Driver are displayed under the SCSI and RAID Controllers as many as installed IMPORTANT StoragePathSavior is necessary to connect NEC Storage using N8803 034 Fiber Channel bo...

Страница 476: ...he card Do not touch the card terminals or onboard parts with a bare hand or place the card directly on the desk For more information on static electricity see ANTI STATIC MEASURES Make sure to read A...

Страница 477: ...he screw 6 Put a LAN cable through a hole from outside the server and plug the LAN connector the bigger connector to the back of the chassis Make sure you see two hooks on the both sides of the LAN co...

Страница 478: ...8 44 System Upgrade 7 Attach the smaller connector to the LAN connector on the ft Remote Management card 8 Attach the below label above the LAN connector on the outside of the chassis...

Страница 479: ...inch drive x 1 USB DVD ROM standard DVD Combo Load type tray Speed x6 Hard disk standard None Hard disk maximum 1 8TB 300GB 6 Auxiliary input device The user area is reduced to a half of the physical...

Страница 480: ......

Страница 481: ...02F8 0x000002FF 0x000003B0 0x000003BB 0x000003B0 0x000003BB 0x000003B0 0x000003BB 0x000003B0 0x000003BB Direct memory access controller Motherboard resources Programmable interrupt controller Motherbo...

Страница 482: ...A2 0x00000CA2 0x00000CA3 0x00000CA3 0x00000CA4 0x00000CA7 Intel R 82801 PCI Bridge 244E Stratus Virtual ATI Video PCI standard PCI to PCI bridge Stratus Fault Tolerant North PCI to PCI Bridge Stratus...

Страница 483: ......

Страница 484: ...N8800 122F EXP320J NEC Express5800 320Fd LR N8800 123F EXP320K NEC Express5800 320Fd MR User s Guide 1st Edition 4 2008 856 127506 101 A...

Отзывы: