4-1
4
Troubleshooting
4.1 Introduction
In this chapter, patient monitor problems are listed along with possible causes and
recommended corrective actions. Refer to the tables to check the patient monitor, identify and
eliminate the troubles.
The troubles we list here are frequently arisen difficulties and the actions we recommend can
correct most problems, but not all of them. For more information on troubleshooting, contact
our Customer Service Department.
4.2 Part Replacement
Printed circuit boards (PCBs), major parts and components in the patient monitor are
replaceable. Once you isolate a PCB you suspect defective, follow the instructions in
Repair
and Disassembly
to replace the PCB with a known good one and check that the trouble
disappears or the patient monitor passes all performance tests. If the trouble remains,
exchange the replacement PCB with the original suspicious PCB and continue
troubleshooting as directed in this chapter. Defective PCB can be sent to us for repair.
To obtain information on replacement parts or order them, refer to
Parts.
4.3 Patient Monitor Status Check
Some troubleshooting tasks may require you to identify the hardware version and status of
your patient monitor.
1. To view the information on system start time, self check, etc., select [
Main Menu
]
→
[
Maintenance >>
]
→
[
Monitor Information
>>
].
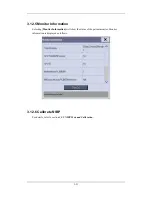
2. You can also view the information on the monitor’s current status by selecting [
Main
Menu
]
→
[
Maintenance>>
]
→
[
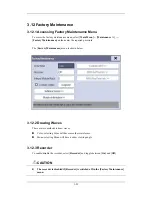
Factory Maintenance>>
]
→
enter the required password
→
[
Monitor Information
>>
].
Содержание BeneView T5
Страница 1: ...DPM 6 Patient Monitor Service Manual ...
Страница 2: ......
Страница 4: ...II FOR YOUR NOTES ...
Страница 12: ...6 FOR YOUR NOTES ...
Страница 16: ...1 4 FOR YOUR NOTES ...
Страница 32: ...2 16 FOR YOUR NOTES ...
Страница 68: ...3 36 FOR YOUR NOTES ...
Страница 80: ...4 12 FOR YOUR NOTES ...
Страница 118: ...5 38 4 Remove the module infrared communication backboard and disconnect all the cables from it ...
Страница 124: ...5 44 5 Unscrew the two M3 8 screws on the parameter board Then pull off the parameter board rightward as shown below ...
Страница 126: ...5 46 FOR YOUR NOTES ...
Страница 133: ...6 7 6 3 3 12 1 Screen Assembly with anti glare screen Exploded View ...
Страница 163: ...6 37 6 6 7 BIS Module Exploded View ...
Страница 180: ...6 54 FOR YOUR NOTES ...
Страница 204: ...A 14 FOR YOUR NOTES ...
Страница 205: ......


