3-7
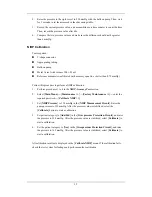
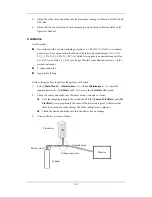
2. Raise the pressure in the rigid vessel to 250 mmHg with the balloon pump. Then, wait
for 5 seconds to let the measured values becoming stable.
3. Record the current pressure value, and meanwhile use a time counter to count the time.
Then, record the pressure value after 60s.
4. Compare the two pressure values and make sure the difference should not be greater
than 6 mmHg.
NIBP Calibration
Tools required:
T-shape connector
Approprating tubing
Balloon pump
Metal Vessel with volume 500 ± 25 ml
Reference manometer (calibrated with accuracy equal to or better than 0.75 mmHg)
Follow this procedure to perform a NIBP calibration:
1. Perform procedures 1 to 4 in the
NIBP Accuracy Test
section.
2. Select
[
Main Menu
]
→
[
Maintenance >>
]
→
[
Factory Maintenance >>
]
→
enter the
required password
→
[
Calibrate NIBP >>
].
3. Set
[
NIBP Pressure
] to 150 mmHg in the [
NIBP Measurement Circuit
]. Raise the
pump pressure to 150 mmHg. After the pressure value is stabilized, select the
[
Calibrate
] button to start a calibration.
5. Set patient category to [
Adu/Ped
] in the [
Overpressure Protection Circuit
], and raise
the pressure to 330 mmHg. After the pressure value is stabilized, select [
Calibrate
] to
start a calibration.
6. Set the patient category to [
Neo
] in the [
Overpressure Protection Circuit
], and raise
the pressure to 165 mmHg. After the pressure value is stabilized, select [
Calibrate
] to
start a calibration.
All calibration results are displayed in the [
Calibrate NIBP
] menu. If the calibration fails,
check the test system for leakage and perform another calibration.
Содержание BeneView T5
Страница 1: ...DPM 6 Patient Monitor Service Manual ...
Страница 2: ......
Страница 4: ...II FOR YOUR NOTES ...
Страница 12: ...6 FOR YOUR NOTES ...
Страница 16: ...1 4 FOR YOUR NOTES ...
Страница 32: ...2 16 FOR YOUR NOTES ...
Страница 68: ...3 36 FOR YOUR NOTES ...
Страница 80: ...4 12 FOR YOUR NOTES ...
Страница 118: ...5 38 4 Remove the module infrared communication backboard and disconnect all the cables from it ...
Страница 124: ...5 44 5 Unscrew the two M3 8 screws on the parameter board Then pull off the parameter board rightward as shown below ...
Страница 126: ...5 46 FOR YOUR NOTES ...
Страница 133: ...6 7 6 3 3 12 1 Screen Assembly with anti glare screen Exploded View ...
Страница 163: ...6 37 6 6 7 BIS Module Exploded View ...
Страница 180: ...6 54 FOR YOUR NOTES ...
Страница 204: ...A 14 FOR YOUR NOTES ...
Страница 205: ......


