A-9
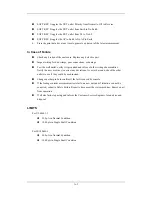
NOTE
z
If all of the applied parts correspond to the instrument type, the applied parts
will be tied together and one reading will be taken. If any of the applied parts
differ from the instrument type, all applied parts will be tested individually,
based on the type of applied part. This applies to Auto and Step modes only.
In Case of Failure
Check any broken of the enclosure. Replace any defective part.
Inspect wiring for bad crimps, poor connections, or damage.
Test the wall outlet; verify it is grounded and is free of other wiring abnormalities.
Notify the user or owner to correct any deviations. As a work around, check the other
outlets to see if they could be used instead.
Change another probe to confirm if the fail is caused by console.
If the leakage current measurement tests fail on a new unit and if situation can not be
corrected, submit a Safety Failure Report to document the system problem. Remove unit
from operation.
If all else fails, stop using and inform the Customer Service Engineer for analysis and
disposal.
LIMITS
For CF
applied parts: 50
μ
A
For BF
applied parts: 5000
μ
A
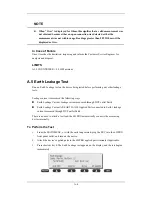
A.8 Patient Auxiliary Current
Patient Auxiliary currents are measured between any selected ECG jack and the remaining
selected ECG jacks. All measurements may have a true RMS only response.
Preparation
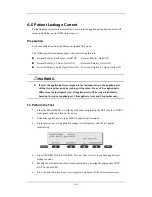
1. From the MAIN MENU, or with the outlet unpowered, plug the DUT into the 601PRO
front panel outlet, and turn on the device.
2. Attach the patient leads to the 601PRO ECG jacks.
3. Define the Lead Types from the View Settings Option (refer to: Lead Type Definitions
in Section 5 of this chapter).
4. Press shortcut key 8. The Patient Auxiliary Current test is displayed, and the test begins
immediately. Display values are continuously updated until another test is selected.
Содержание BeneView T5
Страница 1: ...DPM 6 Patient Monitor Service Manual ...
Страница 2: ......
Страница 4: ...II FOR YOUR NOTES ...
Страница 12: ...6 FOR YOUR NOTES ...
Страница 16: ...1 4 FOR YOUR NOTES ...
Страница 32: ...2 16 FOR YOUR NOTES ...
Страница 68: ...3 36 FOR YOUR NOTES ...
Страница 80: ...4 12 FOR YOUR NOTES ...
Страница 118: ...5 38 4 Remove the module infrared communication backboard and disconnect all the cables from it ...
Страница 124: ...5 44 5 Unscrew the two M3 8 screws on the parameter board Then pull off the parameter board rightward as shown below ...
Страница 126: ...5 46 FOR YOUR NOTES ...
Страница 133: ...6 7 6 3 3 12 1 Screen Assembly with anti glare screen Exploded View ...
Страница 163: ...6 37 6 6 7 BIS Module Exploded View ...
Страница 180: ...6 54 FOR YOUR NOTES ...
Страница 204: ...A 14 FOR YOUR NOTES ...
Страница 205: ......

