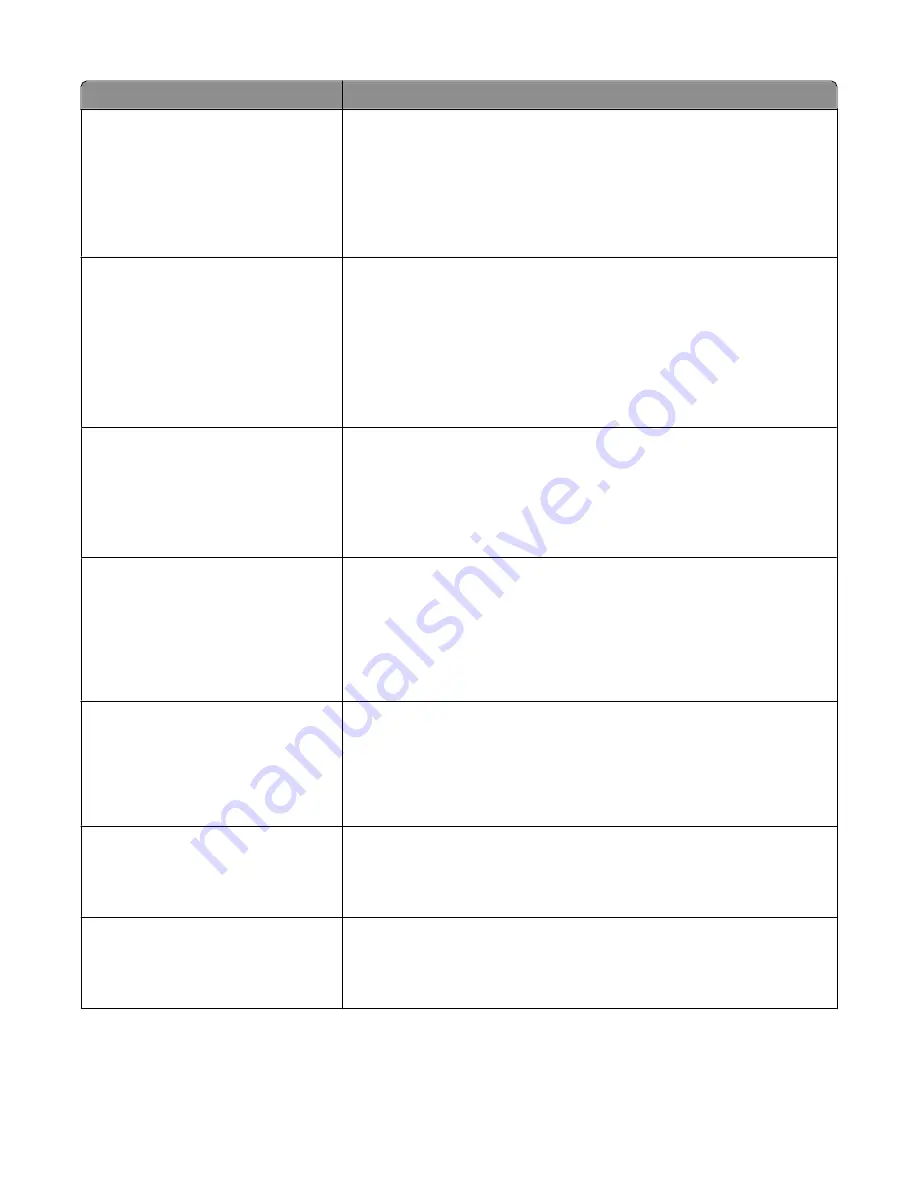
Menu item
Description
PCL Emulation Settings
Point Size
1.00–1008.00
Changes the point size for scalable typographic fonts
Notes:
•
12 is the factory default setting.
•
Point Size refers to the height of the characters in the font. One point equals
approximately 1/72 of an inch.
•
Point sizes can be increased or decreased in 0.25-point increments.
PCL Emulation Settings
Pitch
0.08–100
Specifies the font pitch for scalable monospaced fonts
Notes:
•
10 is the factory default setting.
•
Pitch refers to the number of fixed-space characters per inch (cpi).
•
Pitch can be increased or decreased in 0.01-cpi increments.
•
For nonscalable monospaced fonts, the pitch appears on the display but
cannot be changed.
PCL Emulation Settings
Orientation
Portrait
Landscape
Specifies the orientation of text and graphics on the page
Notes:
•
Portrait is the factory default setting.
•
Portrait prints text and graphics parallel to the short edge of the page.
•
Landscape prints text and graphics parallel to the long edge of the page.
PCL Emulation Settings
Lines per Page
1–255
60
64
Specifies the number of lines that print on each page
Notes:
•
60 is the US factory default setting. 64 is the international default setting.
•
The printer sets the amount of space between each line based on the Lines
per Page, Paper Size, and Orientation settings. Select the desired Paper Size
and Orientation before setting Lines per Page.
PCL Emulation Settings
A4 Width
198 mm
203 mm
Sets the printer to print on A4-size paper
Notes:
•
198 mm is the factory default setting.
•
The 203-mm setting sets the width of the page to allow the printing of
eighty 10-pitch characters.
PCL Emulation Settings
Auto CR after LF
On
Off
Specifies whether the printer automatically performs a carriage return (CR) after
a line feed (LF) control command
Note:
Off is the factory default setting.
PCL Emulation Settings
Auto LF after CR
On
Off
Specifies whether the printer automatically performs a line feed (LF) after a
carriage return (CR) control command
Note:
Off is the factory default setting.
Understanding printer menus
142
Содержание 13B0500
Страница 6: ...6...
Страница 89: ...3 Connect the answering machine or telephone to the adapter Answering machine Telephone Faxing 89...
Страница 167: ...4 Close the rear door 5 Close the front door 6 Press 233 paper jam 1 Remove the tray from the printer Clearing jams 167...
Страница 169: ...242 paper jam 1 Remove the optional tray from the printer 2 Remove the jam 3 Insert the tray 4 Press Clearing jams 169...
Страница 172: ...4 Remove the separator roll 5 Remove the jammed paper 6 Reinstall the separator roll Clearing jams 172...
Страница 173: ...7 Lock the separator roll 8 Close the ADF cover 9 Press Clearing jams 173...


