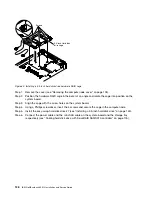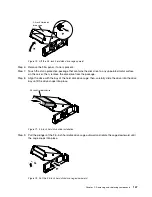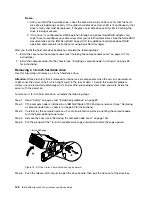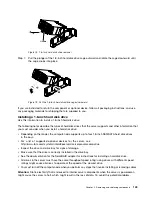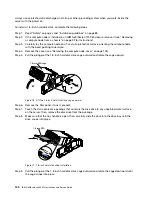
3.5-inch Hard disk
drive cage
Screws
Figure 60. Installing a 3.5-inch hard disk drive hardware RAID cage
Step 1.
Remove the cover (see “Removing the compute node cover” on page 105).
Step 2.
Position the hardware RAID cage in the bezel at an angle and rotate the cage into position on the
system board.
Step 3.
Align the cage with the screw holes on the system board.
Step 4.
Using a Phillips screwdriver, insert the 4 screws and secure the cage in the compute node.
Step 5.
Install the easy-swap hard disk drive #7 (see “Installing a 3.5-inch hard disk drive” on page 143).
Step 6.
Connect the power cable and the mini-SAS cable on the system-board and the storage tray
respectively (see “Cabling hard disk drive with ServeRAID SAS/SATA controller” on page 176).
138
IBM NeXtScale nx360 M4 Installation and Service Guide
Содержание NeXtScale nx360 M4
Страница 1: ...IBM NeXtScale nx360 M4 Installation and Service Guide Machine Type 5455 ...
Страница 6: ...iv IBM NeXtScale nx360 M4 Installation and Service Guide ...
Страница 34: ...20 IBM NeXtScale nx360 M4 Installation and Service Guide ...
Страница 58: ...44 IBM NeXtScale nx360 M4 Installation and Service Guide ...
Страница 94: ...80 IBM NeXtScale nx360 M4 Installation and Service Guide ...
Страница 192: ...178 IBM NeXtScale nx360 M4 Installation and Service Guide ...
Страница 538: ...524 IBM NeXtScale nx360 M4 Installation and Service Guide ...
Страница 562: ...548 IBM NeXtScale nx360 M4 Installation and Service Guide ...
Страница 722: ......
Страница 730: ......
Страница 737: ......
Страница 738: ...Part Number 00KC216 Printed in China 1P P N 00KC216 1P00KC216 ...

