31
Patientendaten eingeben und bearbeiten
Nach dem Einschalten des AIDA DVD-M er -
scheint der Bildschirm Aufnahme (siehe Abb. auf
Seite 30).
Hinweis:
Eine Prozedur kann mit oder ohne vor-
herige Eingabe von Patientendaten gestartet wer-
den. Bestimmte Patientendaten (gelb markierte
Felder im Fenster Patientendaten)
müssen
jedoch
vor Abschluss der Prozedur
eingegeben werden.
Das System fordert am Ende einer Prozedur zur
Eingabe der obligatorischen Patientendatenfelder
auf, sofern noch nicht geschehen.
Tippen Sie den den blauen Hyperlink „
Patienten -
daten”
links oben im Bildschirm „Aufnahme” an.
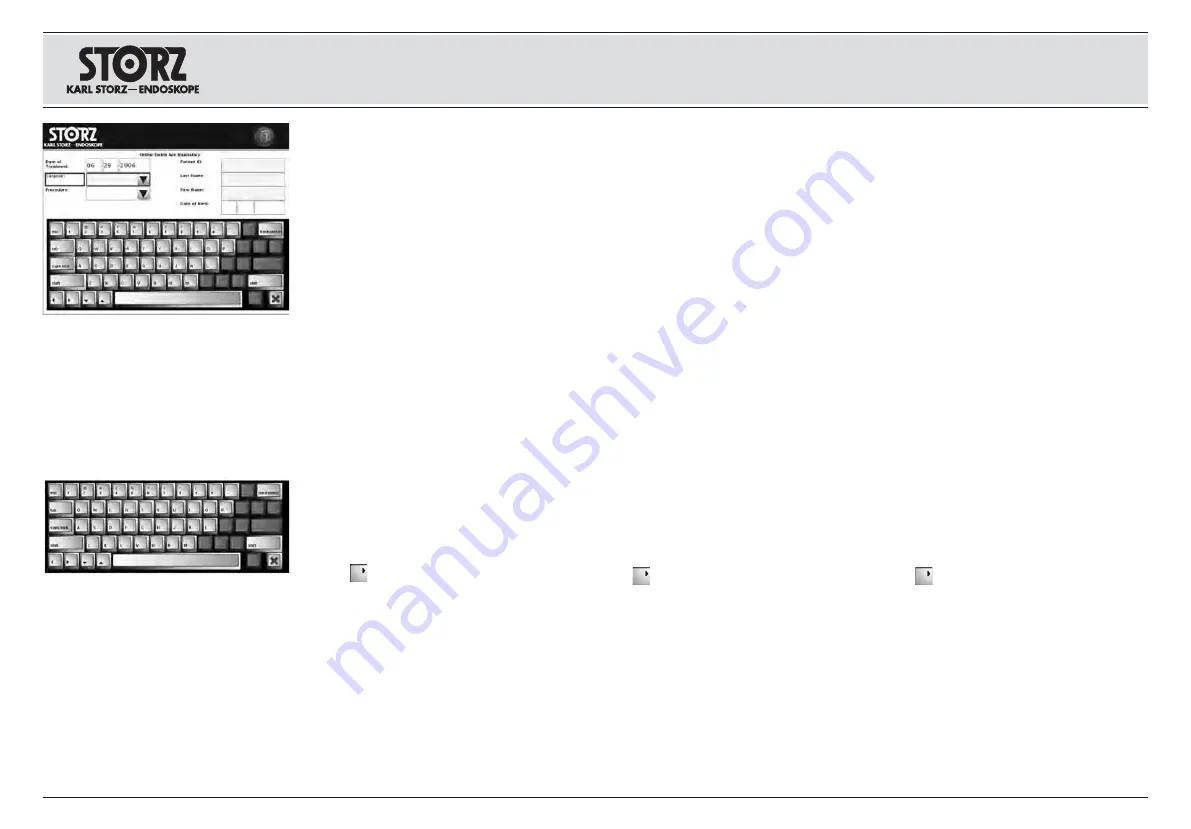
Es erscheint ein der Bildschirm zur Eingabe der
Patientendaten. Tippen Sie zur Daten eingabe die
gewünschten Felder an. Geben Sie dann die
Daten ein.
In den Feldern „Operateur“ und „Eingriff” kön-
nen Sie mittels der Pfeiltaste auf ein Drop down -
menü zugreifen und einen Eintrag auswählen. Zu
den gespeicherten Listen gelangen Sie über
“Ein stel lungen”/Text. Dort können die Listen
bearbeitet werden. Nähere Informationen dazu
finden Sie im Abschnitt „Einstellungen“ Seite 21).
Tastatur
•
Backspace:
Löscht ein Zeichen vor dem Cur -
sor; bei gedrückter Taste wird der Lösch vor -
gang fortgesetzt.
•
Tab:
Bewegt den Cursor zum nächsten Feld.
•
: Bewegt den Cursor in die ent sprech -
ende Pfeilrichtung zum Einfügen von Text
•
: Speichert die eingegebenen Daten und
kehrt zum vorherigen Bild zurück.
•
: Kehrt zum vorherigen Bildschirm zurück,
ohne die Änderungen zu speichern.
Hinweis:
In das Feld „Jahr“ müssen vier Zahlen ein-
gegeben werden. Das Format der Felder „Datum“
und „Geburtsdatum“ kann unter “Einstellungen”/
System eingestellt werden. Nähere Informationen ste-
hen im Abschnitt Einstellungen” (Settings) Seite 25.
To enter patient information, touch the hyperlink
“Patient data” in blue at the top left of the Capture
screen. A keyboard will appear to allow input of
the patient information. To input patient informa-
tion into each field touch the desired field.
Type in the desired information, or use the up or
down arrow to scroll through a list of saved
names in the “Surgeon” and “Procedure” fields
and select the desired entry. Surgeon and
Procedure names may be added to the saved
lists in the Text option in Settings (see ‘Settings’
page 21).
Keyboard
•
Backspace:
Erases back one space; hold down
backspace key to continue erasing.
•
Tab:
Moves cursor to the next field.
•
Moves the cursor in the direction of the
arrow to allow inserting of text
•
: Saves the input information and returns to
the previous screen
•
: Returns to the previous screen without sav-
ing changes.
Note:
The Year field requires four numbers. The
format of the “Date Of Treatment” and “Date of
Birth” fields can be set in the System option in
Settings (see “Settings” section of the manual for
more information, page 25).
Pulse en el hipervínculo azul “
Datos del paciente
”
situado en la parte superior izquierda de la pan-
talla “Grabación”. Aparecerá un teclado en la
pantalla para introducir los datos del paciente.
Para introducir los datos, pulse en el campo
deseado. A continuación, introduzca los datos.
Con las teclas de flechas, puede accederse a un
menú desplegable en los campos “Cirujano” e
“Intervención” para seleccionar una entrada.
Puede accederse a las listas guardadas a través
de “Ajustes”/Texto. Una vez allí, pueden proce-
sarse las listas. Para más información, consulte la
sección “Ajustes” de la página 21.
Teclado
•
Tecla de retroceso:
borra un carácter a la
izquierda del cursor; si se mantiene pulsada, el
proceso de borrado continúa.
•
Tabulador:
traslada el cursor al siguiente campo.
•
: Desplazan el cursor en la dirección
correspondiente a la flecha para incorporar texto.
•
: Guarda los datos ingresados y conmuta
de regreso a la ventana anterior.
•
: Conmuta a la ventana anterior, sin guardar
las modificaciones.
Nota:
En el campo “Año” deben introducirse cuatro
cifras. El formato del campo “Fecha” y “Fecha de
nacimiento” puede ajustarse en “Ajustes”/Sistema.
Para más información, consulte la sección “Ajustes”
(Settings) de la página 25.
Inputting and editing of patient information
After powering up the AIDA DVD-M, the Capture
screen will appear (see picture on p. 30).
Note:
A procedure may be started with or without
first entering patient information. However, certain
required patient information (fields highligh ted in
yellow on patient information screen)
must
be
entered
prior to completion of the procedure
. The
system will prompt the user to enter required
patient information fields at the end of a proce-
dure if this task has not yet been completed.
Ingreso y procesamiento de datos
del paciente
Una vez conectado AIDA DVD-M, aparece la pan-
talla de grabación (véase la fig. de la pág. 30).
Nota:
Puede iniciarse un procedimiento con o sin la
introducción previa de los datos de los pacientes. No
obstante,
deberán
introducirse los datos de los
pacientes
antes de finalizar el procedimiento
en los
campos marcados de amarillo de la ventana Datos
del paciente. El sistema obliga a introducir los datos
obligatorios de los pacientes al finalizar el procedi-
miento en caso de que aún no se haya hecho.
Aufstellen und
Bedienhinweise
1. Patientendaten eingeben und bearbeiten
Installation and
operating instructions
1. Inputting and editing patient information
Montaje e
instucciones operativas
1. Ingreso y procesamiento de datos del paciente


