FusionModule1000A40 Prefabricated All-in-One Data
Center
Commissioning Guide
8 Commissioning Core Components
Issue 02 (2019-12-20)
Copyright © Huawei Technologies Co., Ltd.
57
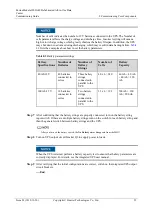
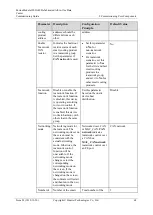
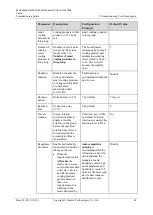
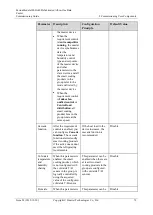
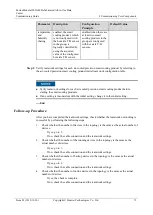
For the diagrams and tables, see the initial configuration parameter manual for the solution in use.
Procedure
Step 1
(Optional) Switch on the ATS control loop (Q1 and Q2 in the left lower part at the rear of the
cabinet) to power on the ATS. Commission the ATS by following instructions in
Commissioning the 8D ATS.
This step applies only to the 40 ft N+X scenario.
Step 2
Switch on the general input circuit breaker and the input power circuit breaker of the
integrated UPS to power on the integrated UPS.
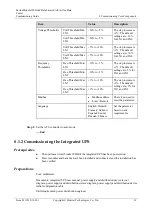
Before the first operation, set the voltage and frequency based on the local voltage system and
check whether the voltage thresholds and frequency hysteresis meet setting requirements.
Step 3
After the MDU starts normally, check that the bypass input is normal and the UPS has
transferred to bypass mode by viewing the system running status on the LCD.
If any alarm is raised, rectify the fault before continuing the commissioning.
During the UPS power-on commissioning, you are not allowed to switch on the bypass
circuit breaker for the UPS.
During the UPS power-on commissioning, you are not allowed to modify the UPS initial
configurations if not authorized by onsite Huawei engineers.
UPSs can work in single or parallel mode. Check that the initial configurations are
consistent with the configurations in the initial configuration table for the solution in use.
You are recommended to set the
Language
to the local language after all settings are
completed.
Step 4
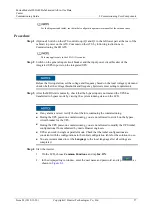
Start the inverter.
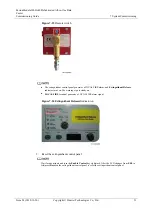
1.
On the LCD, choose
Common Functions
, and tap
Inv. ON
.
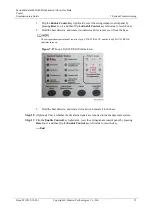
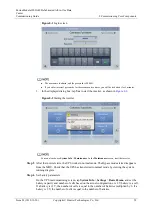
2.
In the displayed login window, enter the user name and password, and tap
, as
shown in

