5 Removing and replacing components
Tecal RH5485 Server
Problem Determination and Service Guide
5-40
Huawei Proprietary and Confidential
Copyright © Huawei Technologies Co., Ltd.
Issue 02 (2011-05-25)
Step 10
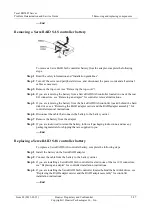
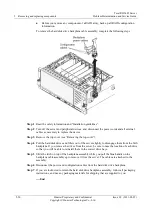
Press on the release latches on the front side of the USB mounting bracket and push the
mounting bracket into the server.
Step 11
Pull the USB assembly through the opening and remove it from the server.
Step 12
If you are instructed to return the front USB assembly, follow all packaging instructions, and
use any packaging materials for shipping that are supplied to you.
----End
Replacing the front USB assembly
To install the replacement front USB assembly, complete the following steps:
Step 1
Insert the USB assembly into the opening from inside the server and push it in until it clicks
into place.
Step 2
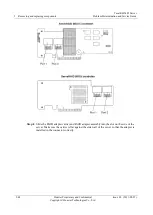
Route the USB assembly cable under the hard disk drive backplane to the outside of the
RAID PCI Express connector.
Step 3
Install the memory-card cage assembly (see “Replacing the memory-card cage”).
Step 4
Connect the SAS cables to the RAID card controller.
Step 5
Install the RAID card controller (“Replacing the RAID adapter carrier and the RAID adapter
assembly”).
Step 6
Install the middle fan (see “Replacing the middle hot-swap fan”).
Step 7
Install the memory cards and memory card fillers (see “Replacing the memory card”).
Step 8
Install the top cover bracket (see “Replacing the top-cover bracket”).
Step 9
Install the top cover (see “Replacing the top cover”) and the front bezel (see “Replacing the
front bezel”).
Step 10
Connect the cables and power cords (see “Connecting the cables” for cabling instructions).
Step 11
Turn on all attached devices and the server.
----End
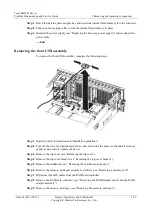
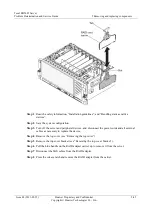
Removing the I/O-board shuttle
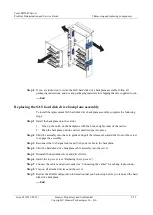
To remove the rear I/O-board shuttle, complete the following steps.


