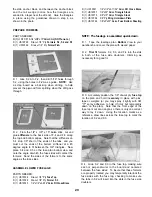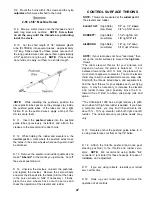
D 3. Glue the 1/4" x 1/4" x 31" balsa top stringers
and the 1/4" x 1/4" x 21" balsa side stringers to the
formers HINT: If F-3A is slightly warped, you may
straighten it during this step by twisting it straight while
gluing the stringers Trim and sand the ends of the
stringers flush with the front of F-3A and the rear of F-
6A.
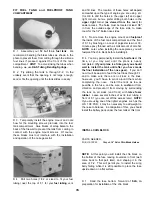
D 4. Use a sanding block to sand the sides of the
stringers to blend with the formers (see the cross-
section drawings on the plan) Also use a long
sanding block to sand the stringers and the tops of
the formers in a straight line from F-3A to F-6A.
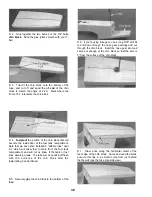
D 5 Prepare the turtle deck sides by cutting the two
3/32" x 3" x 33" balsa sheets to the angle shown in the
following sketch.
D 6 Trial fit one edge of the sheeting down onto the
top of the fuse side Sand the edge of the sheeting if
necessary, for a good fit.
D 7 Glue the bottom edge of the sheeting to the top
of the fuse sides
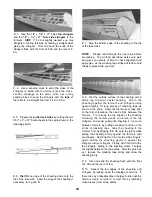
NOTE: Please read through the next step before
proceeding The method described works very well,
and gives you plenty of time to check alignment and
apply glue as the masking tape strips will tend to hold
things in place while you work
D 8. Wet the outside surface of the sheeting with a
damp rag to permit easier bending Pull in the
sheeting against the formers and stringers using
approximately 10 long pieces of masking tape as
shown in the photo Apply the first strips of tape right
at the former locations, then add strips between the
formers Try to keep the top edges of the sheeting
following the normal gentle curvature of the top
stringers and avoid pulling the sheeting in too much
between formers by putting excessive tension on the
strips of masking tape Glue the sheeting to the
formers first by dripping thin CA onto the joints while
pulling the sheeting firmly against the formers with
your fingers Next drip thin CA onto the side stringers,
again pulling the sheeting gently in against the
stringers with your fingers Finally, add thin CA to the
top stringers, pulling in the sheeting where it bulges
out slightly between the tape strips After the glue has
set, remove the masking tape strips and allow the
sheeting to dry
D 9 Trim and sand the sheeting flush with the front
of F-3A and the rear of F-6A.
D 10. Inspect the top edges of the sheeting and
stringers by looking down the fuselage centerline If
there are any noticeable dips or bulges to interrupt the
normal smooth curvature correct this by installing
cross-braces (from scrap balsa).
39
Содержание Ultra-Sport 1000
Страница 7: ...7 DIE PATTERNS Use This Drawing To Identify Die Cut Parts...
Страница 57: ...57...
Страница 59: ...2 View Drawing Use This For Planning Your Trim Scheme 59...


