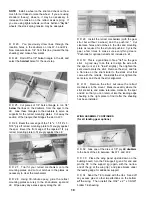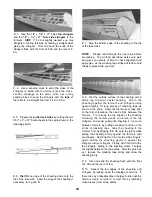
D 5. Accurately position the two pre-cut 1/4" x 1/2"
balsa cross-braces on the plan, and pin them in
place. Pin F-4 and F-5 to the building board, upside
down, in their proper position on the plan.
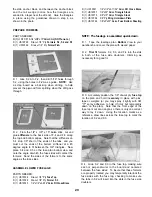
D 8. Place the above assembly upside down on the
waxed paper covered plan, and align the aft portion of
the fuse with the plan. Begin pulling the fuse sides
together, and pin the sides to the board every few
inches as you work forward. Glue the fuse sides to
the rear cross-brace, F-5, the front cross-brace, and F-
4 as you get to them.
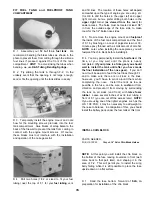
D 6. Trial fit (do not glue) the following parts together:
Fuse top, fuse sides, die-cut 1/8" ply F-2, F-3, and F-
4. Check the fit of all parts and trim, file or sand as
necessary for a good fit.
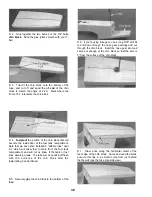
D 7. NOTE: You may want to use 30-minute epoxy
for this step, to fill any gaps and to give you time to get
the alignment right. Temporarily assemble the fuse
sides and the stab base assembly. Pull the fuse sides
together at the aft end and check the fits around the
tail wedge, etc. Sand the tail wedge and the bottom
triangle stock as required so the fuse sides fit together
properly with the stab base in between. When
satisfied with the fit, set the assembly upside down on
a flat surface and check to make sure the fuse sides
are vertical (perpendicular to the work surface). Now
securely glue this aft fuse assembly together from the
aft end to the front of the stab base. Make sure the
stab anchor block is securely glued. Turn the
assembly right side up and continue adding glue until
all glue joints are secure. Block sand the stab base
glue joints to remove any extra glue that has
squeezed out.
D 9. When you reach the fuse top, slip the firewall (F-
1) between the fuse sides at the front and use as
many rubber bands as necessary to pull the fuse sides
together until they are touching F-1. Then hold the
fuse top and the sides firmly against the building board
as you glue the fuse sides to the fuse top and to F-3
and F-2.
D 10. Now glue the firewall (F-1) in place with 30-
minute epoxy. Remember, the fuse is upside down
so the "TOP" mark on the firewall goes at the
bottom.
D 11. Add 1/2" hard balsa triangle behind all four
sides of the firewall, allowing enough of the triangle to
extend beyond the top and bottom of the firewall so
the triangles can be sanded to match the angle of the
top and chin blocks.
D 12. Find the 3/8" ply wing hold-down plate and
trial fit it into the notches in the fuse side doublers,
30
Содержание Ultra-Sport 1000
Страница 7: ...7 DIE PATTERNS Use This Drawing To Identify Die Cut Parts...
Страница 57: ...57...
Страница 59: ...2 View Drawing Use This For Planning Your Trim Scheme 59...


