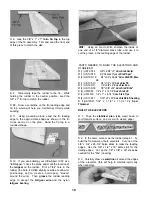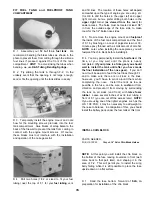
D 1 Make location marks for the fiberglass
reinforcement cloth, 2" each way from the wing
centerline. Cut the 4" x 36" strip of glass cloth in half,
making two strips approx. 18" long.
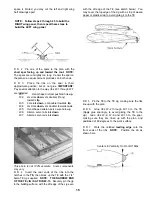
D 8 After the glue has set, trim the excess cloth at
the trailing edge with a sharp X-acto knife followed by
a sanding block.
D 9 Repeat the process for the other side.
D 10 Carefully feather out the edges of the glass
cloth with a T-bar sander with 80 or 100-grit
sandpaper to blend smoothly with the sheeting Also,
lightly sand the surface of the glass cloth with a piece
of 320 or 400-grit wet-or-dry sandpaper held in your
fingers to remove any rough spots WARNING:
When sanding fiberglass, wear safety goggles and
a dust mask to avoid breathing airborne glass
fibers.
INSTALL WING DOWELS
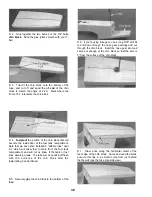
D 2 Trial fit the fiberglass cloth in place The cloth
will wrap around the LE, but not around the TE.
D 3 Spray a very light mist of 3M "77" Spray
Adhesive on one side of a strip of fiberglass cloth.
Hold the spray can at least 12" away from the
cloth when doing this to avoid a heavy buildup The
purpose of this is only to give the cloth a little
"tackiness" If you apply too much spray it could result
in a poor glue bond Allow the spray to dry for a few
minutes before proceeding to Step 4
D 4 Beginning at the trailing edge, lay the glass cloth
in place on the wing Gently press the cloth in place,
working out all wrinkles The "77" spray adhesive
should hold the cloth down to the surface, but will
permit you to lift and reposition the cloth if you make a
mistake Wrap the glass cloth down over the center
leading edge Do not attempt to wrap the glass cloth
around the trailing edge
D 5 Working outdoors or in a very well-ventilated
area apply thin CA glue to the glass cloth Begin by
running a bead of glue down the center of the glass
cloth strip Then continue applying the glue in lines
until all the cloth has been secured Run the thin CA
out 1/4" beyond the edges of the glass cloth to help
protect the balsa sheeting when sanding later.
WARNING: This operation produces a larger than
normal quantity of CA fumes, so adequate
ventilation is a must!
D 6. Inspect the surface of the glass cloth If any
areas are not glued down, apply a couple more drops
of CA glue and press down with a piece of waxed
paper until the glue sets.
D 7. To make sure the glass cloth is fully "wetted out
and bonded to the balsa, you may apply more thin or
medium CA, a few drops at a time, and spread it out
with a piece of waxed paper
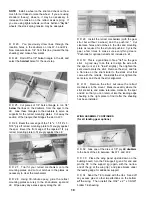
D 1. Mark a horizontal centerline on the flat which
you sanded on the wing LE Also mark a vertical
centerline on the die-cut 1/8" ply former F-2A (the
Wing Dowel Plate).
D 2 Holding the die-cut 1/8" balsa F-2A on the
leading edge, in the exact center of the wing, mark the
dowel locations through the dowel plate holes
D 3 Remove F-2A and double check to make sure
the dowel locations are both the same distance from
the wing center joint.
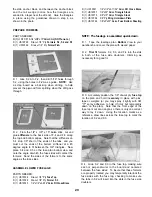
D 4. It is important that you now drill the dowel holes
accurately! To insure accurately positioned holes,
begin by drilling small (1/8") holes in the center of the
marked locations Then gradually increase drill bit
sizes until you have finally drilled the holes to 5/16"
diameter.
D 5 Sand one end of each wing dowel to a rounded
or pointed shape This will help when inserting the
dowels through the holes in the dihedral brace.
23
Содержание Ultra-Sport 1000
Страница 7: ...7 DIE PATTERNS Use This Drawing To Identify Die Cut Parts...
Страница 57: ...57...
Страница 59: ...2 View Drawing Use This For Planning Your Trim Scheme 59...


