4.6 Printing the Scanned Data
Network Scanner fi-6000NS Operator's Guide
215
Regular User Operations
4
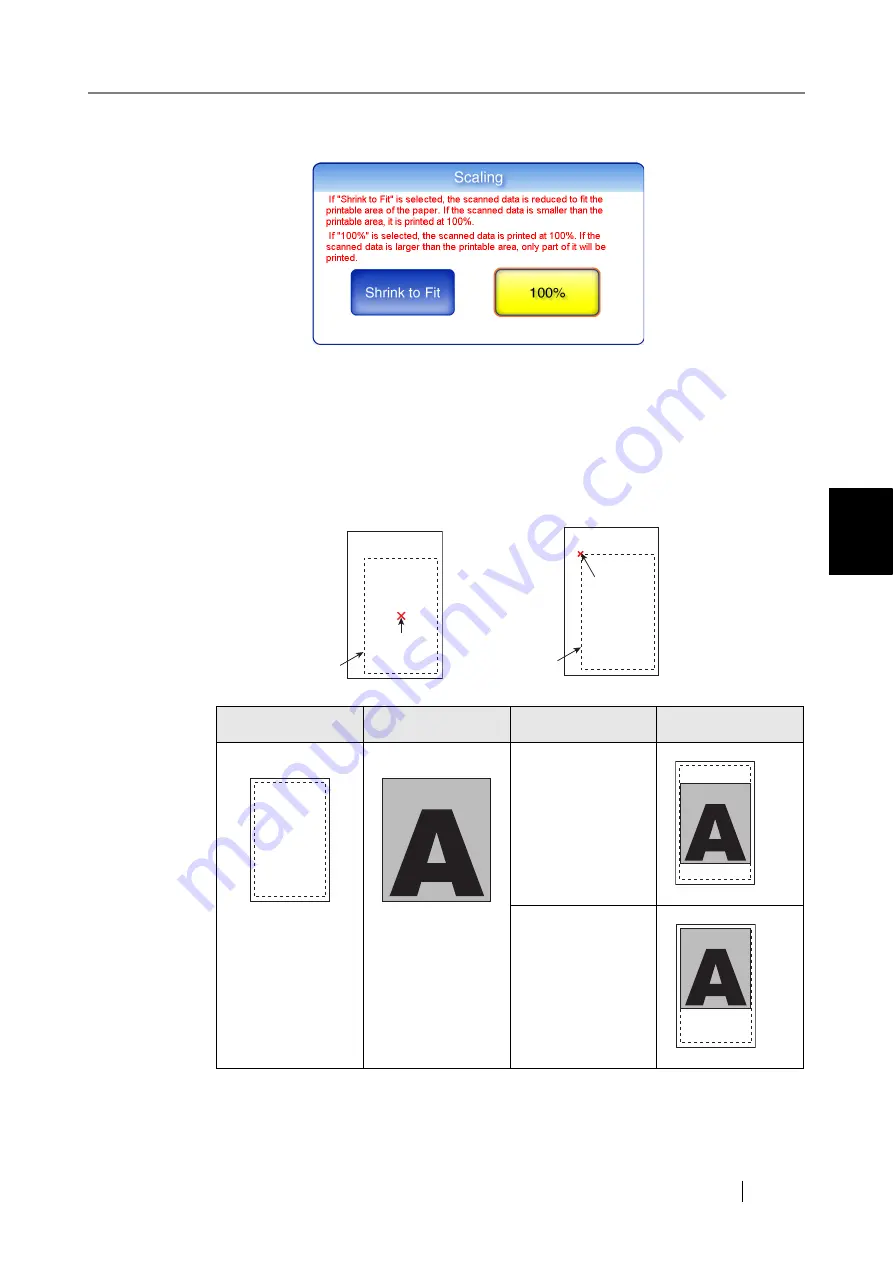
2. Select the print scale of the data.
By default, this is "100%".
•
Shrink to Fit
The image is reduced so that the entire image fits into the area available for printing (area
inside the dotted line). Further enlargement is not possible.
If the positioning setting is "Center", the control point for printing is the center point of the
area available for printing. If the positioning setting is "Top Left", the control point for
printing is the top left corner of the area available for printing. For more details on the
positioning setting, refer to
"4.6.2 Positioning" (page 219)
.
Print Sheet
Scanned Data
Positioning
Result
Small
Large
Center
Top Left
Available Area
for Printing
Control Point
Center
Control Point
Top Left
Available Area
for Printing
Print Sheet
Scanned Data
Scanned Data
Scanned Data
Содержание FI-6000NS
Страница 1: ...P3PC 1852 06ENZ0 ...
Страница 2: ......
Страница 10: ...x ...
Страница 28: ...xxviii ...
Страница 70: ...42 3 Press the Connect button The Login screen appears ...
Страница 72: ...44 5 Press the Login button If the user name and password are valid the System Settings screen appears ...
Страница 78: ...50 5 Press the Now button The system is restarted ...
Страница 122: ...94 4 Press the Add button The screen for adding a network printer is displayed ...
Страница 202: ...174 ...
Страница 296: ...268 ...
Страница 316: ...288 6 Press the OK button The Maintenance screen is shown again ...
Страница 348: ...320 ...
Страница 358: ...330 ...
Страница 362: ...334 ...
Страница 426: ...398 ...
Страница 427: ...Network Scanner fi 6000NS Operator s Guide 399 D Appendix D Glossary ...
Страница 432: ...404 ...


