background image

Safety Notes

xx

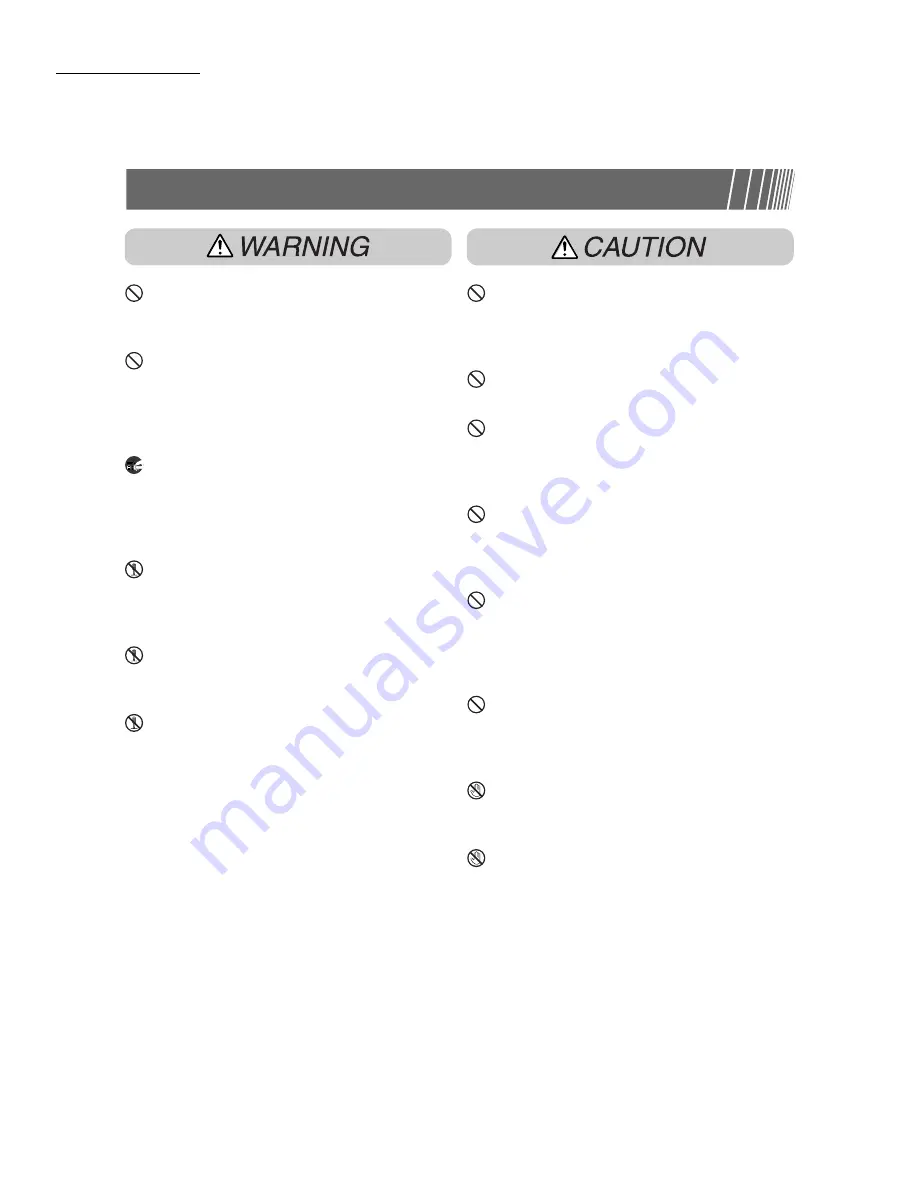
Operating Safeguards

Do not place any liquid container such as a
vase or coffee cup on the machine. Spilt water
can cause a fire or shock hazard.

Do not place any metal parts such as staples
or clips on the machine. If metal and
flammable parts get into the machine, they
can short-circuit internal components, and
cause fire or electric shocks.

If debris (metal or liquid) gets into the
machine, switch off and unplug the machine.
Contact your Customer Support Center.
Operating a debris-contaminated machine can
cause fire or electric shocks.

Never open or remove machine covers that
are secured with screws unless specifically
instructed in this manual. A high voltage
component can cause electric shocks.

Do not try to alter the machine configuration,
or modify any parts. An unauthorized
modification can cause smoke or fire.

This equipment is certified as a Class 1 laser
product under IEC60825-1 (1998). This
means that the machine does not emit
hazardous laser radiation. Since radiation
emitted inside the machine is completely
confined within the protective housings and
external covers, the laser beam cannot
escape from the machine during any phase of
user operation. Do not perform any operation
apart from the instructions given in the
manual. There may be a danger of laser beam
leakage.

If you make copies with the document cover
open, avoid looking directly at the copy lamp.
Direct eye exposure can cause eye fatigue or
damage.

Do not use a highly flammable spray or
solvent near the machine. It can cause fire.

When copying a thick document, do not use
excessive force to press it against the
document glass. The glasss may break and
cause injuries.

Do not place a heavy object or lean your
elbow on the touch-sensitive panel or display.
The panel or display can break and the broken
glass can cause injuries.

Do not use paper that are good electricity
conductors (origami paper, carbon paper,
coated paper, etc.). If the paper is jammed in
the machine, it can result in a short circuit or
fire.

Do not staple document with punched holes
(e.g. perforated paper available in the market)
as the resultant detached staples can injure
your fingers.

Do not touch the areas that are affixed with the
label "High Voltage". You may get an electric
shock.

Do not touch the areas on or near the fuser
unit that are affixed with the label "Hot
Surface". You can get burnt as a result. 
Do not forcefully remove paper that are in the
fuser unit or wrapped around the heat roller.
You can get burnt as a result. Switch off the
machine, and contact your Customer Support
Center.

Содержание 1015S Series

Страница 1: ...mer s copiers and printers Along with our efforts to make environmental values a part of Fuji Xerox culture Document Centre 1015S adopts recycled components that satisfy our strict quality standards T...

Страница 2: ...y 1 or 2 sided documents as 1 or 2 sided copies 5 1 1 Sided 2 Sided Copying Enlarging Reducing Image You can set similar or different percentage for the length and width to change image size 5 2 Enlar...

Страница 3: ...can erase shadows that might form on the sides or center portion of bound document image 5 10 Erasing Edges Shifting Image You can shift or specify image position for copying with white space 5 11 Sh...

Страница 4: ...om a bound document onto separate sheets of paper 5 16 Making Two sided Copies From a Bound Document Adjusting Image Quality You can prevent copying of images from reverse page and adjust contrast aut...

Страница 5: ...opy 5 22 Multiple Documents Copying on One Copy Inserting Separators You can insert blank sheets of paper as separators between transparencies 5 23 Inserting Transparency Separators Specifying Face Up...

Страница 6: ...anagement 5 28 Copying with Stamp or Date Copying on Tab Paper You can copy on tab paper 5 29 Copying on Tab Paper Outputting Bi Folded or Tri Folded paper You can make copies to be folded in half or...

Страница 7: ...computer transfer them by E mail or to FTP server Chapter 7 Scanning Saving Scanned Data You can save scanned data with copying settings on the hard disk as a copy file By connecting to a network you...

Страница 8: ...1 3 4 Other Screens 17 1 3 5 Operations on saved file 18 1 4 Entering Password 19 1 5 Using the Copylyzer 20 Chapter 2 Loading Paper 2 1 Paper to Use 22 2 2 Loading Paper Changing Paper Size of Paper...

Страница 9: ...1 Same for Length and Width 76 5 2 2 Different for Length and Width 81 5 3 Selecting Paper Tray 84 5 3 1 Automatically Selecting Paper Tray 84 5 3 2 Manually Selecting Paper Tray 85 5 4 Sorting Output...

Страница 10: ...6 2 1 Roles of the Folders 184 6 2 2 Setting Storage Folders 186 6 2 3 Setting Shared Folder 189 6 2 4 Setting Link Folder FTP Folder 193 6 2 5 Setting Folder Name 196 6 3 Saving Data 198 6 3 1 Saving...

Страница 11: ...90 8 1 2 Entering Exiting Tools Mode 293 8 1 3 Entering Exiting Auditron Mode 296 8 2 Overview of Tools Mode 298 8 3 Setting Tools Mode 308 8 3 1 Changing Tools Mode Settings 308 8 3 2 Changing Tools...

Страница 12: ...ner Bottle A 383 10 5 Replacing Staple Cartridge 385 10 6 Emptying Punch Scrap Container 389 10 7 Checking Meter 391 10 7 1 Checking sum of copies made 391 10 7 2 Checking the Total Number of Copies f...

Страница 13: ...basic knowledge of making copies copying onto postcard transparency heavy weight paper and interrupt copying Chapter 5 Making Copies Explains the common copying procedures involving the features of Ba...

Страница 14: ...Care Explains how to carry out maintenance of your machine like cleaning replacing consumables like toner cartridge and checking meters Read this chapter when necessary Appendix Explains about the sp...

Страница 15: ...xv Conventions This manual uses the following conventions Additional information about operations and features Indicates reference sources Points to pay attention to...

Страница 16: ...d for normal operation consumables replacement and maintenance to ensure your machine operates at peak performance Your representative will provide necessary support for the proper installation of the...

Страница 17: ...ironmental limits Temperature range 10 32 C Humidity range 30 80 no condensation Humidity should be 61 or below at 32 C and temperature should be 29 C or below at 80 humidity 620 312 1045 455 255 480...

Страница 18: ...less than the rate of 125 V 15 A Also do not connect more than one power cord to the extension power cord Overloading can cause fire Contact your Customer Support Center if you need to obtain an exte...

Страница 19: ...When the machine is not used over an extended period of time switch it off and unplug it If an unused machine is left connected to a power source for a long period degraded insulation can cause elect...

Страница 20: ...ion Do not perform any operation apart from the instructions given in the manual There may be a danger of laser beam leakage If you make copies with the document cover open avoid looking directly at t...

Страница 21: ...g in the cartridge can cause an explosion and you can get burnt Never throw toner or a waste toner bottle into an open fire It can cause an explosion and you can get hurt Do not pull out the drum cart...

Страница 22: ...Safety Notes xxii Locations of warning and caution labels To ensure your safety in operating the copier please read the warning and caution labels pasted on the internal parts of the machine carefully...

Страница 23: ...ode feature This product has a power saving feature which switches the machine to a low power mode automatically if the machine is on and not operated for a certain period of time In this mode the mac...

Страница 24: ...tificates vouchers gift certificates train tickets commuter tickets tokens discount coupons public lottery tickets betting tickets etc 2 Forgery of documents and counterfeiting of seals for the purpos...

Страница 25: ...es it is NOT necessary for a user to obtain the consent of the copyright owner Reproduction of copyrighted works for the purpose of the user s personal use family use or other similar uses within a li...

Страница 26: ......

Страница 27: ...1 Knowing Your Copier 1 1 Main Components and Their Functions 2 1 2 Switching On Off Power 6 1 3 Using the Touch Panel Display 11 1 4 Entering Password 19 1 5 Using the Copylyzer 20...

Страница 28: ...ift up the cover to perform settings in the Tools and Auditron Administration Mode To use the Tools and Auditron Administration Mode switch operation from the main control panel to this copier control...

Страница 29: ...devices such as the photoreceptor 17 Transfer module Copies the image from the drum to the paper Pull out to clear paper jams 18 Waste toner bottle A Collects used toner 19 Toner cartridge Contains t...

Страница 30: ...in Components and Their Functions 4 Knowing Your Copier 40 29 30 31 32 33 34 35 36 37 39 38 42 41 26 27 28 Optional kit High Capacity Feeder HCF Optional kit Booklet Maker Finisher and Folding Unit Z...

Страница 31: ...ge Output Collated or Uncollated are selected 33 Booklet output tray Receives copies when you select Bi Fold or Bi Fold Stapling 34 Booklet output tray button Press this button to deliver booklets to...

Страница 32: ...power switch to the On position The server starts automatically once the power of the copier is switched on 2 Enter the password by department user by using the keypad and then select Enter Each input...

Страница 33: ...installed 1 Ready to copy Quantity Output Format Image Quality Added Features Basic Features Doc 50 Sample Set More 2 1 Sided Head to Head 2 2 Sided Head to Head 1 2 Sided Head to Head 1 1 Sided 2 Si...

Страница 34: ...witch to the On position Entering the Power Saver Mode automatically The machine automatically enters the Low Power Mode if it has been left idle after a fixed period of time If the machine continues...

Страница 35: ...ature is called Auto Start Enabling Auto Start To use the Auto Start feature load the document specify the desired settings and then press the Start button The message Please wait The job will start a...

Страница 36: ...me or when moving the machine push the switch down or to the right To switch it on push it up or to switch if off push it down The power will be cut off automatically once the breaker switch detects a...

Страница 37: ...e switching function refer to 8 1 System Administrator Mode Copy Copy and Save Save to File Build Job Scan Paper Remaining 1 2 3 4 6 5 Edit Print Files Memory 80 1 Ready to copy Quantity Output Format...

Страница 38: ...screen if the Auditron Mode is enabled Use of the machine can be controlled by requiring each user to enter his password by department user 6 Review button Press to check the copy settings You can ch...

Страница 39: ...d in a mailbox as scan files Scan files stored in mailboxes can be downloaded onto client computers 6 Server 7 Scanning Free Memory Indicates the amount of remaining hard disk memory in that can be us...

Страница 40: ...Format Image Quality Added Features Basic Features Doc 50 Sample Set More 2 1 Sided Head to Head 2 2 Sided Head to Head 1 2 Sided Head to Head 1 1 Sided 2 Sided More 141 A4 A3 B5 B4 86 A3 B4 A4 B5 81...

Страница 41: ...tes the number of sets of copies to make Enter a value by using the keypad You can set a value between 1 to 9 999 To reset the value to 1 press the C button Selection buttons Once touched the button w...

Страница 42: ...alue that you have set is shown in the input area Invalid buttons Features that cannot be selected together with some other features or buttons that are not within the range of the settings are displa...

Страница 43: ...lowing will be displayed Follow the instructions shown on the screen to troubleshoot Once the error is resolved the copier screen will be displayed Power Saver screen Once the machine enters the Power...

Страница 44: ...les Select Select All Deselect All to select all files Select Select All Deselect All again to deselect all files Switching between pages Select Next to proceed to the next page or Prev to return to t...

Страница 45: ...splayed 2 Enter your password by using the keypad Each digit input is represented by an asterisk 3 Select Enter on the screen The Copier screen appears once you have entered the correct password Enter...

Страница 46: ...w the instructions If another type of copy control device is used follow the instructions displayed on the screen When a copy control device is used you cannot use the Auditron Administration features...

Страница 47: ...2 Loading Paper 2 1 Paper to Use 22 2 2 Loading Paper Changing Paper Size of Paper Trays 25 2 3 Checking Changing Paper Supply Settings 35...

Страница 48: ...you load the paper SRA3 refers to the size 320 450 mm or 12 6 17 7 3 When loading B5 portrait paper first contact your Customer Support Center 4 When changing B5 portrait to 8 10 paper contact your C...

Страница 49: ...on the display or if you load the paper stock in the wrong tray To make copies properly select the correct paper size paper type and tray Paper tray Paper weight Paper type Paper classification 3 GSM...

Страница 50: ...y with desiccant Always store paper on a flat horizontal surface to prevent bending or curling Take note of the following when loading paper Do not combine and load paper left over from different ream...

Страница 51: ...y hit and hurt your knees if it is pulled out too quickly with excessive force 2 2 1 Loading Paper in Trays 1 2 3 4 No change in site and orientation can be made for tray 1 as it is fixed at A4 portra...

Страница 52: ...hile gripping the paper guide lever B shift it to the right 4 Load the paper aligning to the left side of the tray and with the side to be copied facing down 5 While gripping levers A and B shift and...

Страница 53: ...if the changed paper size for the paper tray is correctly displayed If the changed paper size is not displayed repeat Step 5 and check that levers A and B are at the correct positions After you have...

Страница 54: ...For details on loading the side for copying face up down and paper orientation refer to 5 26 Copying With Covers and Appendix C Originals Copies Orientation With Covers Procedure 1 Open tray 5 bypass...

Страница 55: ...17 7 3 Tighten the screw 3 Place the paper with the side to be copied facing up and with the edges touching the sides of the tray and aligned with the paper guide Once you have loaded paper in tray 5...

Страница 56: ...aining in tray 5 bypass If you have pulled out the extension flap push it back to its original position and close the tray For details on selecting paper size refer to 5 3 Selecting Paper Tray Shift t...

Страница 57: ...r to Use Procedure 1 Pull tray 6 HCF out right to the end The bottom plate is lowered automatically 2 Load the paper aligning to the right side of the tray and with the side to be copied facing up Whe...

Страница 58: ...ot and then tighten the screw 6 Paste the appropriate paper size label on the tray 3 Push in the tray slowly until it stops When pushing in the tray do not touch the inner sides of the tray as your fi...

Страница 59: ...ing paper to tray 7 remove any paper remaining in the tray add it to the stack of paper to be added then load all of the paper into the tray at once For details on the type of paper can be loaded in t...

Страница 60: ...tray 7 Paper loaded in tray 7 is sequentially fed from the top of the stack Procedure 1 If the paper is already printed on load the paper with the printed side facing up and with the tab side to be fe...

Страница 61: ...to specify the paper type each time you load paper in it Changing the paper supply settings The information of the paper size and orientation for trays 2 3 and 4 will be changed automatically once yo...

Страница 62: ...Account Billing Meter Create Mailbox Menu 850 Total Originals Scanned 1250 Total Impressions Close Copy Counter Reset Reset You can also switch the screen by pressing Stop on the main control panel a...

Страница 63: ...ontrol panel 5 Select Tools Mode The Tools Password Entry screen is displayed To return to the normal programming screen exit administration mode using the control panel of the copier and select Back...

Страница 64: ...nput digit is represented by an asterisk If you made a mistake while entering the password press the C button to clear and then re enter Password Entry Please enter the password Use the Numeric Keypad...

Страница 65: ...he settings have been checked The display returns to the Paper Tray Attributes screen 13 Select Close The display returns to the Menu screen 14 Select Exit The default screen or the User Password Entr...

Страница 66: ...ation is switched from the copier control panel to the main control panel and after a while the Copy screen is displayed To return to the normal programming screen exit administration mode using the c...

Страница 67: ...3 Loading Documents 3 1 Types of Documents 42 3 2 Loading Documents 44...

Страница 68: ...do not need to specify the size of your document if it is in one of the sizes listed below If you are making copies onto non standard paper sizes specify the document size by selecting Document Size...

Страница 69: ...selecting Original Size from the Added Features screen Glossy documents Specify the document size by selecting Original Size from the Added Features screen Thick documents e g books Specify the docum...

Страница 70: ...t first be set to On Refer to 5 9 Loading Documents in Batches for High Document Volume settings Procedure 1 Lift up the document cover 2 Place the document face down and align it with the upper left...

Страница 71: ...t however an error message may appear before 1 000 pages are scanned Procedure 1 Align the edges of the documents Remove any staples or clips 2 Place the documents facing up in the DADF side one facin...

Страница 72: ...ead to Left and load the document in that orientation 5 14 Specifying Image Orientation Features related to setting the original orientation are 2 to 1 Sided Margin Shift Mixed Size Originals Multiple...

Страница 73: ...g Procedures 48 4 2 Interrupting Copying 59 4 3 Copying on Postcards 60 4 4 Copying on Transparency 62 4 5 Copying on Heavy Weight 65 4 6 Removing Copies from the Tri Fold Output Tray 66 4 7 Removing...

Страница 74: ...with the top left corner of the document cover and then close the cover In the DADF Load the documents facing up as shown in the illustration and then adjust the document guide to align the documents...

Страница 75: ...uality Added Features Basic Features Doc 50 Sample Set More 2 1 Sided Head to Head 2 2 Sided Head to Head 1 2 Sided Head to Head 1 1 Sided 2 Sided More 141 A4 A3 B5 B4 86 A3 B4 A4 B5 81 B4 A4 B5 A5 70...

Страница 76: ...r copying select Stop in the screen and then press C Clear When the Clearing Paper screen is displayed press Start to output the copies The number of copies can be changed on the screen that appears w...

Страница 77: ...he copy job will be suspended and the following message will be displayed Press Start to continue or C button to cancel To resume the copy job press the Start button again To stop the job press the C...

Страница 78: ...is displayed Only settings related to the files being specified will be displayed when specifying Build Job settings Procedure 1 Press Review on the control panel The Review screen is displayed 2 Sel...

Страница 79: ...on The Review screen is displayed You can also select the folder by entering the folder number from the keypad and then pressing Start on the control panel The password screen is displayed if the fold...

Страница 80: ...py mode to return to the copier screen Close Review Review File Details File Name 2000 08 07_08 23 45 Date Stored 2000 10 25 Y M D 16 06 29 Original Size Auto Detect Others Number of Pages 152 Data Si...

Страница 81: ...are being scanned If On is selected for Doc 50 Program Ahead can be selected only after End Job is selected and scanning documents is completed A message will appear to say that you can program ahead...

Страница 82: ...be displayed under Job Status When you want to verify settings select the job to be checked and press the Check Settings button For details refer to 4 1 2 Checking Settings If multiple files stored in...

Страница 83: ...job status is Stop User Action and then press Delete Job The job that has been paused will be deleted and copying will stop 2 Select Close The display returns to the copy screen You can select Delete...

Страница 84: ...ified first Priority printing is not available during sample copying Procedure 1 Press Job Status The Job Status screen is displayed 2 Select the job to be promoted then press Promote Job The selected...

Страница 85: ...Press Interrupt The interrupt indicator lights up and the machine stops If you press Interrupt when documents are being scanned for copying or when a copy job is being done the machine will enter the...

Страница 86: ...2 3 and 4 and the optional trays 6 HCF and 7 as it may cause machine breakdown or paper jam Copying onto postcards Procedure 1 Load the documents Align the head of the document against the left side o...

Страница 87: ...d and then press Start on the control panel Copies will be made When Postcard is selected for paper size Heavywt 2 is automatically selected for Paper Type A B Series Size Inch Size Non standard Size...

Страница 88: ...7 beforehand The separators output as blank paper will not be used for copying and will not be counted by the meters However they will be counted if Printed Separators is selected on the Transparency...

Страница 89: ...ransparency Separators option buttons to specify whether to print on the separators and Paper Tray Settings are displayed on the right of the screen Select Blank Separators to make copies with blank s...

Страница 90: ...s for other features 7 Using the keypad enter the number of copies desired and then press Start on the control panel Copies will be made Separators Tray A4 P Plain A4 Plain B4 Plain A3 Plain Bypass A4...

Страница 91: ...pe Here we will illustrate with A4 and Heavywt 2 being selected 4 Select Save to specify settings for other features 5 Using the keypad enter the number of copies desired and then press Start on the c...

Страница 92: ...y is full a message appears on the screen Follow the instructions to remove the copies Procedure 1 Press Tri Fold Output Tray The tri fold output tray opens 2 Pull out the tri fold output tray and rem...

Страница 93: ...ars on the screen Follow the instructions to remove the copies The copies delivered to the booklet output tray automatically move to the position for removal if the required setting has been made Cont...

Страница 94: ...will drop from the tray If you place a box under the tray it will temporarily hold the copies and you can make a large volume of copies without removing the output each time the tray fills up Procedu...

Страница 95: ...es From a Bound Document Book Duplex 121 5 17 Adjusting Image Quality Image Quality Presets 123 5 18 Adjusting Copy Density Lighter Darker 125 5 19 Specifying Document Type Original Type 126 5 20 Adju...

Страница 96: ...nts load the documents in the DADF 2 From 2 Sided select 1 1 Sided or 2 1 Sided Select More to specify Originals or Original Orientation 2 Sided Report 1st page 2nd page A B Report 1 sided document 2...

Страница 97: ...ures if necessary 3 Using the keypad enter the number of copies desired and then press Start on the control panel Copies will be made When 2 1 Sided is selected specify in Originals how the two sides...

Страница 98: ...2 Sided Select More to specify Originals or Original Orientation Report 1st page 2nd page A B Report 1 sided document 2 sided document Report 2 sided copy 3 2 Loading Documents Output Format Image Qu...

Страница 99: ...the number of copies desired and then press Start on the control panel Copies will be made When 2 1 Sided is selected specify in Originals how the two sides of the 2 sided document are printed Select...

Страница 100: ...1 1 Sided 2 Sided More 141 A4 A3 B5 B4 86 A3 B4 A4 B5 81 B4 A4 B5 A5 70 A3 A4 B4 B5 Auto 100 Reduce Enlarge Auto Tray 6 HCF A4 P Tray 5 Bypass A4 P Tray 4 A3 Tray 3 B4 Tray 2 A4 Tray 1 A4 P Paper Supp...

Страница 101: ...rm the documents are loaded in the direction as specified in Original Orientation 4 Select Save to specify settings for other features if necessary 3 Using the keypad enter the number of copies desire...

Страница 102: ...ilable are Auto The to enlarge reduce the copies is automatically set based on the document size and paper size for copying You cannot however select Auto for Paper Supply When Auto is selected for Re...

Страница 103: ...ply Procedure 1 Load the documents 2 From Reduce Enlarge select the desired preset Select More to specify Originals or Original Orientation Auto Document Document 100 100 100 Copy to Edge Preset 3 2 L...

Страница 104: ...maller than the document 3 Select Save to specify settings for other features if necessary 3 Using the keypad enter the number of copies desired and then press Start on the control panel Copies will b...

Страница 105: ...122 141 173 200 B5 81 100 115 141 163 A4 70 86 100 122 141 B4 58 70 81 100 115 A3 50 61 70 86 100 3 2 Loading Documents Output Format Image Quality Added Features Basic Features Doc 50 Sample Set More...

Страница 106: ...en or 4 Select Save to specify settings for other features if necessary 5 Using the keypad enter the number of copies desired and then press Start on the control panel Copies will be made To amend a s...

Страница 107: ...r the length and width will be calculated automatically once the document size and the desired copy size are specified Procedure 1 Load the documents 2 From Reduce Enlarge select More The Reduce Enlar...

Страница 108: ...Use the respective to specify the for Y and X When for XY is used you can change the values of X and Y at the same time When Auto Fit is selected The display for Auto Fit appears Preset Variable Inde...

Страница 109: ...rm the documents are loaded in the direction as specified in Original Orientation 5 Select Save to specify settings for other features if necessary 6 Using the keypad enter the number of copies desire...

Страница 110: ...for copying will be selected automatically When paper is not loaded in the automatically selected tray or when the document size cannot be detected a message will be displayed Follow the instructions...

Страница 111: ...o select a paper tray from trays 1 2 3 or 4 that is loaded with your desired paper size When paper is not loaded in the selected tray or when the orientation of the document and the paper for copying...

Страница 112: ...o 2 1 Paper to Use Procedure 1 Load the documents 2 Select Tray 5 Bypass The Tray 5 Bypass screen is displayed 3 2 Loading Documents Once paper is loaded in tray 5 bypass the Tray 5 Bypass screen will...

Страница 113: ...aper Type Cancel Tray 5 Bypass Save A3 B4 A4 A4 P B5 A5 Postcard SRA3 Labels Transp Heavywt 1 129 162g m2 Tab Heavywt 1 64 128g m2 Tab Heavywt 2 129 162g m2 Plain Heavywt 1 64 128g m2 Heavywt 2 163 22...

Страница 114: ...Templates 4 Specify the setting for Paper Type 5 Select Save to specify settings for other features if necessary 6 Load paper into tray 5 bypass if it is empty 7 Using the keypad enter the number of c...

Страница 115: ...00 Collated Copies are output in the specified sets by page sequence e g page 1 2 3 1 2 3 1 2 3 Uncollated Copies are output in the specified sets by page number e g page 1 1 1 2 2 2 3 3 3 The Transpa...

Страница 116: ...n 51 sheets of documents load the documents in batches By using the High Document Volume feature you can load documents in batches and yet copy them with the same settings For details refer to 5 9 Loa...

Страница 117: ...proceed replenish the staples first For details refer to 10 5 Replacing Staple Cartridge When the positions for punching and stapling are in conflict e g stapling on the top left and punching on the r...

Страница 118: ...copies are to be sorted 3 Select Collated Stapled Punched 3 2 Loading Documents When loading mixed size documents align the Y direction edges of the documents Output Format Image Quality Added Featur...

Страница 119: ...number of copies desired and then press Start on the control panel Copies will be made For details on the setting of punching refer to 5 6 Punching Holes Original Orientation Head to Top Head to Left...

Страница 120: ...ng on the right the machine will not start even if you press the Start button Check the positions again Punching cannot be carried out if tray 5 bypass has been selected Punching cannot be carried out...

Страница 121: ...ead 1 1 Sided 2 Sided More 141 A4 A3 B5 B4 86 A3 B4 A4 B5 81 B4 A4 B5 A5 70 A3 A4 B4 B5 Auto 100 Reduce Enlarge Auto Tray 6 HCF A4 P Tray 5 Bypass A4 P Tray 4 A3 Tray 3 B4 Tray 2 A4 Tray 1 A4 P Paper...

Страница 122: ...ber of copies desired and then press Start on the control panel Copies will be made For details on the setting of stapling refer to 5 5 Stapling Original Orientation Head to Top Head to Left Stapling...

Страница 123: ...ents When loading the same size documents 1 If necessary select Reduce Enlarge and or Paper Supply on the Basic Features screen 2 Proceed to Step 2 When loading mixed size documents Load only the docu...

Страница 124: ...on the Basic Features screen The Finishing screen appears Edge A of the document refers to the edge that is to be inserted into the DADF 3 2 2 Loading in DADF 5 15 Copying Mixed Size Originals Output...

Страница 125: ...he finisher tray Original Orientation Head to Top Head to Left Large Output Auto Collated Stapled Punched Uncollated Off Off On Z Fold Off On Left 2 Holes Top 2 Holes Right 2 Holes Punching Left 4 Hol...

Страница 126: ...ossible while the screen prompting for sample copy verification is displayed Sample copying cannot be selected when printing a file that has been saved on the server The factory setting is Off for the...

Страница 127: ...to verify the copy 5 Check the sample copy To continue copying To continue copying the remaining copies select Start The remaining copies will be made after the sample copy is confirmed When canceling...

Страница 128: ...pages can be loaded However depending on the document size error messages may appear before 1 000 pages are scanned The same goes for selecting the High Document Volume feature during interrupt copyi...

Страница 129: ...tart Scanning of the documents for copying will begin 7 When all the documents have been loaded press End Job The remaining copy job starts If you use the DADF to load the documents you can also selec...

Страница 130: ...s Binding Erase cannot be used together with the Multiple Up or Repeat Image feature When Binding Erase is selected with the Bound Originals feature only half of the Binding Erase width will be erased...

Страница 131: ...ant to specify the width of the Edge Erase Top and Bottom is selected as an example 2 Using the keypad enter the value for the Edge Erase 3 2 Loading Documents Bound Originals Off Margin Shift S1 No S...

Страница 132: ...3 Select Top Edge again to save the setting 4 Check Original Orientation Confirm the documents are loaded in the direction as specified in Original Orientation 5 Select Save to specify settings for o...

Страница 133: ...s image shifted to the top bottom left or right within a range of 0 432 mm in 1 mm increments When Mixed Size Originals is selected the images will be shifted based on the image position of the first...

Страница 134: ...of margin shift When Auto Center is selected Use to specify the values for Left Right and Top Bottom 3 2 Loading Documents Bound Originals Off Margin Shift S1 No Shift S2 No Shift Edge Erase T B 0 1 0...

Страница 135: ...ht and Top Bottom No Shift Auto Center Corner Shift Variable Shift Original Orientation Head to Top Head to Left Top Bottom 0 0 17 0 0 0 Left Right 0 0 17 0 0 0 Cancel Side 1 Save No Shift Auto Center...

Страница 136: ...on for the shift When copying with the same settings as Side 1 When copying Side 2 with the same settings as Side 1 select Mirror Shift Horizontally facing pages are copied symmetrically on the right...

Страница 137: ...izes Select from the 13 preset standard paper sizes A3 B4 A4 A4 portrait B5 B5 portrait A5 11 17 8 5 13 8 5 11 8 5 11 portrait The factory setting for the standard sizes are A3 B4 A4 A4 portrait B5 B5...

Страница 138: ...cifying a standard size Select from the standard sizes listed 3 2 Loading Documents Bound Originals Off Margin Shift S1 No Shift S2 No Shift Edge Erase T B 0 1 0 1 L R 0 1 0 1 Bind 0 0 Original Size S...

Страница 139: ...o specify the values for X and Y 4 Select Save to specify settings for other features if necessary 5 Using the keypad enter the number of copies desired and then press Start on the control panel Copie...

Страница 140: ...e sheets Left Page Then Right If Both Pages is selected the bound document is copied from the left page first Right Page Then Left If Both Pages is selected the bound document is copied from the right...

Страница 141: ...sired and then press Start on the control panel Copies will be made Bound Originals Off Margin Shift S1 No Shift S2 No Shift Edge Erase T B 0 1 0 1 L R 0 1 0 1 Bind 0 0 Original Size Size Detect Mixed...

Страница 142: ...or the DADF Head to Left The head of the document is aligned with the left edge of the document glass or the DADF Ensure that you select Head to Left when the document is loaded in this way When you a...

Страница 143: ...uments When Original Orientation is selected after selecting the Bound Originals function a screen is displayed to confirm whether the Bound Originals function is to be canceled Perform operations as...

Страница 144: ...zes will enable the sizes to be detected automatically and then copied on suitable copy paper sizes When Reduce Enlarge is specified the copies will be made on paper sizes based on the reduction enlar...

Страница 145: ...is displayed Output Format Image Quality Added Features Basic Features Doc 50 Sample Set More 2 1 Sided Head to Head 2 2 Sided Head to Head 1 2 Sided Head to Head 1 1 Sided 2 Sided More 141 A4 A3 B5 B...

Страница 146: ...r the number of copies desired and then press Start on the control panel Copies will be made If the documents are not loaded in the direction as specified in Original Orientation the copies obtained w...

Страница 147: ...Left Two sided copies are made from the right page of the bound document starting from the right page Top Page Then Bottom Two sided copies are made from the top page of the bound document starting fr...

Страница 148: ...ter the number of copies desired and then press Start on the control panel Copies will be made 7 When the machine has finished scanning the last document select End Job Bound Originals Off Margin Shif...

Страница 149: ...uppression Prevents images from the reverse side of the document from being copied when copying the front Copies will be made based on the automatically selected settings of Lighter Darker Sharpness a...

Страница 150: ...ol and Sharpness 3 To adjust the settings of Original Type Density Control and Sharpness click their icons to display the screen for setting Once an image quality preset has been selected adjusting an...

Страница 151: ...copy density will be automatically set Any copy density level set before selecting an image quality preset will be changed accordingly Procedure 1 Load the documents 2 Select a copy density level from...

Страница 152: ...ocuments with pasted photos Light Text For documents with very light text to be made more suitable for copying Text Select this for copying with clearer text Photos graphs and illustrations will also...

Страница 153: ...on according to your document type If you select Text Select the set of options displayed Original Type Text Normal Text Density Control Normal Sharpness Normal Image Quality Presets Normal Lightest D...

Страница 154: ...t of options displayed If you select Map Proceed to Step 4 4 Select Save to specify settings for other features if necessary 5 Using the keypad enter the number of copies desired and then press Start...

Страница 155: ...quality preset will be changed accordingly The factory setting can be changed in the Tools Mode For details refer to 8 3 Setting Tools Mode Procedure 1 Load the documents 2 Select Density Control on t...

Страница 156: ...ch of the The level of each density is displayed on the bar graph 4 Select Save to specify settings for other features if necessary 5 Using the keypad enter the number of copies desired and then press...

Страница 157: ...cting an image quality preset will be changed accordingly The factory setting can be changed in the Tools Mode For details refer to 8 3 Setting Tools Mode Procedure 1 Load the documents 2 Select Sharp...

Страница 158: ...ates 3 Select one of the levels from Softer to Sharper 4 Select Save to specify settings for other features if necessary 5 Using the keypad enter the number of copies desired and then press Start on t...

Страница 159: ...tures Bound Originals Binding Erase Mixed Size Originals Repeat Image Auto Contrast of Image Quality Presets or Copy to Edge of Reduce Enlarge When specifying your own for the Reduce Enlarge feature y...

Страница 160: ...B5 81 B4 A4 B5 A5 70 A3 A4 B4 B5 Auto 100 Reduce Enlarge Auto Tray 6 HCF A4 P Tray 5 Bypass A4 P Tray 4 A3 Tray 3 B4 Tray 2 A4 Tray 1 A4 P Paper Supply Original Type Mixed Size Originals Finishing Sto...

Страница 161: ...Check Original Orientation Confirm the documents are loaded in the direction as specified in Original Orientation the copy image layout obtained will not be as desired 6 Select Save to specify settin...

Страница 162: ...hen the document placed on the document glass has been scanned for copying the following message appears 1 Replace the sheet of document on the document glass with the next sheet 2 Press Start on the...

Страница 163: ...separators inserted When you select Printed Separators copies will be made with separators inserted with the same image as those of the transparencies To prevent machine breakdown or paper jam do not...

Страница 164: ...mat screen The Transparency Separators screen is displayed 3 2 Loading Documents 4 4 Copying on Transparency A B Series Size Inch Size Non standard Size Paper Type Cancel Tray 5 Bypass Save A3 B4 A4 A...

Страница 165: ...cify settings for other features if necessary 10 Press Start Copies will be made Off On Blank Separators Printed Separators Paper Tray Settings Transp Tray 5 Bypass A4 P Transp Sep Tray 6 A4 P Plain C...

Страница 166: ...lected cannot be used for the Face Down option the copies will be output facing up The following paper types cannot be output facing down heavywt 2 postcard transparency 12 18 and SRA3 The following p...

Страница 167: ...ry 6 Using the keypad enter the number of copies desired and then press Start on the control panel Copies will be made Image Quality Added Features Basic Features Output Format Covers No Covers Multip...

Страница 168: ...The factory setting of this function can be changed through the Tools and Auditron Administration Mode To change the setting refer to 8 3 Setting Tools Mode This feature cannot be combined with the M...

Страница 169: ...d the specified number of image repetitions Output Format Image Quality Added Features Basic Features Doc 50 Sample Set More 2 1 Sided Head to Head 2 2 Sided Head to Head 1 2 Sided Head to Head 1 1 Si...

Страница 170: ...n a single sheet of paper Here we will select 2 Images 5 Load the documents 6 Select Save to specify settings for other features if necessary 7 Using the keypad enter the number of copies desired and...

Страница 171: ...last page of the document copied on the front and back cover respectively Back Cover Only To copy with back covers added When Blank Covers is selected copies will be output with a blank sheet of back...

Страница 172: ...ay 7 differs as follows With tray 5 bypass loaded Face Up selected for Output Orientation and the papers to be used as covers are placed facing up the covers will be output facing up With tray 7 loade...

Страница 173: ...bring selected 3 2 Loading Documents Load paper of the same size and in the same orientation for both the covers and the body pages Image Quality Added Features Basic Features Output Format Covers No...

Страница 174: ...cover and the internal side of the back cover are printed in simplex copying Both the external and internal sides of the front and back covers are printed in duplex copying Printed Covers 2 Sided Fron...

Страница 175: ...5 bypass No Covers Printed Covers 1 Sided Printed Covers 2 Sided Printed Covers 2 Sided Front 1 Sided Back Paper Tray Settings Front Cover Tray 3 A4 Plain Body Pages Tray 6 A4 Plain Back Cover Tray 3...

Страница 176: ...n 4 A4 P Plain A4 Plain 3 Quantity 1 sheets A4 Plain 2 A4 P Plain 7 Bypass A4 P Back Cover Tray A3 Plain 4 A4 P Plain Quantity 1 sheets A4 Plain 2 A4 P Plain 7 Bypass A4 P Body Pages Tray A4 Plain 3 A...

Страница 177: ...nto one sheet so that they will form a center bound booklet by specifying 4 for Booklet Imposision the number of pages to be copied When creating a booklet you can also set the center binding margin g...

Страница 178: ...ing scanning a screen appears allowing you to select whether to cancel the stapling or bi folding with stapling or to stop copying You cannot set 1 1 Sided 2 1 Sided Uncollated Mixed Size Originals Co...

Страница 179: ...ored Job Templates Tab Copying Off Folding Off Document Copy Bi Fold Bi Fold Stapling Report 3 4 5 2 1 6 Report 2 sided copy from 1 sided documents 6 Report 4 2 Select Only Folding Stapling when you d...

Страница 180: ...n appears Cancel Booklet Creation Save Covers Image Order No Covers Gutter 0 0 Folding Stapling Off Paper Tray Settings Covers Tray 7 A3 Plain Body Pages Tray 2 A3 Plain Off Left Bind Right Bind Top B...

Страница 181: ...page from the last may become blank The front cover is double sided copies Orient the cover tray and paper tray in the same direction as the loaded paper If tray 5 bypass or tray 7 is specified as the...

Страница 182: ...center margin with or You can set the center margin gutter in the range from 0 to 50 mm by 1 mm increments Cancel Booklet Creation Save Covers Image Order No Covers Gutter 0 0 Folding Stapling Off Pap...

Страница 183: ...y specifying Booklet Imposition You can output the copies by setting Bi fold Stapling when copying after specifying Booklet Imposition 1 Specify the tray that you loaded paper in the horizontal direct...

Страница 184: ...Basic Features screen 3 Select Booklet Creation on the Output Format screen The Booklet Creation screen appears 4 Select Only Folding Stapling 5 Specify Covers when necessary 6 Select Only Folding Sta...

Страница 185: ...s are output to the booklet output tray Refer to 4 7 Removing Copies from the Booklet Output Tray to remove the copies Cancel Save Folding Stapling Off Bi Fold Bi Fold Stapling To cancel any setting s...

Страница 186: ...tion features set to the originals become invalid Even when Reduce Enlarge Margin Shift or Edge Erase is set the sizes of annotation images and characters do not change In Multiple Up annotations are...

Страница 187: ...3 Set On to Stamp Date Page Numbering or Set Numbering for annotation 3 2 Loading Documents Image Quality Added Features Basic Features Output Format Covers No Covers Multiple Up 1 Up Transp Separator...

Страница 188: ...ve Circular IMPORTANT URGENT Copy Prohibited CONFIDENTIAL Font Size Position Print On Options All Pages First Page Only Bottom Right Bottom Center Bottom Left Center Top Right Top Center Top Left Goth...

Страница 189: ...ight and left edges of paper A customer engineer is permitted to adjust the printing position The setting is common to date printing Consult your Customer Support Center To enter the start number sele...

Страница 190: ...f 1 to 15 mm The factory setting for the margin shift is 13 mm Tab Copying cannot be selected with Margin Shift Edge Erase Binding Erase Multiple Up Repeat Image Booklet Creation Annotation Bound Orig...

Страница 191: ...ng up and with the edge opposite to the tab to be fed first 5 Press Start Copies will be made If you select Tab Heavywt 1 64 128 g m2 for Paper Type the copies cannot be output facing up If you select...

Страница 192: ...Fold are A4 and 8 5 11 The Folding feature cannot be selected with Auto for Paper Supply Transparency Covers Booklet Creation Book Duplex Output Finishing or Output Orientation features If Auto is se...

Страница 193: ...s are output to the tri fold output tray Refer to 4 6 Removing Copies from the Tri Fold Output Tray to remove the copies When Bi Fold is selected The copies are output to the booklet output tray Refer...

Страница 194: ...the memory Enter Change Job Name Enters or changes a name for a job 5 31 1 Storing Job Templates The following procedure explains how to store programmed settings in the memory Procedure 1 Select the...

Страница 195: ...at was stored in Step 1 5 Select Save The setting will be saved Recall Job Templates Store Job Templates Job Number Nob Name Job No 6 Job No 7 Job No 8 Job No 4 Job No 10 Job No 5 Job No 9 Delete Job...

Страница 196: ...nter the name and select Save You can set the same name as the existing job Recall Job Templates Store Job Templates Job Number Nob Name Job No 6 Job No 7 Job No 8 Job No 4 Job No 10 Job No 5 Job No 9...

Страница 197: ...mber to be deleted 2 Select Confirm if you wish to delete the job Recall Job Templates Store Job Templates Job Number Nob Name Job No 6 Job No 7 Job No 8 Job No 4 Job No 10 Job No 5 Job No 9 Delete Jo...

Страница 198: ...rammed settings stored in the memory Procedure 1 Load the documents 2 Select Recall Job Templates and the job number to retrieve 3 Press Start Copies will be made 3 2 Loading Documents Recall Job Temp...

Страница 199: ...h different copying settings If the machine is not touched fro a certain time after Build Job mode is selected the display automatically returns to the default screen Copy screen Specify settings for...

Страница 200: ...ou add covers or insert separators Y directions of the covers separators and paper to be copied must be the same length For details about paper size for folding refer to 5 7 Z Folding Covers No Covers...

Страница 201: ...settings of Stored Job Templates for Build Job However the setting of Build Job cannot be programmed in the memory 1 Build Job selected Ready to copy Quantity Output Format Image Quality Added Feature...

Страница 202: ...where the setting for the very first document is not specified yet Next Cancel Job End Job Sample Set End Job Save File End Job Start Build Job Select Next to program and scan the next job segment Or...

Страница 203: ...e If the output is acceptable select Start to print the remaining sets or select Cancel Finishing to continue the job without stapling and punching If the output is not acceptable select Cancel Job to...

Страница 204: ...0 Folder Name No of Files Product_A 3 Product_B 23 Auto Remote Copying No Name 0 No Name 0 Search Folder Number Folder List Copy Files Cancel To cancel copying in progress click Stop on the screen and...

Страница 205: ...mode select any other mode e g Copy Enter a folder number by using the keypad on the control panel and press Start to search the folder Select Folder Prev Next 1 6 Last First 2 3 4 4 5 6 1 Save to MO...

Страница 206: ......

Страница 207: ...6 6 6 6 Server 6 1 About Server 182 6 2 Setting Folders 184 6 3 Saving Data 198 6 4 Editing Files 206 6 5 Copying and Moving Files 220 6 6 Printing Files 229 6 7 Retrieving Files 234...

Страница 208: ...ting Folders When you save scanned documents in the shared folder No 30 the file can be accessed retrieved and printed at other linked machines Document Centre 1015S or Document Centre 1010VS Also lin...

Страница 209: ...d machine Document Centre 1010VS a file for the tray 7 at the linked machine cannot be printed automatically If a file other than Auto for Paper Supply is transferred to print automatically when the p...

Страница 210: ...ng file Renaming deleting or editing a file Copying moving a file You can copy or move a file to any folder Shared folder No 30 An open folder existing in this machine This folder can be accessed from...

Страница 211: ...set the IP address of a linked machine Remote FTP password You can set the FTP password of a linked machine The login name is fixed to dc1010s Function Handling of files stored in linked machine You c...

Страница 212: ...cessary Procedure 1 Press System Settings Meter Check The Menu screen appears 2 Select Create Change Folder The Create Change Folder Copy File screen appears Billing Meter Create Change Folder Network...

Страница 213: ...nter a folder number by using the keypad on the control panel and press Start to search the folder No Name 0 No Name 0 Folder Name No of Files Select Folder Enter Change Folder Name Close No Name 0 No...

Страница 214: ...pecify this option if necessary A copied file will be saved in the shared folder in the linked machine No 30 1 Specify a folder to set as a remote link folder and then select Select Folder You can sel...

Страница 215: ...e following procedure explains how to set the shared folder No 30 If the shared folder is set the file stored in the folder can be accessed from network connected machines All files transferred from t...

Страница 216: ...ange Mailbox Menu 850 Total Originals Scanned 1250 Total Impressions Close Copy Counter Reset Reset Enter a folder number by using the keypad on the control panel and press Start to search the folder...

Страница 217: ...returns to the Create Change Folder screen Save 1 a k u 0 j 2 b l v 3 c m w 4 d n x 5 e o y 6 f p z 7 g q 8 h r 9 i s t Space DC1010VS Clear Cancel FTP Password To clear the input you have entered pr...

Страница 218: ...nt function A file is automatically printed when a linked machine transfers the file to the shared folder with Auto Print feature enabled Even if the machine is not connected to a network you can also...

Страница 219: ...o other machines and FTP servers via a network Procedure 1 Press System Settings Meter Check The Menu screen appears 2 Select Create Change Folder The Create Change Folder Copy File screen appears Bil...

Страница 220: ...elect Modify No Name No Name Folder Name No of Files Select Folder Enter Change Folder Name Close DC_31_2D7 Remotely Linked DC_32_2D5 Remotely Linked No Name No Name Search Folder Number Create Change...

Страница 221: ...or 1 Enter the FTP password and select Save The display returns to the Create Change Folder screen 5 To finish the settings select Save or Close continuously until the display returns to the copy scre...

Страница 222: ...with no name Procedure 1 Press System Settings Meter Check The Menu screen appears 2 Select Create Change Folder The Create Change Folder Copy File screen appears Billing Meter Create Change Folder Ne...

Страница 223: ...Name 0 Folder Name No of Files Select Folder Enter Change Folder Name Close No Name 0 No Name 0 No Name 0 No Name 0 Search Folder Number Create Change Folder Copy File 2 3 4 5 6 1 Prev Next 1 7 Last F...

Страница 224: ...in the following format Even if the saved file name is changed the save time is still displayed Saved document pages About 3 000 pages about 1 000 pages in one file This is the maximum number of docum...

Страница 225: ...iles screen appears 3 Specify a folder where the file is stored and then select Select Folder The Basic Features screen appears 4 Specify settings for other features if necessary Enter a folder number...

Страница 226: ...copy file has been saved in an storage folder the same file is also copied into the remote linked folder If the Auto Print function is enabled at the shared folder multiple machines can print the sam...

Страница 227: ...Saving data in MO disk You can retrieve read a file saved in the MO disk on a client computer Refer to 6 7 Retrieving Files for details Procedure 1 Open the cover on the server and insert the MO disk...

Страница 228: ...ents for copying as well as the copying settings will be saved as a file When an error occurs during scanning or scanning is paused by selecting Stop The operation will continue after the error is res...

Страница 229: ...search the folder If the folder has a Password the Password Entry screen appears When checking files stored in a MO disk insert the MO disk and select the MO tab Hard Disk Copy File Select Folder MO P...

Страница 230: ...es Data Size Date Time 2000 08 10_16 45 23 5 6504KB 08 10_16 45 Delete File s Change File Name Merge Edit Files Copy Move Files Change File Order Select All Deseled All MO 2000 08 08_10 05 27 1 38KB 0...

Страница 231: ...ow All is selected 4 Select Copy to return to the Copy screen Use the Keypad to enter the page number you want to show or edit and select Save Note Blank covers and separators which are later added to...

Страница 232: ...No 37 to 42 or MO disk cannot be renamed Procedure 1 Select Edit Print Files to display the Hard Disk Copy File screen 2 Specify a folder where the file is stored and then select Select Folder Files...

Страница 233: ...the file names cannot be changed Hard Disk Copy File 1 2 3 4 5 6 Order File Name Pages Data Size Date Time 2000 08 10_16 45 23 5 6504KB 08 10_16 45 Delete File s Change File Name Merge Edit Files Copy...

Страница 234: ...a file stored in a folder 1 Check that the Hard Disk Copy File is displayed 2 Specify a folder where the file is stored and then select Select Folder Files stored in the folder are listed Enter a fol...

Страница 235: ...Time 2000 08 10_16 45 23 5 6504KB 08 10_16 45 Delete File s Change File Name Merge Edit Files Copy Move Files Change File Order Select All Deseled All MO 2000 08 08_10 05 27 1 38KB 08 08_10 05 Prev N...

Страница 236: ...hat have been programmed with the Transparency Booklet Creation or Tab Copying feature cannot be merged with other copy files Files that are saved with similar settings for paper supply but different...

Страница 237: ...iles Product_A 0 Product_B 23 Auto Remote Copying No Name 0 No Name 0 2 3 4 4 5 6 Search Folder Number 1 The order of the copy files selected is displayed in Order To deselect a selection select it ag...

Страница 238: ...front or back cover The number of covers can be set from 1 to 99 as required Select Edit Pages to check the contents of a file delete a page or insert a file after the selected page Or select Merge E...

Страница 239: ...ssumes that Annotation Covers Separators and the Finishing are not selected in Step 5 The Merge Files screen is displayed 5 23 Inserting Transparency Separators This does not change the setting of sta...

Страница 240: ...en The merged files will become a new file and displayed at the top of the list To specify settings for Covers Separators and Finishing select Previous Screen Ready to merge files Select Merge Del Sou...

Страница 241: ...led and vice versa A file with Face Up for Output Orientation set cannot be inserted in a file without this setting and vice versa A File with Folding enabled cannot be inserted in a file with this fe...

Страница 242: ...der If the folder has a Password the Password Entry screen appears Hard Disk Copy File Select Folder MO Prev Next 1 7 Last First No Name 0 No Name 0 Folder Name No of Files Product_A 0 Product_B 23 Au...

Страница 243: ...e multiple files into a file and apply Covers Finishing and Annotation features to the file Merge Edit Files Merge Edit Files Edit Pages Previous Screen A blank page is not included in the page number...

Страница 244: ...tation of both files is either Head to Top Head to Left Head to Head or Head to Toe between the specified page and the section boundary A file containing only blank pages as a result of the page delet...

Страница 245: ...containing the selected page e g The file will be inserted after side 2 for 2 sided documents even if the selected page is side 1 Note Blank covers and separators which are later added to the file ar...

Страница 246: ...link folder No 31 to 36 You cannot copy or move a file in a storage folder Nos 1 to 29 shared folder No 30 link folder No 31 to 36 or FTP folder No 37 to 42 to the same folder containing the source f...

Страница 247: ...opy File 1 2 3 4 5 6 Order File Name Pages Data Size Date Time 2000 08 10_16 45 23 5 6504KB 08 10_16 45 Delete File s Change File Name Merge Edit Files Copy Move Files Change File Order Select All Des...

Страница 248: ...shared folder multiple machines can print the same data simultaneously No Name 0 No Name 0 Folder Name No of Files No Name 0 No Name 0 No Name 0 No Name 0 Shared Folder Search Folder Number Folder Li...

Страница 249: ...he file after printing select Off for Save to File 10 Start Previous Screen Auto Print at Remote Machine Save to File at Remote Machine Print Quantity at Remote Machine If the free space on the hard d...

Страница 250: ...hey are automatically decompressed Procedure 1 Open the cover on the server and insert the MO disk 2 Select Edit Print Files 3 Select the MO tab The MO screen appears 4 Select the file you want to cop...

Страница 251: ...he Password Entry screen appears No Name 0 No Name 0 Folder Name No of Files Select Folder Cancel Product_A 3 Product_B 23 Auto Remote Copying No Name 0 No Name 0 Search Folder Number Folder List Copy...

Страница 252: ...ver and insert the MO disk 2 Select Edit Print Files to display the Hard Disk Copy File screen 3 Specify a folder where the file is saved and then select Select Folder Files stored in the folder are l...

Страница 253: ...e 1 2 3 4 5 6 Order File Name Pages Data Size Date Time 2000 08 10_16 45 23 5 6504KB 08 10_16 45 Delete File s Change File Name Merge Edit Files Copy Move Files Change File Order Select All Deseled Al...

Страница 254: ...MO disk an error message is displayed If the number of files on the MO disk exceeds 250 after copying or moving an error message is displayed The time taken to load a document to an MO disk is about...

Страница 255: ...creen are applied to all the selected files Procedure 1 Select Edit Print Files to display the Hard Disk Copy File screen 2 Select file s to be printed When printing file s in the folder 1 Specify a f...

Страница 256: ...8_10 05 27 1 38KB 08 08_10 05 2000 08 07_08 23 45 152 1 010KB 08 07_08 23 Prev Next 1 1 Last First 1 Hard Disk Copy File 1 2 3 4 5 6 2000 10 05_18 06 02 128 3 384KB 10 05_18 06 MO report_MDG 1 38KB 08...

Страница 257: ...te the original file settings but will not be saved The scanned images cannot be edited Select Print First Page to print the first page of the file Or press Start or Start Printing to begin printing P...

Страница 258: ...the print result The first page of the selected file is printed If there is no image for the first sheet of a document due to covers or transparency separators the first page having an image is autom...

Страница 259: ...d machines you can simultaneously print the file from multiple machines connected to the network using the Auto Send feature If you press the Job Status button and select Delete Job while printing mul...

Страница 260: ...r does not have an MO drive or if the FTP server is used under the Windows environment Refer to Help for the detailed operations and features Types of files that can be converted The types of files th...

Страница 261: ...n X DC1015S 2101_Convt YYY Disk1 3 In Disk 1 double click the Setup exe icon The Installation Wizard starts and the InstallShield Wizard dialog box appears 4 Select the language to be used during inst...

Страница 262: ...Installation starts 7 Confirm the destination folder and select Next 8 When installation is completed select Finish The converter is installed in the following location Z Program Files Fuji Xerox DC10...

Страница 263: ...s that are saved When retrieving files from the MO disk 1 Insert the MO disk containing the file saved to the MO drive of the client computer 2 Select Refresh from the View menu When retrieving files...

Страница 264: ...at Save as type you can select the compression format and whether to apply the ASCII format on the option dialog box 5 Select Save Conversion starts After a while when the conversion has completed a d...

Страница 265: ...The Add Remove Programs Properties dialog box appears 2 Select DC1015S 2101 Copy Server File Converter and click Add Remove Your computer prepares to uninstall the converter and after a moment the Con...

Страница 266: ......

Страница 267: ...7 7 7 7 Scanning 7 1 About Scanning 242 7 2 Mailbox Settings 243 7 3 Scanning Documents 265 7 4 Installing the Scanner Driver 277 7 5 Downloading Scanned Data 281...

Страница 268: ...page TIFF JPEG Single page TIFF G3MH PDF PDFF JPEG PDF G3MH as the file format when saving files A document of multiple pages are saved as a single file Specify Density Resolution File Format and Col...

Страница 269: ...edure explains how to set or change a mailbox password Set a password when necessary Passwords are set as numbers of up to 4 digits using the numerals 0 to 9 Procedure 1 Press System Settings Meter Ch...

Страница 270: ...creen appears Enter a folder number by using the keypad on the operator panel and press Start to search the folder Photo 3 Auto Send FTP Photo 5 Auto Send E mail Mailbox Name No of Files Select Mailbo...

Страница 271: ...select Confirm 7 To finish the settings select Close or Save continuously until the display returns to the copy screen The password you enter is displayed as a series of asterisks If you enter the wr...

Страница 272: ...no name Procedure 1 Press System Settings Meter Check The Menu screen is displayed 2 Select Create Change Mailbox The Create Mailbox Scan File screen appears Billing Meter Create Change Folder Networ...

Страница 273: ...more than one Mailbox When multiple Mailboxes are selected the box names cannot be set Photo 3 Auto Send FTP Photo 5 Auto Send E mail Mailbox Name No of Files Select Mailbox Enter Change MailBoxName C...

Страница 274: ...Start the File Name Entry screen is displayed to enter a file name Procedure 1 Press System Settings Meter Check The Menu screen is displayed 2 Select Create Change Mailbox The Create Mailbox Scan Fil...

Страница 275: ...rt to search the folder Photo 3 Auto Send FTP Photo 5 Auto Send E mail Mailbox Name No of Files Select Mailbox Enter Change MailBoxName Close No Name 0 No Name 0 No Name 0 No Name 0 2 3 4 4 5 6 Search...

Страница 276: ...ilbox from the client computer using the folder sharing feature Client computers can manage files such as moving copying deleting renaming files and changing properties of files Refer to 7 5 6 Accessi...

Страница 277: ...istrator Mode Account Billing Meter Create Change Mailbox Menu 850 Total Originals Scanned 1250 Total Impressions Close Copy Counter Reset Reset Enter a folder number by using the keypad on the contro...

Страница 278: ...gs select Save or Close continuously until the display returns to the copy screen Password File Name Entry Screen Auto Send Transmitted File E mail Address E mail Subject Next Prev Close Modify Item C...

Страница 279: ...l Service Pack 2 Microsoft Windows XP Professional Service Pack 1 FTP service Microsoft Internet Information Server 4 0 FTP Service The user name password and destination folder required for logging o...

Страница 280: ...ork Settings Consumables System Administrator Mode Account Billing Meter Create Change Mailbox Menu 850 Total Originals Scanned 1250 Total Impressions Close Copy Counter Reset Reset Enter a folder num...

Страница 281: ...ailbox screen Password File Name Entry Screen Auto Send Transmitted File E mail Address E mail Subject Next Prev Close Modify Item Current Setting Create Change Mailbox SMB Sharing Send as E mail Send...

Страница 282: ...e and select Save The display returns to the Create Change Mailbox screen Up to 60 characters can be entered Save Space Backspace Uppercase Clear Cancel E mail Address Taro Fuji Fujixerox co jp com 1...

Страница 283: ..._ 3 c m w 4 d n x 5 e o y 6 f p z 7 g q 8 h r 9 i s t The factory setting is 1 0MB Maximum E mail Size Save Cancel Sets the maximum size of the file that the machine can automatically send as an E mai...

Страница 284: ...ve The display returns to the Create Change Mailbox screen Cancel FTP Address Save 1 0 2 3 4 5 6 7 8 9 129 249 123 456 To clear the input you have entered press Clear Enter leading zeros for each set...

Страница 285: ...screen 5 Proceed to Step 7 Up to 20 characters can be entered Cancel FTP Password Save 1 a k u 0 j 2 b l v 3 c m w 4 d n x 5 e o y 6 f p z 7 g q 8 h r 9 i s t mdg To clear the input you have enterd p...

Страница 286: ...and then Save The display returns to the Create Change Mailbox screen 8 To finish the settings select Save or Close continuously until the display returns to the copy screen Delete Save Sets whether t...

Страница 287: ...failure and the sender address Consult your network administrator for the SMTP server address and port settings Procedure 1 Press System Settings Meter Check The Menu screen is displayed 2 Select Netw...

Страница 288: ...Address yamada fujixerox co jp You can modify the E mail settings by selecting the button below Close Modify Network Settings System Settings IP Address 129 249 220 123 Subnet Mask 255 255 255 0 Defa...

Страница 289: ...nd select Save Up to 12 characters can be entered Cancel SMTP Server Address Save 1 0 2 3 4 5 6 7 8 9 123 456 789 012 To clear the input you have entered press Clear Enter leading zeros for each set o...

Страница 290: ...recommended to enter the address of the machine administrator Enter the From address and select Save 6 To finish the settings select Save or Close continuously until the display returns to the copy s...

Страница 291: ...Name When the display of the File Name Entry screen is set to On the value entered for scanning is displayed For details about the File Name Entry screen see 7 2 3 Displaying the File Name Entry Scree...

Страница 292: ...s necessary For details refer to 7 2 Mailbox Settings After you select Single page TIFF Single page TIFF JPEG or Single page TIFF G3MH to scan the document the scanned pages are saved as a file even i...

Страница 293: ...rns display to the Mailbox list on the Mailbox List Scan File screen Mailbox List Scan File 2 3 4 5 6 0 1 Photo 3 Auto Send FTP Photo2 5 Auto Send E mail Mailbox Name No of Files Select Mailbox Check...

Страница 294: ...white documents You can specify this when Black is selected for Color Gradation Use this setting when you want to compress black and white documents for scanning Select More to specify Single page TI...

Страница 295: ...Size Use this option to specify a document size for scanning when using a non standard size document or when the size of the document is different from the copy paper When specifying a non standard d...

Страница 296: ...nts of various sizes in the DADF and scan them all at once When On is selected in High Document Volume however you can load the documents on the document glass 6 Press Start The document is scanned an...

Страница 297: ...The files saved in the Mailbox are displayed Mailbox List Scan File 2 3 4 5 6 0 1 Photo 3 Auto Send FTP Photo2 5 Auto Send E mail Mailbox Name No of Files Select Mailbox Check Files Illust 0 No Name 0...

Страница 298: ...eck Files The Password Entry screen is displayed Files saved in a Mailbox can be downloaded to the client computer For details refer to 7 5 Downloading Scanned Data 1 2 3 4 5 6 2000 08 08_10 05 27 100...

Страница 299: ...o password is set for the Mailbox the screen for entering the password is not displayed 1 2 3 4 5 6 2000 08 08_10 05 27 100KB 08 08 10 05 2000 08 07_08 23 45 2 100KB 08 07 08 23 2000 08 01_11 38 07 10...

Страница 300: ...name the Check File screen appears To overwrite the file select Overwrite To change to another file name select Redo The file name 001_abcde already exists Select Overwrite to replace the contents of...

Страница 301: ...aved then select Check Files The Password Entry screen is displayed 3 Type in the password registered for that Mailbox and select Enter The files saved in the Mailbox are displayed Mailbox List Scan F...

Страница 302: ...5 2 100KB 08 07 08 23 2000 08 01_11 38 07 100KB 08 01 11 38 2000 08 01_10 20 05 100KB 08 01 10 20 2000 08 10_16 45 23 310KB 08 10 16 45 Selecting Cancel will close the Delete File s screen without del...

Страница 303: ...download files by FTP with a Web browser or a common FTP tool For details refer to 7 5 4 Downloading files with a Web browser and 7 5 5 Downloading files Using FTP 7 4 1 About the Operating Environmen...

Страница 304: ...ve 2 Open X DC1015S 2101_Scan YYY Disk1 3 In Disk1 double click the Setup exe icon The installation wizard starts and the InstallShield Wizard download box appears 4 Select the language to be used dur...

Страница 305: ...ur User Name and Company Name then select Next Installation starts 7 When installation is completed select Finish Installation is completed The scanner driver is installed in the following location Z...

Страница 306: ...Panel Add Remove Programs The Add Remove Programs Properties dialog box appears 2 Select DC1015S 2101 Scanner Driver and click Add Remove Your computer prepares to uninstall the driver and after a mom...

Страница 307: ...FTP tool For details refer to 7 5 3 Downloading Files and 7 5 4 Downloading files with a Web browser and 7 5 5 Downloading files Using FTP 7 5 1 About the Applications This section lists available app...

Страница 308: ...ecifying Edit You can change Scanner or Server Name or IP settings for the selected scanner When specifying Delete Deletes the selected scanner Select Yes to delete the scanner To cancel the deletion...

Страница 309: ...lick OK The Scanner Settings dialog box appears The registered scanner is displayed in the Select Scanner dialog box 7 Select the scanner and click Select Scanner The Select File dialog box appears Fo...

Страница 310: ...er settings refer to the procedure from step 4 Procedure 1 Start up DocuWorks Desk 2 Select Select Source from the File menu The Select Source dialog box appears 3 Select DC1015S 2101 and click Select...

Страница 311: ...other scanner connected to the network Select the scanner you want to change and click Select Scanner When you have finished changing the scanner settings return to step 4 When specifying Save The Sav...

Страница 312: ...nload When specifying Yes downloading of the file is canceled for the remaining pages including the page that was being downloaded when you clicked Cancel When all of the files selected are not downlo...

Страница 313: ...ddress Example When the Mailbox No is 001 and the server s IP address is 123 223 123 223 specify the following ftp 001 123 223 123 223 Passwords When accessing the server you must enter the password r...

Страница 314: ...ilbox Enter the user name and password user name scanadmi password the Auditron Administrator Password to log in the position one level higher than mailboxes From there you can access any mailbox Refe...

Страница 315: ...Administrator Mode Settings 8 1 System Administrator Mode 290 8 2 Overview of Tools Mode 298 8 3 Setting Tools Mode 308 8 4 Overview of Auditron Mode 312 8 5 Auditron Menu 314 8 6 Checking Network Set...

Страница 316: ...Mode 8 1 1 Using System Administrator Mode In order to use the System Administrator Mode we have to switch from the control panel that is normally used to the control panel of the copier The following...

Страница 317: ...to make selections However this is to be used only for the System Administrator Mode 3 System Settings Meter Check button Used by the system administrator when specifying specifications for copying f...

Страница 318: ...System Administrator Mode Account Billing Meter Create Mailbox Menu 850 Total Originals Scanned 1250 Total Impressions Close Copy Counter Reset Reset Select Cancel to return to the Menu screen You can...

Страница 319: ...eatures displayed or change the image quality and the machine setting status You need to enter the Tools password in order to access Tools Mode You cannot switch to Tools Mode if there is an error mes...

Страница 320: ...factory setting of the Tools Password is 11111 Each input digit is represented by an asterisk If you made a mistake while entering the password press the C button to clear and then re enter Select Ca...

Страница 321: ...y screen or the User Password Entry screen is displayed soon Tools Menu Exit Tools Mode Paper Tray Attributes Audio Tones Image Quality Timers Reduce Enlarge Presets Administrator Password Copy Defaul...

Страница 322: ...try screen is displayed The factory setting of the Tools password is 11111 This password can be changed For security reasons change this password as soon as possible For details refer to 8 5 5 Change...

Страница 323: ...rd Entry screen is displayed soon Auditron Menu Exit Auditron Administrator Mode Auditron Setup Delete Reset Account Data Auditron Administrator Password Create Modify Accounts Check Accounts Auditron...

Страница 324: ...optional tray 6 Select the correct paper type to ensure that copies can be made correctly Selecting a wrong paper type might lead to paper jam or machine breakdown Before you set trays 2 to 4 and tray...

Страница 325: ...o Tray Switching Once Enable is selected for this item the ATS feature will be applicable to trays that are selected with Enable If Enabled during Auto Paper is selected the ATS feature will only be a...

Страница 326: ...utomatically switch to the Low Power Mode after copying is done or some operations have been made 1 2 2 Saving Energy 1 to 240 min in 1 min increments 15 min Power Saver Off Mode Specify the time for...

Страница 327: ...tray 6 HCF optional tray 7 Reduce Enlarge Specify the default value of Reduce Enlarge on the Basic Features screen Nine preset ratios are displayed there for your selection Out of the nine ratios thre...

Страница 328: ...Auto Collated Uncollated Output Orientation Specify the default value of Output Orientation on the Output Format screen Auto Face Up Face Up Reverse Order 2 Sided Specify the default value of 2 Sided...

Страница 329: ...t 1 and the third button Tray Preset 2 Tray 1 Tray Preset 1 Tray 2 Tray Preset 2 Tray 3 Tray 4 Tray 6 HCF optional Tray Preset 2 Reduce Enlarge Preset 1 Among the seven buttons of Reduce Enlarge on th...

Страница 330: ...Basic Features screen will remain as 100 Original Size Defaults You can set the document sizes to be displayed when you select Original Size on the Added Features screen Besides the button for Auto Si...

Страница 331: ...11 A3 B4 A5 A4 A4 portrait B5 B5 portrait 11 17 8 5 13 8 5 11 8 5 11 portrait Original Size 2 Original Size 3 Original Size 4 Top Center Original Size 5 Original Size 6 Original Size 7 Original Size...

Страница 332: ...blems with color mixtures that are difficult to reproduce will be resolved Lower to Normal to Higher 5 levels Item Description Available options Scan Resolution Specify the default value of Resolution...

Страница 333: ...to access a file in the mailbox The password must be 0 4 digits 1 Use the keypad to enter the password 2 Use the keypad to enter the same password and select Confirm 3 Select Close Item Available opt...

Страница 334: ...Defaults screen is displayed 3 Use to select the required feature 8 1 1 Using System Administrator Mode 8 1 2 Entering Exiting Tools Mode Tools Menu Exit Tools Mode Paper Tray Attributes Audio Tones I...

Страница 335: ...Tools Menu screen 8 Select Exit to exit Tools Mode Copy Defaults Close Tools Mode Items Current Settings Change Settings Next Page Previous Page Paper Supply Cover Supply Reduce Enlarge Original Type...

Страница 336: ...large Presets Administrator Password Copy Defaults Others Screen Layout Original Size Defaults Scan Mode Settings Each input digit is represented by an asterisk If you made a mistake while entering th...

Страница 337: ...urns to the Tools Menu screen 8 Select Exit to exit Tools Mode Reset Confirm Close Tools Mode Tools Administator Password 1 Key in the new password and select Enter 2 Key in the same password for conf...

Страница 338: ...g From Password Entry Screen and Normal Screen 1 Ready to copy Quantity Output Format Image Quality Added Features Basic Features Doc 50 Sample Set More 2 1 Sided Head to Head 2 2 Sided Head to Head 1...

Страница 339: ...ach account to zero 8 5 2 Create Modify Accounts Delete Reset Account Data You can delete the current copy volume password and copy limit of each account all at the same time here The copy volume will...

Страница 340: ...d 3 Select Key in Account Number and then enter the account number you wish to review by using the keypad Alternatively you can use to select the account number 8 1 3 Entering Exiting Auditron Mode Au...

Страница 341: ...Output or Collated is selected the number of copies set is greater than one and Start is pressed In this case even if the copy limit is exceeded during copying the next set is copied to the end if eve...

Страница 342: ...range from 100 to 2 099 Create Modify Accounts Close 100 Account Number 100 2099 Confirm Copy Volume User Password Copy Limit Auditron Administrator Mode To create or modify account data use the Up D...

Страница 343: ...itron Menu screen 10 Exit from the Auditron Administrator Mode Close User Password Confirm Copy Limit x 100 Confirm Key in Copy Limit 12345 Modify Account Number 400 Key in Password Auditron Administr...

Страница 344: ...accounts Procedure 1 Display the Auditron Menu screen 2 Select Delete Reset Account Data The Delete Reset Account Data screen is displayed 3 Select the button of the type of data that you wish to dele...

Страница 345: ...ditron Mode you must set the account data for all users 8 5 2 Create Modify Accounts User Password Entry Screen Timer You can set the time for the User Password Entry screen to be automatically displa...

Страница 346: ...Mode When you have not set the account by department user data you cannot use the Auditron feature even if you select On for Auditron Mode Auditron Setup Save Auditron Administrator Mode User Password...

Страница 347: ...itron Menu Exit Auditron Administrator Mode Auditron Setup Delete Reset Account Data Auditron Administrator Password Create Modify Accounts Check Accounts Each input digit is represented by an asteris...

Страница 348: ...its New Password Confirmation Password Auditron Administrator Password Auditron Administrator Mode Please follow the instructions on the screen Reset Confirm Close 1 Key in the new password and select...

Страница 349: ...rocedure see 7 2 5 Sending Scanned Files Automatically Procedure 1 Press System Settings Meter Check The Menu screen is displayed 2 Select Network Settings The Network Settings screen appears Billing...

Страница 350: ...s System Settings IP Address 129 249 220 123 Subnet Mask 255 255 255 0 Default Gateway 129 249 220 254 Domain Name ebina fujixerox co jp DNS1 129 249 148 1 DNS2 129 249 148 2 E mail Settings SMTP Serv...

Страница 351: ...9 Troubleshooting 9 1 Troubleshooting 326 9 2 Clearing Paper Jams 330 9 3 Clearing Document Jams 365 9 4 Solving Stapling Problems 369 9 5 Solving Curled Output 373...

Страница 352: ...document or document size cannot be detected Load document or input document size Document size is too small to be detected Document is moved Document is not placed on the document glass Document is n...

Страница 353: ...or the document cover dirty Clean the document glass or the document cover 10 1 Cleaning Copier Are the documents of very high transparency level e g transparencies If documents with high transparenc...

Страница 354: ...r tray completely 2 2 Loading Paper Changing Paper Size of Paper Trays Is paper properly loaded in the paper tray Is the paper guide of tray 5 bypass tray aligned with the paper Load the paper properl...

Страница 355: ...h paper from a new ream 2 2 Loading Paper Changing Paper Size of Paper Trays Is the paper curled Turn over the paper in the paper tray or replace with paper from a new ream 2 2 Loading Paper Changing...

Страница 356: ...ss C button to cancel the job is displayed Press the Start button to begin copying from where you left off prior to the jam Press the C button if you wish to cancel the copy job When removing jammed p...

Страница 357: ...is jammed in trays 1 to 4 Follow the procedure below to remove the jammed paper Procedure 1 Pull out the paper tray that is shown on the display 2 Remove the jammed paper Paper Jam 1 Pull out Tray 2 a...

Страница 358: ...ocedure below to remove the jammed paper Procedure 1 Lift the lever on the top cover of tray 5 bypass to open it There is a magnet in the machine to attract and hold the top cover A message will appea...

Страница 359: ...aper jam message will remain if paper is still left in the machine Remove the paper or check for jammed paper at other locations 2 2 2 Loading Paper in Tray 5 Bypass If the top cover of tray 5 bypass...

Страница 360: ...over Paper jam inside HCF top right cover and Paper jam between HCF and copier Paper jam at HCF The following message will be displayed if paper is jammed at the HCF Follow the procedure below to remo...

Страница 361: ...is jammed inside the top cover of the HCF Follow the procedure below to remove the jammed paper Procedure 1 Open the top cover of the HCF A message will appear and the machine will not start if the t...

Страница 362: ...ht cover of the HCF Follow the procedure below to remove the jammed paper If the top cover of the machine is not closed completely an error message will appear and the machine will not start If paper...

Страница 363: ...ve the jammed paper 4 If the paper is torn check that no torn pieces are left in the machine 5 Close the top right cover If the top right cover of the machine is not closed completely an error message...

Страница 364: ...age will be displayed if paper is jammed between the HCF and the copier Follow the procedure below to remove the jammed paper Procedure 1 Slide the HCF to the left until the end Paper Jam 1 Side Tray...

Страница 365: ...the machine 6 Slide back the HCF to the right until it is connected to the machine Close the lower left cover of the machine completely If the HCF is connected to the copier with this cover left open...

Страница 366: ...remove the jammed paper Procedure 1 Lift up the document output tray and press the button shown in the diagram 2 Open cover R4 to remove the jammed paper 3 If the paper is torn check that no torn piec...

Страница 367: ...he copier Follow the procedure below to remove the jammed paper Procedure 1 Press the latch on the lower left cover of the machine to open it If the cover is not closed completely an error message is...

Страница 368: ...no torn pieces are left in the machine 4 Close the lower left cover of the machine If the lower left cover of the machine is not closed completely an error message is displayed and the machine will no...

Страница 369: ...burnt as a result The following error message is displayed when paper jam occurred at the four named locations inside the machine The error message displayed differs according to the location of the...

Страница 370: ...r near the fuser unit that are affixed with labels like Hot Surface and CAUTION You can get burnt as a result 5 If the jammed paper cannot be removed turn the green lever on the right of the fuser uni...

Страница 371: ...green lever to the left If the lever cannot be turned pull out the transfer module halfway and push it in again 9 Close the front door If the front door of the machine is not closed completely an err...

Страница 372: ...paper jam location If a lever or cover is not returned to the original position an error messages is displayed and the machine will not start If paper or documents are still jammed at other locations...

Страница 373: ...R1 press down the button at the lower right of the finisher and open the lower right cover 5 3 Remove the jammed paper 4 If the paper is torn check that no torn pieces are left in the machine 5 Close...

Страница 374: ...2 to the left 3 If the paper is torn check that no torn pieces are left in the machine 4 Return lever R1 to the original position 5 Close the left door of the finisher Paper Jam R1 R2 1 Open Finisher...

Страница 375: ...re 1 Open the left door of the finisher 2 Move lever R3b to remove the jammed paper 3 If you cannot remove the paper in Step 2 lift up lever R3a to remove the jammed paper 4 If the paper is torn check...

Страница 376: ...at lever R14a and knob R13 Paper jam at lever R14b and knob R15 and Paper jam at lever R16 and knob R11 Open the finisher right door shown below to remove the jammed paper When paper jam occurs insid...

Страница 377: ...jammed paper 3 If the paper is torn check that no torn pieces are left in the machine 4 Return levers R12a and R12b to the original position 5 Close the right door of the finisher Paper Jam R12b R12a...

Страница 378: ...b R13 to the right and remove the jammed paper 3 If the paper is torn check that no torn pieces are left in the machine 4 Return lever R14a to the original position 5 Close the right door of the finis...

Страница 379: ...1 Open the right door of the finisher 2 Move lever R14b turn knob R15 to the left and remove the jammed paper 3 If the paper is torn check that no torn pieces are left in the machine 4 Return lever R...

Страница 380: ...e 1 Open the right door of the finisher 2 Move lever R16 turn knob R11 to the right and remove the jammed paper 3 If the paper is torn check that no torn pieces are left in the machine 4 Return lever...

Страница 381: ...jammed paper The messages displayed vary depending on the position of the paper jam If levers or covers are not properly set or are not completely closed a message appears and the machine will not st...

Страница 382: ...ight door of the finisher 2 Lift up lever R5 and then turn knob R11 counterclockwise to remove the jammed paper 3 If the paper is torn check that no torn pieces are left in the machine 4 Return lever...

Страница 383: ...ure 1 Open the right door of the finisher 2 Swing lever R6 and turn knob R7 clockwise to remove the jammed paper 3 If the paper is torn check that no torn pieces are left in the machine 4 Return lever...

Страница 384: ...the paper in Step 2 swing back lever R8a and swing lever R8b to the right turn knob R7 to the right then remove the jammed paper 4 If the paper is torn check that no torn pieces are left in the machi...

Страница 385: ...jammed at tri fold output tray R9 and lever R10 of the finisher Follow the instructions below to clear the jammed paper Procedure 1 Open the right door of the finisher 2 Pull out the tri fold output...

Страница 386: ...e finisher Paper jam at unit R17 lever R18 and knob R19 The following message will be displayed if paper is jammed Follow the instructions below to clear the jammed paper Procedure 1 Open the right do...

Страница 387: ...t to remove all the jammed paper from the left side of the unit 4 If paper is jammed at lever R18 open lever R18 to remove the paper 5 If the paper is torn check that no torn pieces are left in the ma...

Страница 388: ...ctions below to clear the jammed paper Procedure 1 Remove the jammed paper from the output tray 2 If the paper is torn check that no torn pieces are left in the machine 3 Open and Close the right door...

Страница 389: ...1 Remove the jammed paper from the finisher tray 2 If the paper is torn check that no torn pieces are left in the machine 3 Open and Close the right door of the finisher until the message disappears P...

Страница 390: ...r of the finisher 2 Turn knob R19 to the right to remove the jammed paper at the booklet output tray 3 If the paper is torn check that no torn pieces are left in the machine 4 Close the right door of...

Страница 391: ...eft cover top area Once the document is jammed in the DADF the machine will stop and the following error message will appear Follow the instructions below to clear the jammed paper Procedure 1 Lift th...

Страница 392: ...documents including those that have been output Those documents that have been previously scanned will be automatically skipped and scanning will begin for the others Loading torn folded or wrinkled...

Страница 393: ...low to clear the jammed document Procedure 1 Remove the jammed document at the output area of the DADF Document Jam 1 Remove the misfed original from the output area of the Document Feeder 2 Lift Docu...

Страница 394: ...he documents including those that have been output Those documents that have been previously scanned will be automatically skipped and scanning will begin for the others Loading torn folded or wrinkle...

Страница 395: ...w the procedure on the next page to proceed If the suggestion does not solve your problem contact your Customer Support Center If staples are in the following conditions after stapling contact your Cu...

Страница 396: ...UR1 1 Lift up the lever as shown in the diagram 2 Pull the staple cartridge 3 Open the staple cartridge cover as shown in the diagram and remove the jammed staple When removing the staple be extra ca...

Страница 397: ...cover until it clicks When the booklet staple cartridge UR2 front or UR3 back is used 1 Pressing the lever to the right pull out the cartridge 2 Holding the tabs of the booklet staple cartridge slide...

Страница 398: ...re your fingers 4 Holding the tabs of the booklet staple cartridge return the cartridge to the original position and gently push it until it clicks 5 Push the cartridge back to the original position 3...

Страница 399: ...e the curling correction mode among Auto ON and OFF press the De curl button on the finisher not the Reset button on the control panel while the machine is in operation The change will be applied imme...

Страница 400: ...rection is automatically performed according to the paper size or output orientation It is recommended that this feature be used in Auto mode The Auto mode is entered in the following cases After turn...

Страница 401: ...Cleaning Copier 376 10 2 Consumables 377 10 3 Replacing Toner Cartridge 380 10 4 Replacing Waste Toner Bottle A 383 10 5 Replacing Staple Cartridge 385 10 6 Emptying Punch Scrap Container 389 10 7 Ch...

Страница 402: ...he paint and coating of plastic parts of the machine Do not use too much water It might damage the document or cause machine breakdown Cleaning document cover DADF belt area Follow the procedure below...

Страница 403: ...place Now Empty or Full To display the Consumables screen follow the procedure below The consumables displayed in the screen differ depending on the optional product installed If Replace Now is displa...

Страница 404: ...artridge for 50 sheets For details contact your Customer Support Center Types of consumables Packaging Product Code Toner cartridge 1 per box CT200049 Waste toner bottle 1 per box CWAA0005 Staple cart...

Страница 405: ...ow the instructions and warning notes on the boxes and containers of the consumables before using them It is recommended to prepare an extra box of consumables Check the product code of the consumable...

Страница 406: ...ire It might explode and you can get burnt Contact your Customer Support Center for proper disposal of the used toner cartridges If you use toner cartridge waste toner bottle or staple cartridge that...

Страница 407: ...n lift to remove it Never throw the toner cartridge into a fire It might explode and you can get burnt 5 Shake the new toner cartridge to the left and right 6 Hold the toner cartridge with the arrow m...

Страница 408: ...cartridge to the right until the end 8 Turn the toner cartridge unit to the left until it clicks 9 Close the front door The Ready to copy message is displayed If the front door of the machine is not...

Страница 409: ...et burnt Contact your Customer Support Center for proper disposal of the used waste toner bottle If you use toner cartridge waste toner bottle or staple cartridge that is not recommended by us the mac...

Страница 410: ...e toner bottle into a fire It might explode and you can get burnt 5 Push the new waste toner bottle all the way into the machine 6 Close the front door The Ready to copy message is displayed The waste...

Страница 411: ...nter to place order for the staple cartridge Open the staple cartridge cover only when removing the bent staple If you do not remove the bent staple a staple jam may occur as a result Procedure 1 Open...

Страница 412: ...d the UR1 at the position shown in the diagram and lift it slightly 2 Pull out the staple cartridge 3 Push the positions indicated by arrows to remove the staple case from the cartridge 4 Push the new...

Страница 413: ...l it clicks When the booklet staple cartridge UR2 front or UR3 back is used To refill the booklet staples replace the entire cartridge 1 Pressing the lever to the right pull out the cartridge unit 2 H...

Страница 414: ...tridge return the cartridge to the original position and gently push it until it clicks 4 Push the cartridge back to the original position 3 Close the right door of the finisher If the right door of t...

Страница 415: ...ainer may be full before the next message is displayed and this may cause machine breakdown Remove the container while the power is on If you switch off the power when emptying the scraps box the mach...

Страница 416: ...e finisher When the punch scrap container has been pulled out even slightly ensure that all the scraps are discarded If there are scraps remaining the container may be full before the next message is...

Страница 417: ...copying with the Transparency feature however this will be counted when Printed Separators is selected Jammed paper and paper automatically discarded by the machine during an error 10 7 1 Checking sum...

Страница 418: ...pies is displayed for each department on the Account Billing Meter screen Even users other than Auditron administrators can check the total number of copies and allowed number of copies for each depar...

Страница 419: ...ong with the number of pages that have been copied and output When Rest is selected the number of pages counted returns to 0 Billing Meter Create Change Folder Network Settings Consumables System Admi...

Страница 420: ......

Страница 421: ...Appendix A Specifications 396 B Possible Combinations of Features 402 C Originals Copies Orientation With Covers 411 D Originals Copies Orientation With Drilled Paper 414...

Страница 422: ...10 mm Copy Paper Size Tray 1 A4 portrait A5 1 B5 portrait 1 8 5 11 portrait 1 Tray 2 3 4 B5 B5 portrait A4 A4 portrait B4 A3 8 10 portrait 8 5 11 portrait 8 5 11 8 5 13 8 5 14 11 17 12 18 2 8 K 16 K n...

Страница 423: ...L paper Tray 6 HCF optional 4 300 sheets FX P paper 4 500 sheets FX L paper Maximum paper supply capacity 6 870 sheets Tray 1 to 6 FX P paper 7 320 sheets Tray 1 to 6 FX L paper No of Continuous Copi...

Страница 424: ...Tray Capacity 50 sheets but up to 40 sheets only for paper exceeding 100 g m2 FX P and L paper Document Feed Speed 50 sheets A4 portrait 1 sided Paper Size A4 portrait B5 portrait 8 5 11 portrait Whe...

Страница 425: ...Booklet maker finisher 2 000 sheets 200 sets B5 portrait A4 portrait 8 5 11 portrait 8 10 portrait 16 K portrait 1 500 sheets 100 sets B5 A4 B4 A3 8 5 11 8 5 13 8 5 14 8 K 11 17 12 18 12 6 17 7 SRA3 W...

Страница 426: ...13 3 8 5 11 1 8 5 11 portrait 8 10 portrait 2 8 K 16 K portrait Contact your Customer Support Center in the following cases 1 When changing A4 to 8 5 11 paper 2 When changing B5 portrait to 8 10 pape...

Страница 427: ...nisher Dimensions W 200 D 725 H 1 115 mm Weight 40kg or less Document Size Document glass Max 297 432 mm Min no limit DADF Max 297 432 mm Min 148 210 mm Resolution 600 400 300 200 100dpi 23 6 15 7 11...

Страница 428: ...t the first selection is ignored D Selections can be made but the second selection is ignored E First selection will be changed to another selection S When Start button is pressed message will appear...

Страница 429: ...E First selection will be changed to another selection S When Start button is pressed message will appear to say that copying cannot be done U When selecting a feature a message is displayed that the...

Страница 430: ...button is pressed message will appear to say that copying cannot be done U When selecting a feature a message is displayed that the feature cannot be used with the one already selected 1 Cannot enlar...

Страница 431: ...E First selection will be changed to another selection S When Start button is pressed message will appear to say that copying cannot be done U When selecting a feature a message is displayed that the...

Страница 432: ...s not available C Selections can be made but the first selection is ignored D Selections can be made but the second selection is ignored E First selection will be changed to another selection S When S...

Страница 433: ...ions can be made but the second selection is ignored E First selection will be changed to another selection S When Start button is pressed message will appear to say that copying cannot be done U When...

Страница 434: ...S When Start button is pressed message will appear to say that copying cannot be done U When selecting a feature a message is displayed that the feature cannot be used with the one already selected 1...

Страница 435: ...D Selections can be made but the second selection is ignored E First selection will be changed to another selection S When Start button is pressed message will appear to say that copying cannot be do...

Страница 436: ...lection is ignored D Selections can be made but the second selection is ignored E First selection will be changed to another selection S When Start button is pressed message will appear to say that co...

Страница 437: ...tation when using DADF only When using document glass set as follows 3 For information on document orientation refer to 5 14 Specifying Image Orientation 4 For information on output orientation refer...

Страница 438: ...g Orientation on DADF 2 Staple 3 Original orientatio n 4 Output orientatio n 5 Tray 7 not selected Tray 7 selected 6 Tray 5 Tray 5 Tray 7 Top Left Head to Top Face Down Copies are output facing down H...

Страница 439: ...g Face Up Down 6 When Tray 7 is selected together with the staple option staple positions enclosed in bold rules in the table are not available This limitation can be changed by a customer engineer Co...

Страница 440: ...aper Staple Copies result resulting image Orientation on DADF 2 Copy paper setting 5 Output orientation 4 Tray 1 Tray 2 to 4 Tray 6 high capacity With staple s 3 Staples Left Double Head to Top Staple...

Страница 441: ...ntation 3 For information on stapling setting refer to 5 5 Stapling 4 For information on output orientation refer to 5 24 Outputting Face Up Down 5 If the required setting has been made by a customer...

Страница 442: ......

Страница 443: ...utput tray button 5 Bound document 114 Bound Originals 114 Breaker switch 3 10 Brightness adjustment dial 291 Build Job 173 Build Job button 13 Business paper 22 C C Clear button 12 291 Calculator Red...

Страница 444: ...mode 13 Error message screen 17 F Face Down 140 Face Down Output Orientation 140 Face Up 140 Face Up Output Orientation 140 Fault Tone 299 Feature buttons 16 Feature Defaults 301 Finishing 89 91 94 97...

Страница 445: ...Output Orientation 140 Output sorting 89 Output tray 5 P Paper Capacity 22 Paper classification 23 Paper jam 330 Paper Remaining 13 Paper size for punching 94 Paper sizes for stapling 91 Paper sizes t...

Страница 446: ...t 5 Staple cartridge holder 5 Stapling 91 Stapling positions 91 Start button 12 Stop button 12 Store Job Templates 168 Stored Job Templates 168 Switch Mode buttons 13 Switching control panel 290 Switc...

Страница 447: ...Index 421 V Variable 80 Variable Shift Margin Shift 107 Volume adjustment dial 12 W Waste toner bottle 3 Web browser 287 White space 107 X X print paper 22...

Страница 448: ......

Страница 449: ...n Address About the Manual Strongly Neutral Strongly Agree Disagree 1 It is handy 1 2 3 4 5 2 It is easy to read 1 2 3 4 5 3 Titles of chapters and sections make sense 1 2 3 4 5 4 Information is logic...

Страница 450: ......

Отзывы: