Froling TURBOMAT TM 150 Скачать руководство пользователя страница 1

Installation Instructions

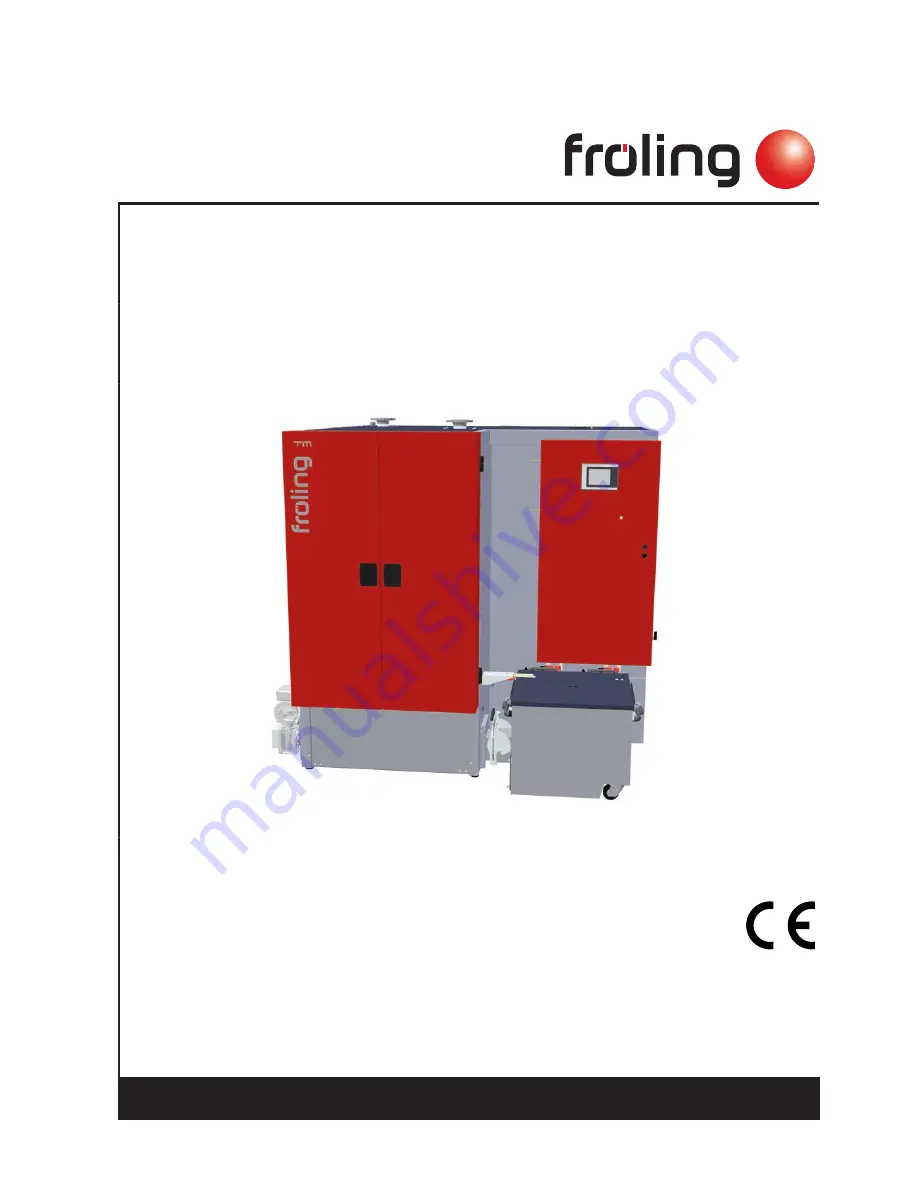
Turbomat TM 150 - 250


Translation of the original German installation instructions for technicians

Read and follow the instructions and safety information!

Technical changes, typographical errors and omissions reserved!

M0650314_en | Edition 11/08/2014

Fröling GesmbH | A-4710 Grieskirchen, Industriestraße 12 | www.froeling.com

Содержание TURBOMAT TM 150

Страница 1: ...al German installation instructions for technicians Read and follow the instructions and safety information Technical changes typographical errors and omissions reserved M0650314_en Edition 11 08 2014...

Страница 2: ...14 4 Installation 16 4 1 Transport 16 4 2 Positioning 16 4 3 Temporary storage 16 4 4 Setting up in the boiler room 16 4 4 1 Moving the boiler in the boiler room 16 4 4 2 Minimum space requirements i...

Страница 3: ...l equalisation 55 4 6 2 Fitting the insulation cover and the cover plate 56 4 7 Connecting up thermal discharge safety sensor connection 57 4 8 Connecting up the slide on duct cooling 58 4 9 Final ins...

Страница 4: ...dif ferences from the pictures and content If you discover any errors please let us know doku froeling com Subject to technical change The EC Declaration of Conformity is only valid in conjunction wi...

Страница 5: ...not observed it will lead to serious injury or death You must follow the instructions WARNING The dangerous situation may occur and if measures are not observed it will lead to serious injury or deat...

Страница 6: ...sure that staff have the protective equipment specified by accident pre vention regulations For transportation setup and assembly suitable workwear protective gloves sturdy shoes 2 4 Design Informatio...

Страница 7: ...ms in buildings to reduce energy consumption with reference to Article 4 Comma 4 of the Legis lative Decree of 9 January 1991 No 10 Italy Regulations and standards for permitted fuels 1 BImSchV First...

Страница 8: ...ts or cleaning agents containing chlorine in the room where the boiler is installed Keep the air suction opening of the boiler free from dust Ventilation of the boiler room Ventilation air for the boi...

Страница 9: ...too high air is released by means of a solenoid valve The systems are built solely with closed diaphragm expansion tanks to prevent the damaging introduction of oxygen in to the heating water Pump co...

Страница 10: ...of the storage tank and the line insulation in accordance with NORM M 7510 or guideline UZ37 please consult your installer or Froling See Addresses page 67 2 4 8 Chimney connection chimney system EN 3...

Страница 11: ...minal load C 150 150 150 Flue gas temperature at partial load 110 110 110 Flue gas mass flow with wood chip W30 13 O2 m3 h kg h 807 665 1071 882 1346 1108 Flue gas mass flow with wood chip W30 9 O2 51...

Страница 12: ...s pipe connection with FGR mm 1105 1080 1080 B Total width including fittings mm 2170 2180 2180 B1 Width boiler including insulation mm 1870 1930 1930 B2 Width ash trolley mm 870 870 870 L Total lengt...

Страница 13: ...ge safety sensor connection Inches D Flue gas pipe connection without FGR flue gas recircula tion mm 200 250 250 E Flue gas pipe connection with FGR flue gas recirculation mm 150 150 150 F Broadband p...

Страница 14: ...with the same constructional characteristics it is sufficient if the ratio of nominal heat output from the largest to the smallest boiler is 2 1 to perform the tests with the smallest and the largest...

Страница 15: ...est data for pellets Emissions in mg m 1 nominal load partial load Carbon monoxide CO mg m 13 107 11 117 9 127 Nitrogen oxide NOx mg m 99 77 93 77 86 78 Organic hydrocarbons OGC mg m 2 2 2 2 2 1 5 Dus...

Страница 16: ...to the hooking point securely and position the boiler 4 3 Temporary storage If the system is to be assembled at a later stage Store components at a protected location which is dry and free from dust...

Страница 17: ...es Observe the applicable standards and regulations when setting up the system Observe additional standards for noise protection NORM H 5190 Noise protection measures A B D C Posi tion Description Uni...

Страница 18: ...chamber door ash can control cabinet and other components are on the front of the unit The back of the boiler is opposite the front The stoker unit EOS drive and complete flue gas system are on the ba...

Страница 19: ...the combustion chamber from the side Raise the com bustion chamber just enough so that it can be positioned in the the heat exchang er without colliding Push the combustion chamber fully home into the...

Страница 20: ...ensor the combustion chamber temperature sensor the automatic ignition and the underpressure controller On the back of the combustion chamber remove the support 4 5 3 Fitting the thermal discharge saf...

Страница 21: ...e heat exchanger Pass the ceramic fibre mats through the opening in the heat exchanger and lay them in the combustion chamber as shown in the figure Ensure that you lay two mats alongside each other o...

Страница 22: ...y them on the ceramic fibre mats as shown in the figure Tip Positioning the firebricks is easier with two people standing on the opposite sides of the chamber 4 Installation Installing the boiler 22 F...

Страница 23: ...the control cabinet If the heat exchanger is installed on the left it will be necessary to change over the WOS rods as follows Lock the lock nuts 1 on the knobs 2 Turn the knobs 2 clockwise until the...

Страница 24: ...the opposite side Insert the WOS shaft 5 with the washer 8 on the opposite side and push it through Refit the bearing bush 9 and blanking plug 10 that you removed previously on the opposite side Secur...

Страница 25: ...r insulation 2 under the combustion chamber and another piece under the heat exchanger Fit the lengthways strut 3 to the cross pieces 1 Ensure that the lugs on the cross pieces and lengthways struts s...

Страница 26: ...e with the cross piece Push the floor insulation into the front area under the heat exchanger Fit the front lengthways strut 1 to the cable duct on the heat exchanger Fit the cable duct 2 to the front...

Страница 27: ...5 7 Fitting the insulating side panels Fit the insulation side panels to the combustion chamber as follows Hang the insulation side panel at the bottom at the bracket 1 of the base frame Hang the insu...

Страница 28: ...heat exchanger Remove the pre punched cut out for the WOS from the insulation side panel Fit the insulation side panel to the front of the heat exchanger Fit the insulation side panel to the right ha...

Страница 29: ...ulation side panels If necessary slightly loosen the fixing the panels to the base frame adjust and align the insulation side panels and then re tighten the screws 4 5 8 Fitting the ash cans to the he...

Страница 30: ...lt ash removal will take place at the first pull With the heat exchanger on the right the chain tensioner 2 is at the bottom With the heat exchanger on the left the chain tensioner is at the top Greas...

Страница 31: ...lation side panel with screws Fit the chain tensioner 1 to the bearing block Engage the chain tensioner 1 with the bolts on the bearing block so that the chain is tensioned correctly Set the sprocket...

Страница 32: ...flange as shown in the figure below 2 4 5 7 1 M8x25 hexagonal head screw 2 Ash removal flange 3 Spring washer 4 Locking lever 5 Bush 6 M8 toothed washer 7 M8 nut 8 Plastic grip 4 Installation Install...

Страница 33: ...2 Align and fit both safety switches 1 complete with brackets 2 to the insulation side panel Do not fully tighten the screws yet Bend the clamp 3 over the insulation side panel Lay the safety switch c...

Страница 34: ...e key plate into the safety switch Set the safety switch so that the key plate engages correctly Tighten the safety switch screws 4 5 10 Fitting the combustion chamber ash removal unit Fit the flange...

Страница 35: ...by the angle bracket 7 and then the screw for the shaft retainer 6 Fit the cover 8 to the insulation side panel 4 5mm Set the proximity sensor 3 Distance between sensor 3 and the angle bracket 7 4 5mm...

Страница 36: ...ble to the control cabinet 4 5 11 Fitting the control cabinet Hang the control cabinet 1 with the fixing bolts 2 provided flat head bolts in the control cabinet packaging in the locating slots 3 in th...

Страница 37: ...ir fan Fit the combustion air fan complete with the ceramic fibre seal Fit the combustion air fan complete with the ceramic fibre seal TM 150 TM 200 250 Installation 4 Installing the boiler Installati...

Страница 38: ...illary through the opening in the frame element and lay it to the immersion sleeve of the boiler flow Push the boiler sensor and the STL capillary with the pressure spring 1 into the pre installed imm...

Страница 39: ...bustion chamber door and as you are doing this slide the key plate 2 so that it engages smoothly with the door contact switch 3 Fix the key plate in position 2 Open and close the combustion chamber do...

Страница 40: ...n the gear motor Slide the key 6 into the groove and fit the shaft retainer 7 4 5mm Fit the gear motor 5 complete with the WOS disc 4 to the motor mounting bracket 1 with the two top screws The motor...

Страница 41: ...5 16 Installing the grate drive Prepare the gear motor Remove the shipping clamp from the gear motor Fit the vent screw supplied to the highest point Grease the shaft stub 1 Insert the seal 2 and the...

Страница 42: ...it Do not fully tighten the screws yet Fit the stocker unit complete with the ceramic fibre seal to the slide on duct Adjust the stoker unit with the adjustable foot and then tighten the screw on the...

Страница 43: ...hen tighten the screw on the adjustable foot Fit the discharge system feed screw etc according to the installation instructions enclosed 4 5 18 Installing the induced draught fan Fit the four rubber b...

Страница 44: ...e spring washers and spacer washers to the induced draught bracket Also screw on the earthing wire 3 supplied with the toothed washer as po tential equalisation Position the rubber buffers 4 of the in...

Страница 45: ...left L Press the unlock key 2 and turn the drive for the shaft to the air duct 3 to the left as far as the stop Mount secondary air servo motor 1 on the pneumatic rods The connecting cable must face d...

Страница 46: ...side panels using the hooks 3 Fit the upper cover plate 4 and screw to the insulation side panel and the side cover plates On versions with NO FGR Close off the opening for the FGR duct with heat insu...

Страница 47: ...le 3 and then tighten Fit the spring washer 6 Fix the other end of the silicon hose to the nipple of the underpressure sensor 4 with the hose clamp 5 and tighten Do not remove the red reduction plug 4...

Страница 48: ...temperature sensor 6 so that it projects by ap prox 40 50 mm into the combustion chamber 7 Fix in position on the counterflange with the clamping screws Only finger tighten the screw Combustion chambe...

Страница 49: ...e duct to the control cabinet Fit the cover 7 4 5 25 Fitting the broad band probe and flue gas sensor Screw the bush 1 into the induced draught fan flange and finger tighten Screw the broadband probe...

Страница 50: ...diate flange 1 with the fibreglass seal 2 to the upper FGR duct 3 Fit the cover 4 with the fibreglass seal 2 to the upper FGR duct 3 Fit the connecting bracket 5 with the fibreglass seal 2 to the lowe...

Страница 51: ...tion 1 Keep the heat insulation you will need it later Wrap the heat insulation mat 2 around the upper FGR duct and fix in place using spring clips at the bottom Wrap the heat insulation mat 3 around...

Страница 52: ...ower FGR duct 4 Fit the fan box 5 with its seals to the flange of the induced draught fan Fit the bracket 6 for the FGR blower fan on the induced draught duct Fit the FGR blower fan 1 Under the bracke...

Страница 53: ...eat exchanger Fit the cover plate 1 to the induced draught duct Fit the cable duct 2 to the insulation Cut out the pre punched cut out 3 from the cover plate 4 Fit the cover 5 and the cover plate 4 on...

Страница 54: ...removal unit flange Push the lever on the side of the ash removal unit flange downwards to lock the ash container in place Push the key plate into the safety switch Set the safety switch so that the k...

Страница 55: ...e cable ducts to the control cabi net Wire the connections according to the wiring diagram Secure the cables in the control cabinet to the terminal strips provided using cable ties strain relief Notes...

Страница 56: ...into the insulation Fold the cable duct upwards and fas ten with screws Fit the cover 3 and its cover plate to the left on top of the heat exchanger Fit the cover 4 in the middle on top of the heat e...

Страница 57: ...nnot be shut off 1 2 3 4 5 1 Thermal discharge safety sensor probe 2 Thermal discharge safety sensor opens at approx 95 C 3 Cleaning valve T piece 4 Dirt trap 5 Pressure reducer valve1 1 Required when...

Страница 58: ...Boiler return 3 Slide on duct flow 4 Heat exchanger drainage 5 Slide on duct return 8 Thermometer recommended 6 Gate valve or ball valve General specification for pipe connections Must be shut off ty...

Страница 59: ...tting the combustion chamber door page 61 Resistance noticeable at a gap of 3 cm Setting must be corrected Push the hinge toward the front See Setting the combustion chamber door page 61 Checking the...

Страница 60: ...tion chamber door page 61 Checking the door handle seal Open the door Insert a sheet of paper at both the top and the bottom area at the side of the door handle between the door and the boiler Close t...

Страница 61: ...n with the lock nuts 1 at the top and the bottom Door handles Loosen the lock nuts 1 at the top and bottom of the locking plate Use suitable tools e g screwdriver and hammer to move the locking plate...

Страница 62: ...ructions for modifying the parameters see the instruction manual for the boiler controller Check the system pressure of the heating system Check that the heating system is fully vented Check that the...

Страница 63: ...ns Protection Ordinance BimSchV applicable version Wood pellets Wood pellets made from natural wood with a diameter of 6 mm EU Fuel acc to EN 14961 Part 2 Wood pellets class A1 D06 and or Certificatio...

Страница 64: ...iler and as a result this will invalidate the guarantee Therefore If the fuel is changed e g from wood chips to pellets the system must be reset by Froling customer services 5 2 2 Non permitted fuels...

Страница 65: ...dry run of the system means that the discharge system must be empty at the start of initial startup Fuel must be available however so that the discharge system can be filled once the system is releas...

Страница 66: ...f service during the winter Have the system completely drained by a qualified technician Protection against frost 6 2 Disassembly To disassemble the system follow the steps for assembly in reverse ord...

Страница 67: ...LING Heizkessel und Beh lterbau GesmbH Industriestra e 12 A 4710 Grieskirchen AUSTRIA TEL 0043 0 7248 606 0 FAX 0043 0 7248 606 600 INTERNET www froeling com 7 1 2 Address of the installer Stamp Appe...

Отзывы: