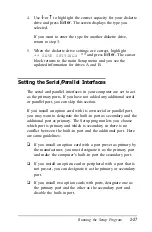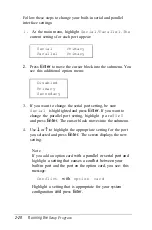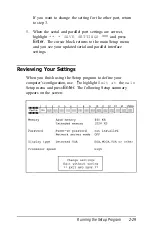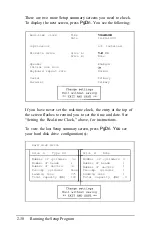
Check each Setup summary screen to see if all the information is
correct. You can press
PgUp
to display the previous screen or
PgDn
to display the next screen. If anything is incorrect, be sure
Change
settings
is highlighted and press
Enter.
The
main Setup menu appears and you can change the appropriate
settings.
Leaving the Setup Menu
If you did not change any settings or you want to cancel the
changes you made, highlight
Exit
without saving at
a Setup summary screen and press
Enter.
The Operation Menu
appears. (If you changed the time or date, the new setting takes
effect even if you exit the Setup program without saving your
changes.)
If you want to save the settings you entered, highlight
** EXIT AND SAVE
* *
and press
Enter
at a Setup
summary screen. The Setup program stores the new settings and
resets the computer using the new configuration. If you have set
a password, you need to enter it at the key prompt. (See “Using
a Power-on Password” in Chapter 3 for instructions.) The
Operation Menu appears.
If you have just run Setup for the first time, remove the
Reference diskette from the drive and turn off your system. Then
follow the instructions in your MS-DOS Installation Guide to
install MS-DOS. (If you are using a different operating system,
follow the installation instructions in that manual.)
Once you have installed MS-DOS, you should always boot the
computer from the hard disk or the MS-DOS Startup diskette
when you are finished running Setup. First remove the
Reference diskette from drive A. If you do not have a hard disk,
insert the Startup diskette. Then reset your computer to make
sure it performs all the commands in the CONFIG.SYS and
AUTOEXEC.BAT files.
Running the Setup Program.
2-31
Содержание Equity 386/25
Страница 1: ......
Страница 3: ......
Страница 14: ...xii ...
Страница 20: ...6 lntroduction ...
Страница 63: ...Hard disk drive types continued Running the Setup Program 2 25 ...
Страница 142: ...5 34 lnstalling and Removing Options ...
Страница 216: ...3 Raise the front of the subassembly to a slight angle as shown below Installing and Removing Disk Drives B 19 ...
Страница 248: ...C 14 Physically Formatting a Hard Disk ...
Страница 298: ...F 6 Specifications ...
Страница 326: ......

