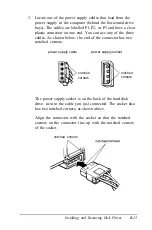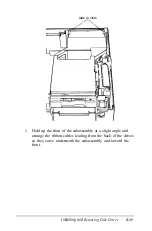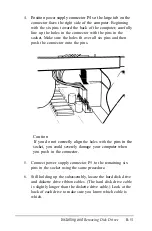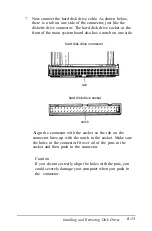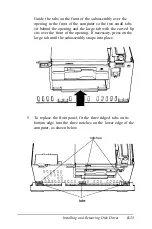
2.
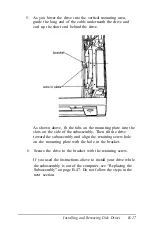
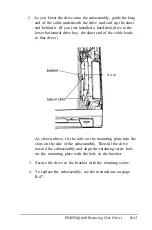
As you lower the drive onto the subassembly, guide the long
end of the cable underneath the drive and curl up the short
end behind it. (If you just installed a hard disk drive in the
lower horizontal drive bay, the short end of the cable leads
to that drive.)
- h o l e
As shown above, fit the tabs on the mounting plate into the
slots on the side of the subassembly. Then tilt the drive
toward the subassembly and align the retaining screw hole
on the mounting plate with the hole in the bracket.
3.
Secure the drive to the bracket with the retaining screw.
4.
To replace the subassembly, see the instructions on page
B-47.
Installing and
Removing Disk Drives
B-43
Содержание Equity 386/25
Страница 1: ......
Страница 3: ......
Страница 14: ...xii ...
Страница 20: ...6 lntroduction ...
Страница 63: ...Hard disk drive types continued Running the Setup Program 2 25 ...
Страница 142: ...5 34 lnstalling and Removing Options ...
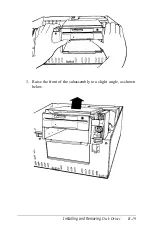
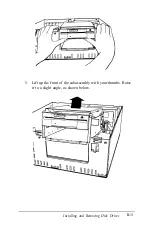
Страница 216: ...3 Raise the front of the subassembly to a slight angle as shown below Installing and Removing Disk Drives B 19 ...
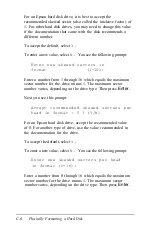
Страница 248: ...C 14 Physically Formatting a Hard Disk ...
Страница 298: ...F 6 Specifications ...
Страница 326: ......

