


7
■
Dialup connection (APN) setup
Perform the dialup connection (APN) setup required
for packet communication.
Unlike 64K data communication, phone numbers
cannot be used as a dialup connection for FOMA
packet communication. Set a dialup connection
name called APN in the FOMA terminal for each
dialup connection in advance, and enter the
registration number (cid) in the phone number field
of dialup connection. By default, “mopera.ne.jp”
(APN) is registered in cid 1 to connect to mopera,
and “mopera.net” (APN) for cid 3 to connect to
mopera U, but the APN for connections to other
providers and in-house LAN must be set.
Installing the FOMA PC configuration software
・
Uninstall an old version of the FOMA PC
configuration software (version 4.0.0), if already
installed, before installing the FOMA PC
configuration software. You can display the version
from
メニュー
(Menu)
→
バージョン情報
(Version
information) of the FOMA PC configuration software.
・
If the following software (provided with the FOMA
terminal released before this model) are installed,
uninstall them in advance:
・
W-TCP environment configuration software
・
FOMA data communication configuration software
・
Uninstall the FOMA PC configuration software in
advance, if already installed, before installing the
FOMA PC configuration software.
・
Before operation, read “Before installation/
uninstallation”.
☛
P4
1
Insert the attached CD-ROM into the PC
The
FOMA D905i CD-ROM
screen appears.
2
Click
データリンクソフト・各種設定ソフト
(Datalink software, configuration software)
3
Click
インストール
(Installation) of
FOMA PC
設定ソフト
(FOMA PC configuration software)
4
Click
次へ
(Next)
The FOMA PC configuration software license
agreement appears.
5
Read the content of the screen and click
はい
if you agree to the agreement
6
Select
タスクトレイに常駐する
(Reside in
task tray) and click
次へ
通信設定最適化
(Optimization of the communication
settings) resides in the task tray after the setup.
・
You can change the setting of resident software
after the installation.
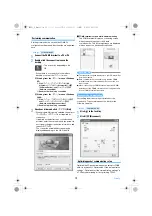
7
Check the installation path and click
次へ
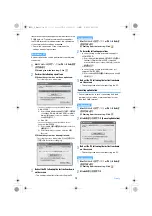
Example
For Windows XP
When clicking
インストール
(Installation), the
warning screen shown below may appear.
This warning is displayed according to the
security setting of Microsoft Internet Explorer, but
this will not cause a problem. The screen may be
different depending on your PC environment.
・
In case the screen of
ファイルのダウンロード−
セキュリティの警告
(Downloading file -security
warning) is displayed
Click
実行
(For Windows 2000, click
開く
(Open).).
・
In case of the screen of
Internet Explorer
−セ
キュリティの警告
(Security warning) is
displayed
Click
実行する
(Execute).
Next
▲
D905i_E_Manual.fm 7 ページ 2007年10月16日 火曜日 午前11時55分
Содержание FOMA D905I
Страница 1: ......
Страница 152: ...150 Camera Saving or displaying ToruCa Highlight the name of a ToruCa file z o z Save To display ToruCa Display...
Страница 269: ...267 Full Browser Viewing web pages designed for PC Full Browser 268 Setting Full Browser Browser Setting 272...
Страница 446: ...444 MEMO...
Страница 447: ...445 MEMO...
Страница 448: ...446 MEMO...
Страница 449: ...447 MEMO...
Страница 450: ...448 MEMO...
Страница 451: ...449 MEMO...
Страница 452: ...450 MEMO...
Страница 453: ...451 Index Quick Manual Index 452 Quick Manual 458...