Using the Front Panel Interface
5-13
Cycle through the options
(EXT, INT, NET, DATA 4, DATA 3, DATA
2, DATA 1, AUX)
using the
Up
o
r Down Arrows
and press
ENTER
when you come to
EXT.
Press
ENTER
to conÞrm your action when the prompt appears.
3
Move to
BKUP CLK INT
and set the backup clock the same way
you set the main clock.
4
Move to
EXT CLK
and select a frequency for the external clock.
Enabling NET IBC
You can enable IBC only by using the In-Band Bit setting in the
Network ConÞg
menu. Refer to Ò
ConÞguring the E1 Network
Parameters
Ó in Chapter 3 for more information on the IBC.
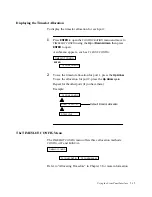
The AUX CONFIG Menu
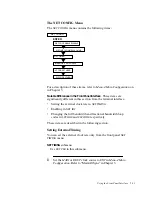
The
AUX CONFIG
menu appears on the front panel interface only when
the optional auxiliary
E1
port is in use.
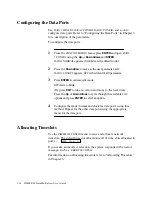
It contains the following items:
Refer to Chapter 3 for a description of the auxiliary port parameters.
AUX CONFIG
ENTER
AUX CRC ENABLE/DISABLE
AUX IMP 75/120 OHM
Содержание DL600E
Страница 1: ...DL600EE1 DataMultiplexer User s Guide...
Страница 2: ......
Страница 12: ...xiv DL600E E1 Data Multiplexer User s Guide...
Страница 14: ...xvi DL600E E1 Data Multiplexer User s Guide...
Страница 20: ...xxii DL600E E1 Data Multiplexer User s Guide...
Страница 26: ...1 6 DL600E E1 Data Multiplexer User s Guide...
Страница 34: ...2 8 DL600E E1 Data Multiplexer User s Guide...
Страница 102: ...5 26 DL600E E1 Data Multiplexer User s Guide...
Страница 113: ...Appendix A DL600E Technical Speci cations...
Страница 122: ...A 10 DL600E E1 Data Multiplexer User s Guide...
Страница 123: ...Appendix B Connector and Pin Assignments...
Страница 132: ...B 10 DL600E E1 Data Multiplexer User s Guide...
Страница 144: ...G 12 DL600E E1 Data Multiplexer User s Guide...

