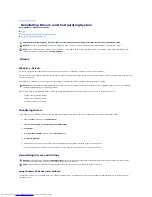
9.
If the
Modem Dialing Information
screen appears, enter the requested information and click
Next
.
10.
Enter the date, time, and time zone in the
Date and Time Settings
window, and click
Next
.
11.
If the
Networking Settings
screen appears, click
Typical
and click
Next
.
12.
If you are reinstalling Windows XP Professional and you are prompted to provide further information regarding your network configuration, enter your
selections. If you are unsure of your settings, accept the default selections.
Windows XP installs the operating system components and configures the computer. The computer automatically restarts.
13.
When the
Welcome to Microsoft
screen appears, click
Next
.
14.
When the
How will this computer connect to the Internet?
message appears, click
Skip
.
15.
When the
Ready to register with Microsoft?
screen appears, select
No, not at this time
and click
Next
.
16.
When the
Who will use this computer?
screen appears, you can enter up to five users.
17.
Click
Next
.
18.
Click
Finish
to complete the setup, and remove the CD.
19.
Reinstall the appropriate drivers
with the
Drivers and Utilities
CD.
20.
Reinstall your virus protection software.
21.
Reinstall your programs.
Back to Contents Page
NOTICE:
Do not press any key when the following message appears:
Press any key to boot from the CD.
NOTE:
To reinstall and activate your Microsoft Office or Microsoft Works Suite programs, you need the Product Key number located on the back of the
Microsoft Office or Microsoft Works Suite CD sleeve.
Содержание OptiPlex GX520
Страница 1: ...Dell OptiPlex GX520 User s Guide Mini Tower Computer Desktop Computer Small Form Factor Computer ...
Страница 22: ...4 Press Alt b to restart the computer and implement your changes Back to Contents Page ...
Страница 29: ......
Страница 97: ...Back to Contents Page ...
Страница 108: ......
Страница 145: ......
Страница 149: ...10 Replace the computer cover Back to Contents Page 3 captive screw housing 2 ...
Страница 157: ...Back to Contents Page ...
Страница 166: ...Back to Contents Page ...
Страница 181: ...10 Replace the computer cover Back to Contents Page 3 captive screw in housing 2 ...
Страница 222: ...Back to Contents Page Dell OptiPlex GX520 User s Guide Back to Contents Page ...


