1 201 Paper Jam
5 23x Paper Jam
2 200 Paper Jam
6 24x Paper Jam
3 260 Paper Jam
7 23x Paper Jam
4 250 Paper Jam
8 202 Paper Jam
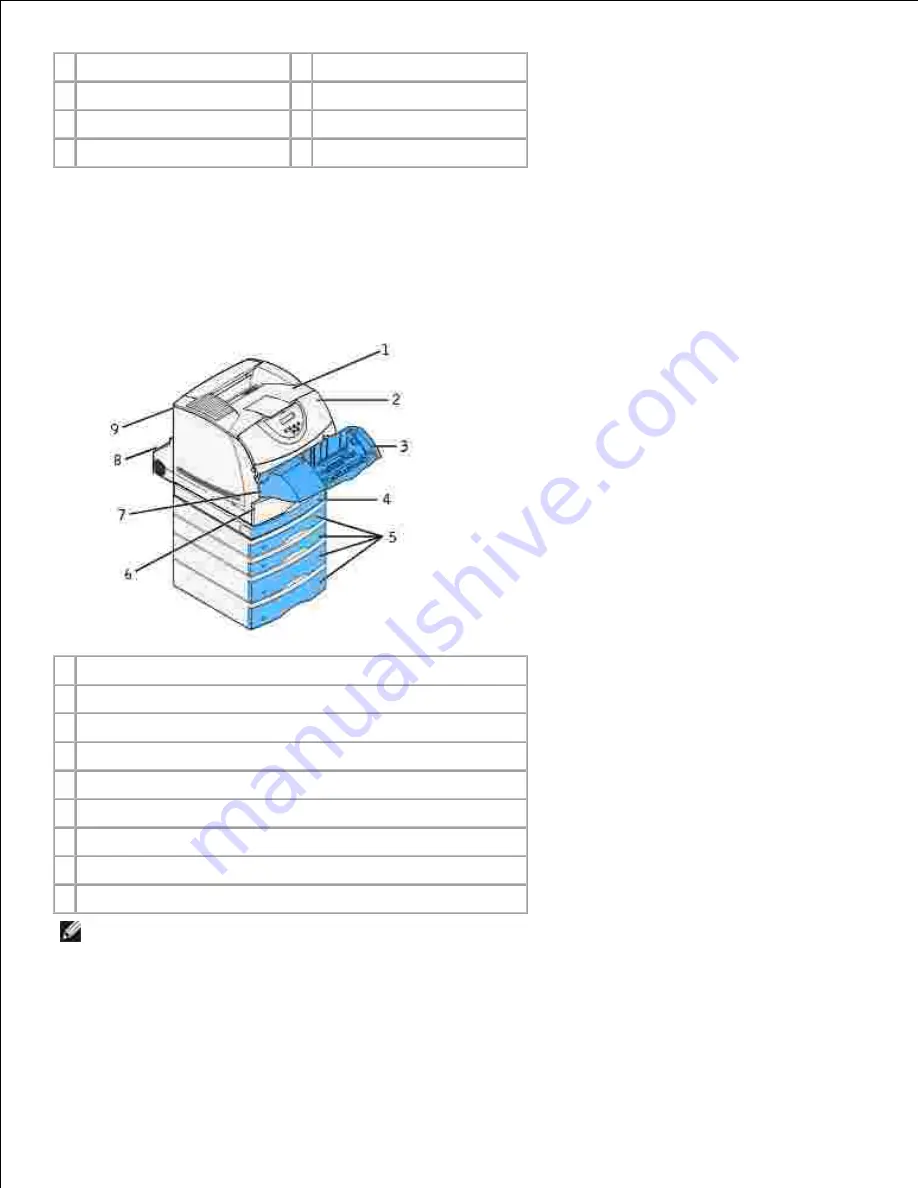
Accessing jam areas
Open doors and covers, remove trays, and remove options to access jam areas. The illustration shows the
location of sources and possible jam areas.
1 Standard output bin
2 Upper front door
3 Optional envelope feeder
4 Optional duplex unit, front access cover
5 Optional trays
6 Standard tray
7 Lower front door (down when envelope feeder is installed)
8 Optional duplex unit, rear door
9 Printer rear door
NOTE:
Jams in the standard output bin and the duplex unit are either paper or card stock.
Use the following table to locate instructions for a particular jam:
Содержание 5200n Mono Laser Printer
Страница 3: ...Refer to the Drivers and Utilities CD for details March 2003 Rev A01 ...
Страница 16: ...1 Tab 2 Slot Guide the cartridge in until it snaps into place 6 Close the upper door and then the lower door 7 ...
Страница 67: ...1 Support 2 Support extension Gently releasing the support extension drops it to its open position 3 ...
Страница 153: ...Pull down and out if the print media is in this position Close the duplex rear door Make sure it snaps into place 6 ...
Страница 155: ...Pull down and out if the print media is in this position Close the duplex rear door Make sure it snaps into place 3 ...
Страница 157: ...Close the duplex rear door Make sure it snaps into place 3 Remove the standard tray 4 ...
Страница 188: ...support dell com ...


