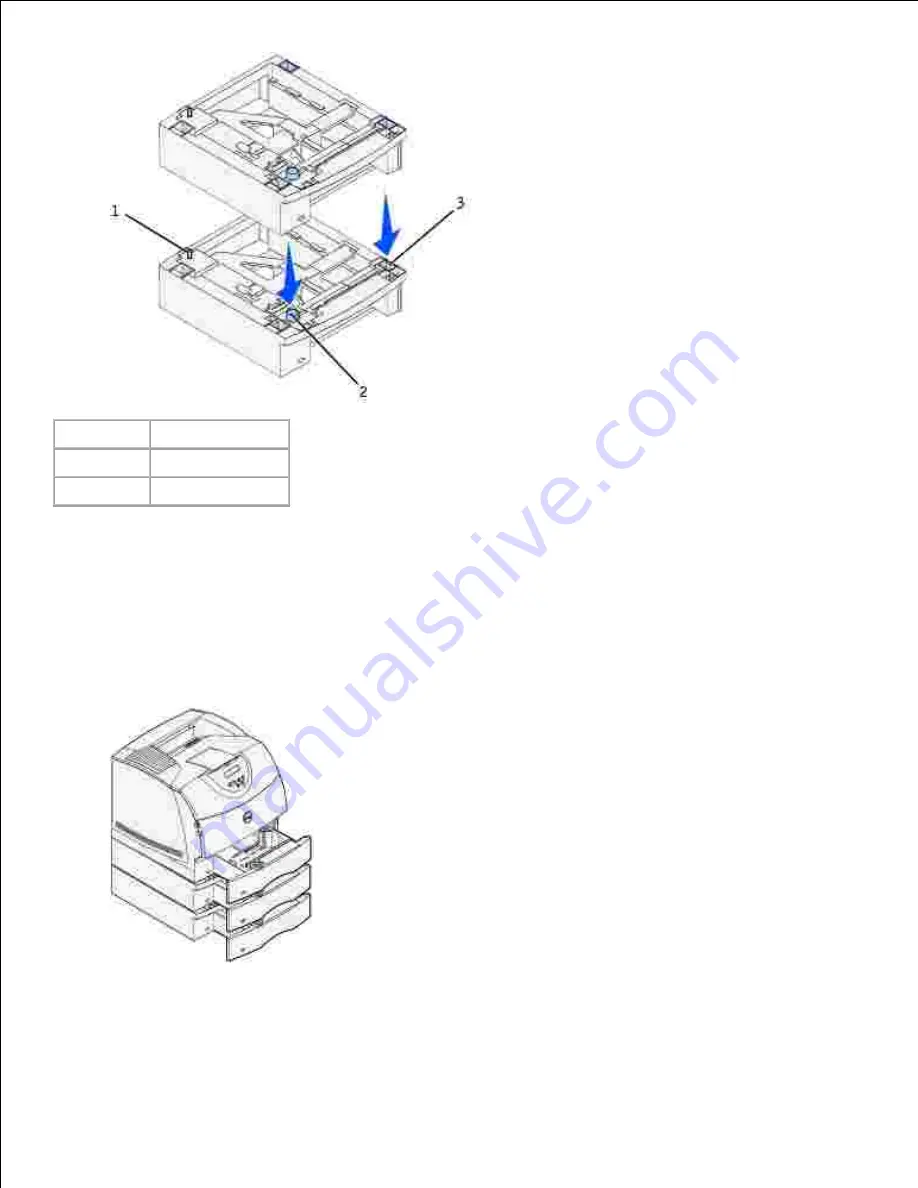
1
Tab
2
Round peg
3
Square hole
Attach decals to the trays.
3.
Decals showing the number "1" are on your printer and the standard tray. These decals keep the
standard tray paired with the printer.
Use the decals shipped with any optional drawer to mark it appropriately. Peel the decals from the
sheet and attach them to the recessed areas on the optional drawers and the matching trays.
Print a menu settings page to verify the optional tray is installed properly.
Turn the printer on.
a.
b.
4.
Содержание 5200n Mono Laser Printer
Страница 3: ...Refer to the Drivers and Utilities CD for details March 2003 Rev A01 ...
Страница 16: ...1 Tab 2 Slot Guide the cartridge in until it snaps into place 6 Close the upper door and then the lower door 7 ...
Страница 67: ...1 Support 2 Support extension Gently releasing the support extension drops it to its open position 3 ...
Страница 153: ...Pull down and out if the print media is in this position Close the duplex rear door Make sure it snaps into place 6 ...
Страница 155: ...Pull down and out if the print media is in this position Close the duplex rear door Make sure it snaps into place 3 ...
Страница 157: ...Close the duplex rear door Make sure it snaps into place 3 Remove the standard tray 4 ...
Страница 188: ...support dell com ...


