196
How-To Topics
Use Magnetic Stripe Escapes
The data to encode on a magnetic stripe is entered as text and can look like data to
print. The XPS Card Printer Driver uses special characters called Escape Codes to
identify data to encode. Data within escape codes is not printed. The driver
supports several Escape Code systems to allow easy compatibility with other
card printers. See
“Supported Escape Codes”
.
Using Magnetic Stripe Escapes
1.
Use ID software or other application to create a card design.
2.
Format the text and graphics to print on the card.
3.
Choose a location on the card where
typing the data to encode will not
affect other card design
components.
4.
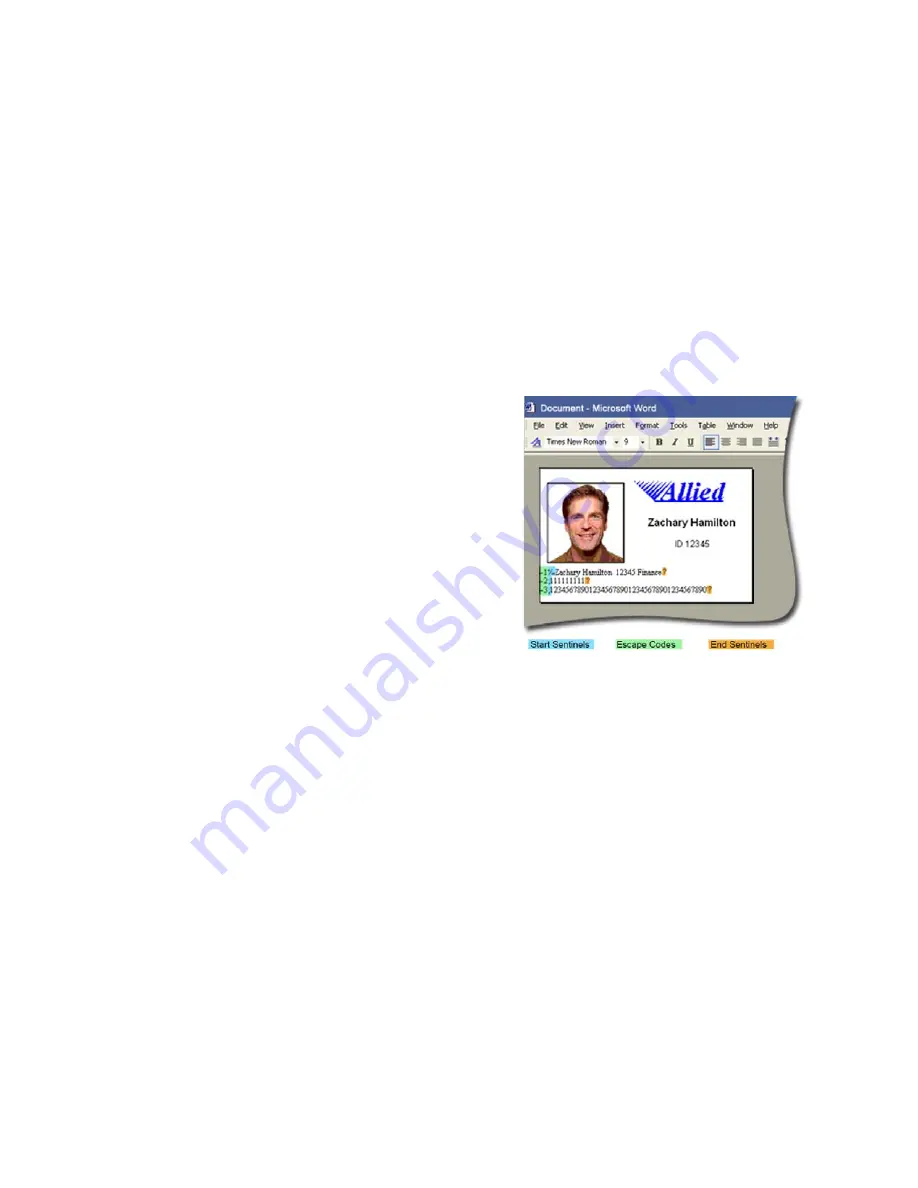
Type the encode data (text) for one
track. The example shown uses the
~<track#><Start Sentinel><Data>
<End Sentinel> syntax.
•
The text for track 1 looks like
this: ~1%Zachary Hamilton
12345 Finance?
•
Press E
NTER
to end a line.
5.
Repeat Steps 3 and 4 for each track of magnetic stripe data.
•
End each line with an E
NTER
keystroke.
•
Do not put data for two tracks on the same line.
•
Do not allow text to encode to wrap to another line.
•
You can use two or more lines of text for one track. Each line must start
and end with escape codes. The driver will add (append) lines for the
same track together.
•
Data to encode can be on side 1 (front) or side 2 (back) of the card.
•
Do not enter data to print on the same line as data to encode. It will not
print.
6.
With magnetic stripe cards in the printer, send the card to print.
7.
Verify the encoding success by passing the card through a card reader.
Содержание CD800S
Страница 1: ...Datacard XPS Card Printer Installation and User Guide October 2011 Part No 539957 001 Rev B ...
Страница 13: ...3 Printer with Input Hopper Inside a single feed or hopper equipped printer ...
Страница 14: ...4 Welcome to Card Printer Information Printer with Duplex Option Inside a printer with a duplex option ...
Страница 18: ...8 Welcome to Card Printer Information ...
Страница 32: ...22 Install the Printer 8 The installer will prompt you to connect the printer to the PC using a USB cable ...
Страница 45: ...35 10 Plug in and power on the printer ...
Страница 102: ...92 Using the Printer ...
Страница 124: ...114 Printer Driver ...
Страница 130: ...120 Removing a Printer from a Windows PC ...
Страница 148: ...138 Troubleshooting ...
Страница 158: ...148 Supplies and Parts ...
Страница 216: ...206 Legal Notices ...


