12-43
Cisco ASR 1000 Series Aggregation Services Routers Hardware Installation Guide
OL-13208-11
Chapter 12 Cisco ASR 1001 Router Overview and Installation
Cisco ASR 1001 Router Power Supply Installation
Caution
Secure the wires coming in from the terminal block plug so that they cannot be disturbed by casual
contact.
Step 10
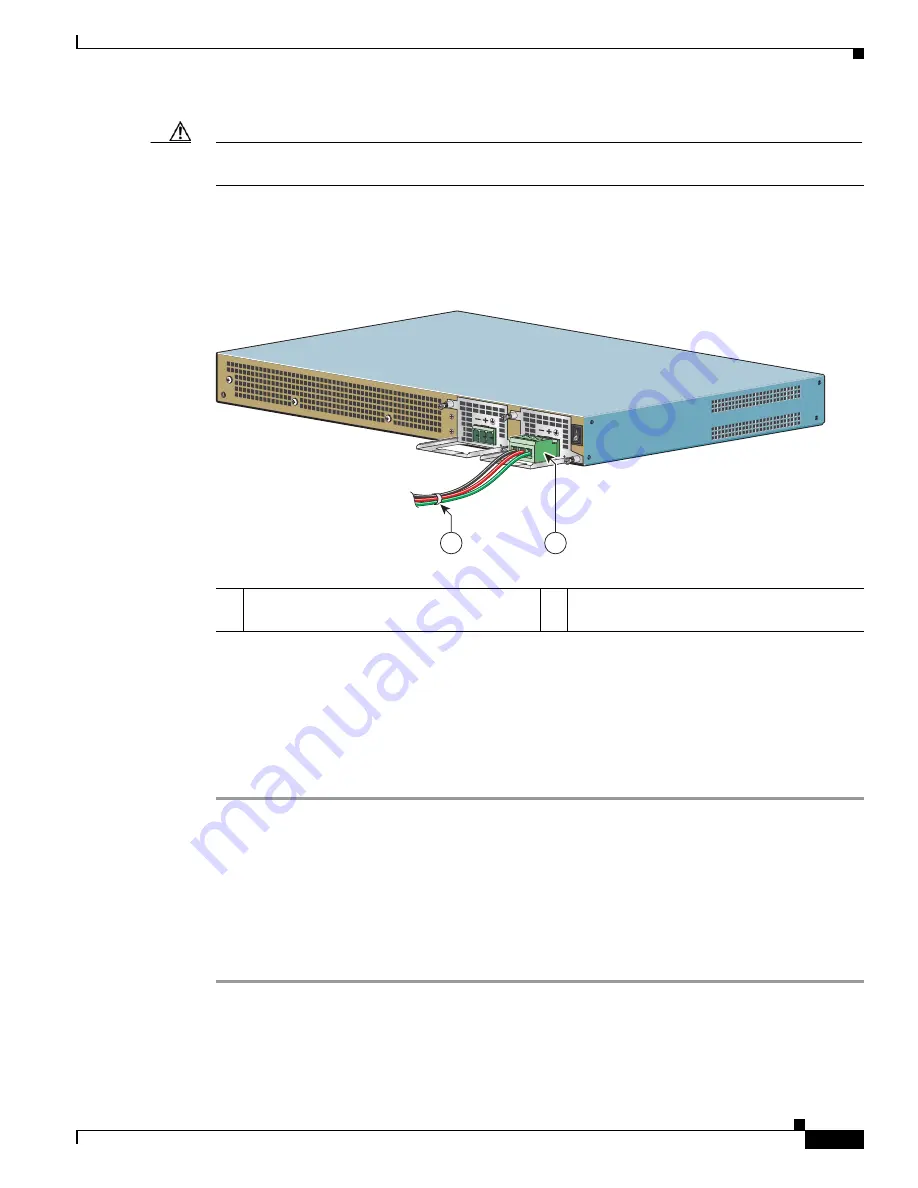
Use a tie wrap to secure the wires to the rack, so that the wires are not pulled from the terminal block
plug by casual contact. Make sure the tie wrap allows for some slack in the ground wire.
Figure 12-33
shows the DC terminal block plug inserted and the tie wrap secured.
Figure 12-33
Complete DC Terminal Block Plug Insertion and Secure Tie Wrap
Step 11
Ensure that the terminal block plug is fully seated in the terminal block header on the DC power supply
panel. You will hear a snap or click when installed properly.
Step 12
Remove the tape (if any) from the circuit breaker switch handle, and move the circuit breaker switch
handle to the On position.
Step 13
At the rear of the router, place the power supply Standby switch in the On position to turn on the router.
The power supply LEDs light up when power is supplied to the router.
This completes the procedure for connecting the DC power supply in the Cisco ASR 1001 Router.
Removing DC Input Power from the Cisco ASR 1001 Router
This section describes how to remove a DC power supply from the Cisco ASR 1001 Router. Follow these
steps:
Step 1
Turn off the circuit breaker.
Step 2
Pull the terminal block plug connector out of the terminal block head in the power supply.
Step 3
Unscrew the two power supply fasteners on the unit.
1
Lead wires secured with a tie wrap
2
DC power supply terminal block plug being
inserted into terminal block header.
207701
1
2


