3-46
COPYRIGHT © CANON ELECTRONICS INC. 2008
CANON DR-X10C FIRST EDITION
CHAPTER 3 DISASSEMBLY & REASSEMBLY
VII. UPPER UNIT-2 (ELECTRICAL SYSTEM)
1. Main Drive PCB
1) Remove the eject tray unit.
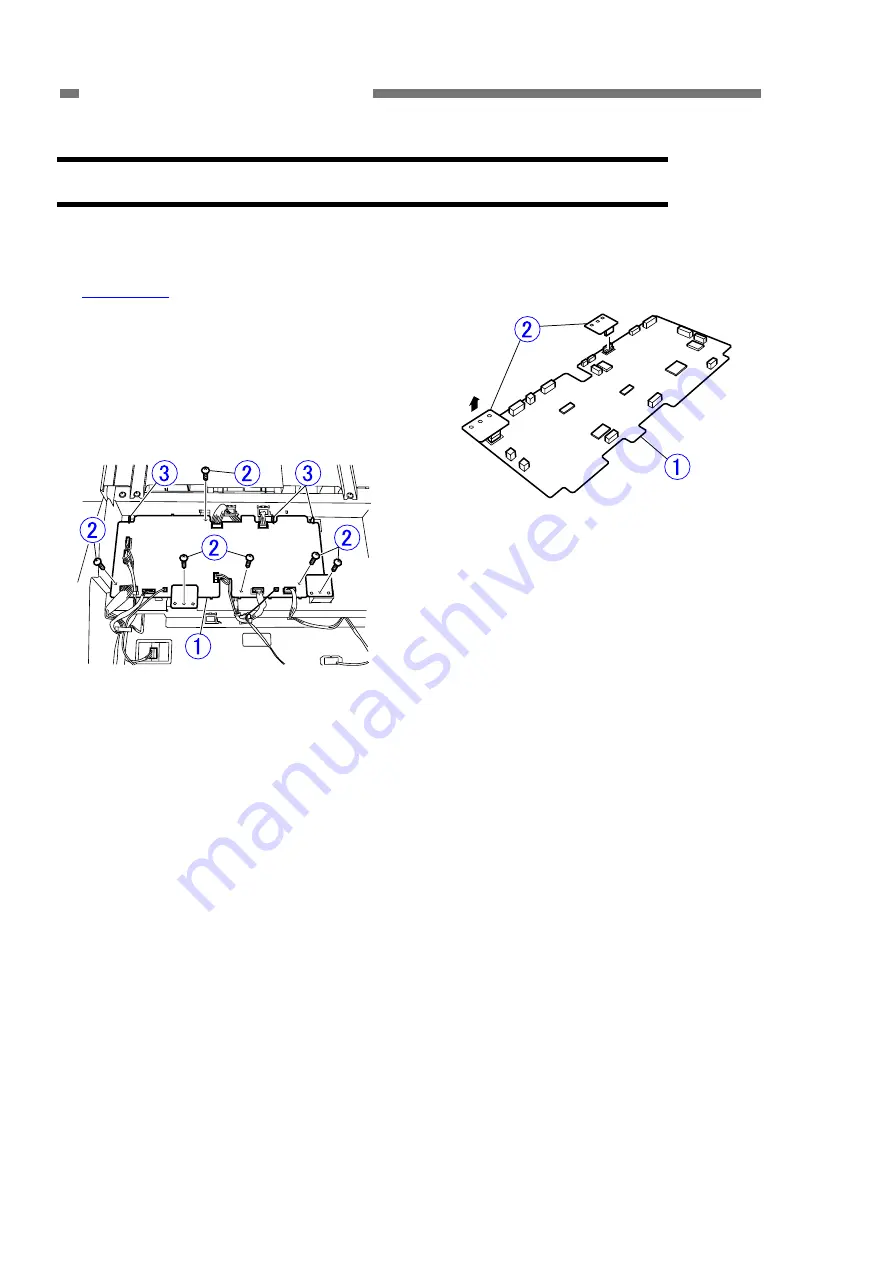
2) Remove the cables connected to the main
drive PCB
{
1
.
Then, remove 6 screws
{
2
(M3, round
tips), and while unhooking 3 pairs of the
fitting parts
{
3
, remove the main drive
PCB (with the frame LED PCB).
Figure 3-701
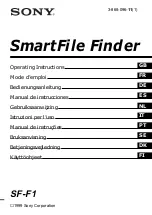
3) Remove 2 frame LED PCBs
{
2
from the
main drive PCB
{
1
.
Note:
Both frame LED PCBs are same parts.
Figure 3-702


