S-7300A
7. ADJUSTMENT
142
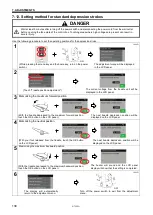
7-14. Touch key adjustment
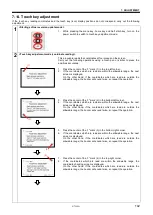
If the touch key reading coordinates and the touch key (icon) display positions do not correspond, carry out the following
adjustment.
1
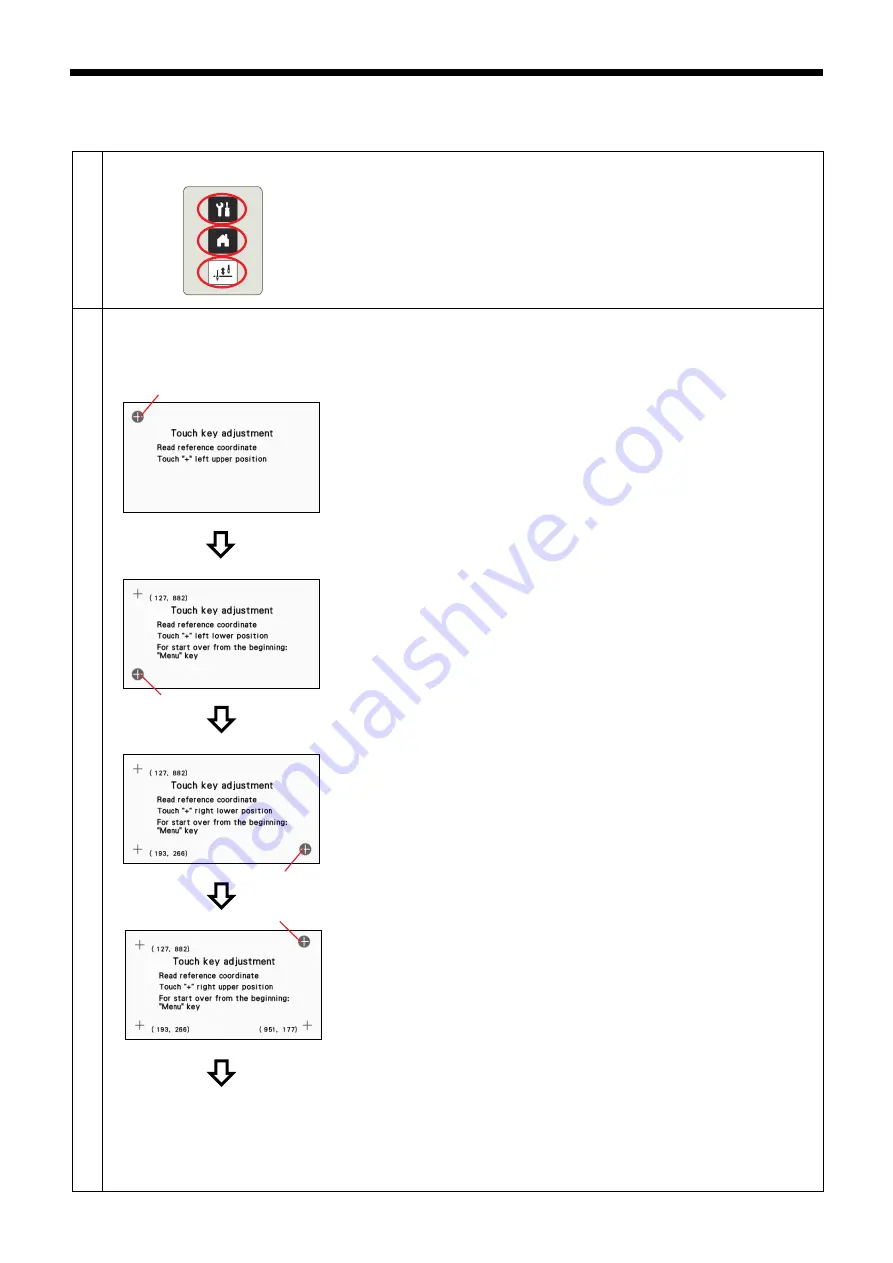
<Starting software version update mode>
1. While pressing the menu key, home key and half stitch key, turn on the
power switch to switch to touch key adjustment mode.
2
<Touch key adjustment mode (coordinate reading)>
This procedure reads the coordinates at four places on the screen.
Carry out the following operations using a touch pen or similar to press the
positions accurately.
1. Press the center of the "+" mark (1) in the top-left corner.
2. If the coordinates which are read are within the allowable range, the next
screen is displayed.
On the other hand, if the coordinates which are read are outside the
allowable range, the buzzer will sound twice, so repeat the operation.
3. Press the center of the "+" mark (2) in the bottom-left corner.
4. If the coordinates which are read are within the allowable range, the next
screen is displayed.
On the other hand, if the coordinates which are read are outside the
allowable range, the buzzer will sound twice, so repeat the operation.
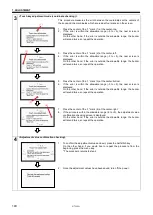
5. Press the center of the "+" mark (3) in the bottom-right corner.
6. If the coordinates which are read are within the allowable range, the next
screen is displayed.
On the other hand, if the coordinates which are read are outside the
allowable range, the buzzer will sound twice, so repeat the operation.
7. Press the center of the "+" mark (4) in the top-right corner.
8. If the coordinates which are read are within the allowable range, the
coordinate checking screen is displayed.
On the other hand, if the coordinates which are read are outside the
allowable range, the buzzer will sound twice, so repeat the operation.
(1)
(2)
(3)
(4)
Содержание S-7300A
Страница 8: ...S 7300A vi Control box Oil tank Transformer box 100 V 400 V system only 0874D ...
Страница 9: ...S 7300A vii ...
Страница 107: ...S 7300A 6 ASSEMBLY 96 1094D 6 14 Stand 1 Stand L 2 Stands R 3 pcs ...
Страница 174: ...S 7300A 8 REPLACING PARTS 163 15 Install the top cover 1 16 Install the pulley cover 2 1029D 1030D ...

