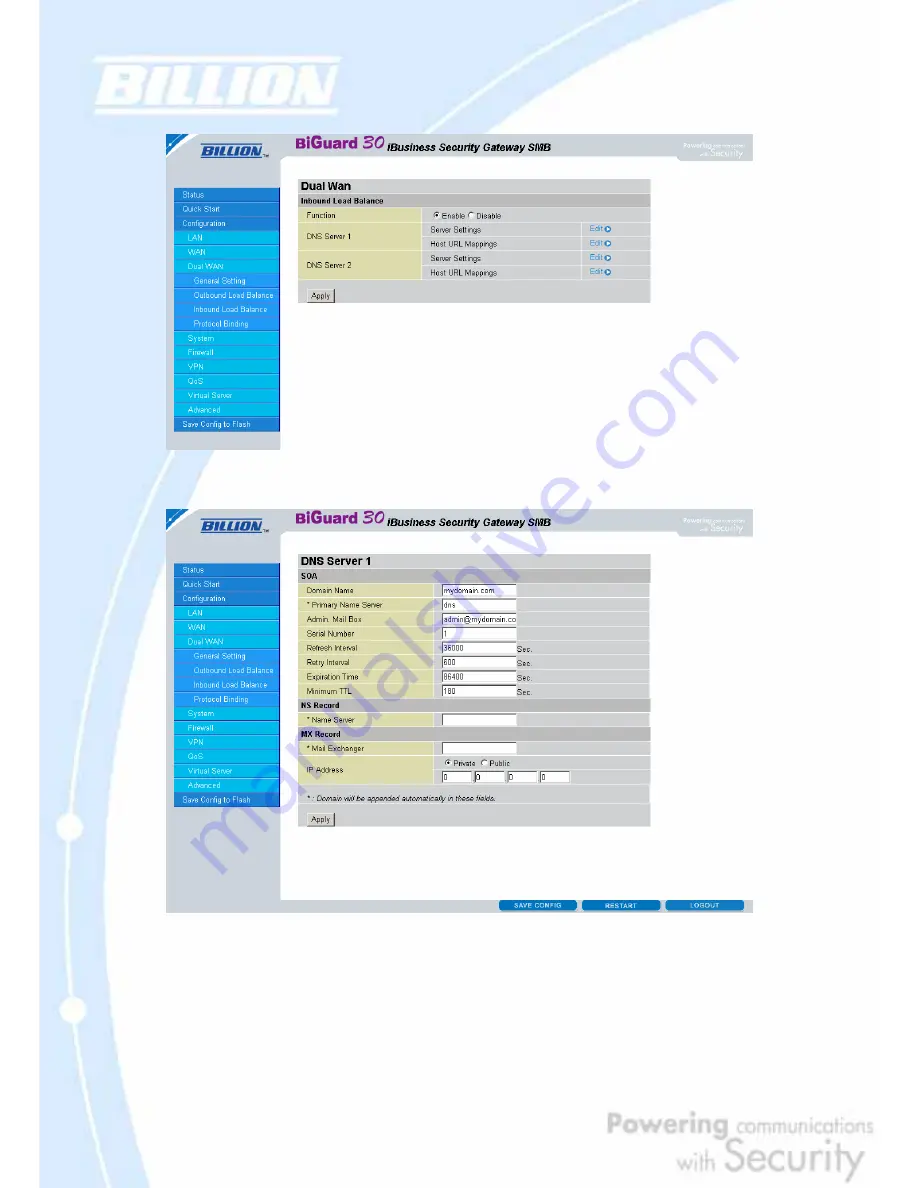
184
Enable
radio button and configure DNS Server 1 by clicking
Edit
.
Step 3: Input DNS Server 1 settings and click
Apply
.
Step 4: Configure your Host URL Mapping for DNS Server 1 by clicking
Edit
to enter
the Host URL Mappings List. Click
Create
and input the settings for Host URL
Mappings and click
New
.
Содержание BiGuard 30
Страница 1: ...BiGuard 30 iBusiness Security Gateway SMB User s Manual Version Release 5 00 FW 1 03...
Страница 46: ...46 2 Double click the Network icon The Network window displays a list of installed components...
Страница 48: ...48 c Select the manufacturer and model of your Ethernet adapter then click OK If you need TCP IP a Click Add...
Страница 51: ...51 2 In the Control Panel double click Network and choose the Configuration tab...
Страница 171: ...171 Main Aggressive mode peer ID is identifier string ISAKMP SA Established IPsec SA Established...
Страница 182: ...182 Step 4 From the same menu set the WAN2 DDNS settings Step 5 Click Save Config to save all changes to flash memory...
Страница 190: ...190 Step 4 Go to Configuration Advanced Dynamic DNS and input the dynamic DNS settings for WAN1 and WAN2 WAN1...
Страница 191: ...191 WAN 2 Step 5 Go to Configuration Virtual Server and set up a virtual server for both FTP and HTTP...
Страница 207: ...207 Step10 Input PPTP Server Address and press Next Step11 Please press Finish...
Страница 211: ...211 Step5 In another BiGuard as Client Go to Configuration WAN ISP Settings Step6 Click Apply and Save CONFIG...


