■
All Tests (Separate) creates a separate file for each test containing all results.
8
Select the format of the report in the Report Format box:
■
XML creates an .xml file containing all the clashes and a jpeg of their viewpoints alongside their details.
On choosing this option, you will need to select or create a folder for the files and enter a name for the
xml file.
■
HTML will create an .html file containing all the clashes and a jpeg of their viewpoints alongside their
details. On choosing this option, you will need to select or create a folder for the files and enter a name
for the html file.
NOTE
To customize the appearance or layout of the html file, you will need to edit the
clash_report_html_lang.xsl
file, where
lang
is a code representing your language. The installed file is
located in the stylesheets subdirectory of the Autodesk Navisworks install directory. You can copy the edited
file to the stylesheets subdirectory of any of the Autodesk Navisworks search directories. See “
on page 84 for more information.
■
Text creates a .txt file containing all the clash details and the location of a jpeg of each clash.On choosing
this option, you will need to select or create a folder for the files and enter a name for the txt file.
■
As Viewpoints creates a folder in the Saved Viewpoints dockable window, called the name of the test.
Each clash is saved as a viewpoint in this folder, with a comment attached containing the clash result
details.
9
Click the Write Report button to write the report.
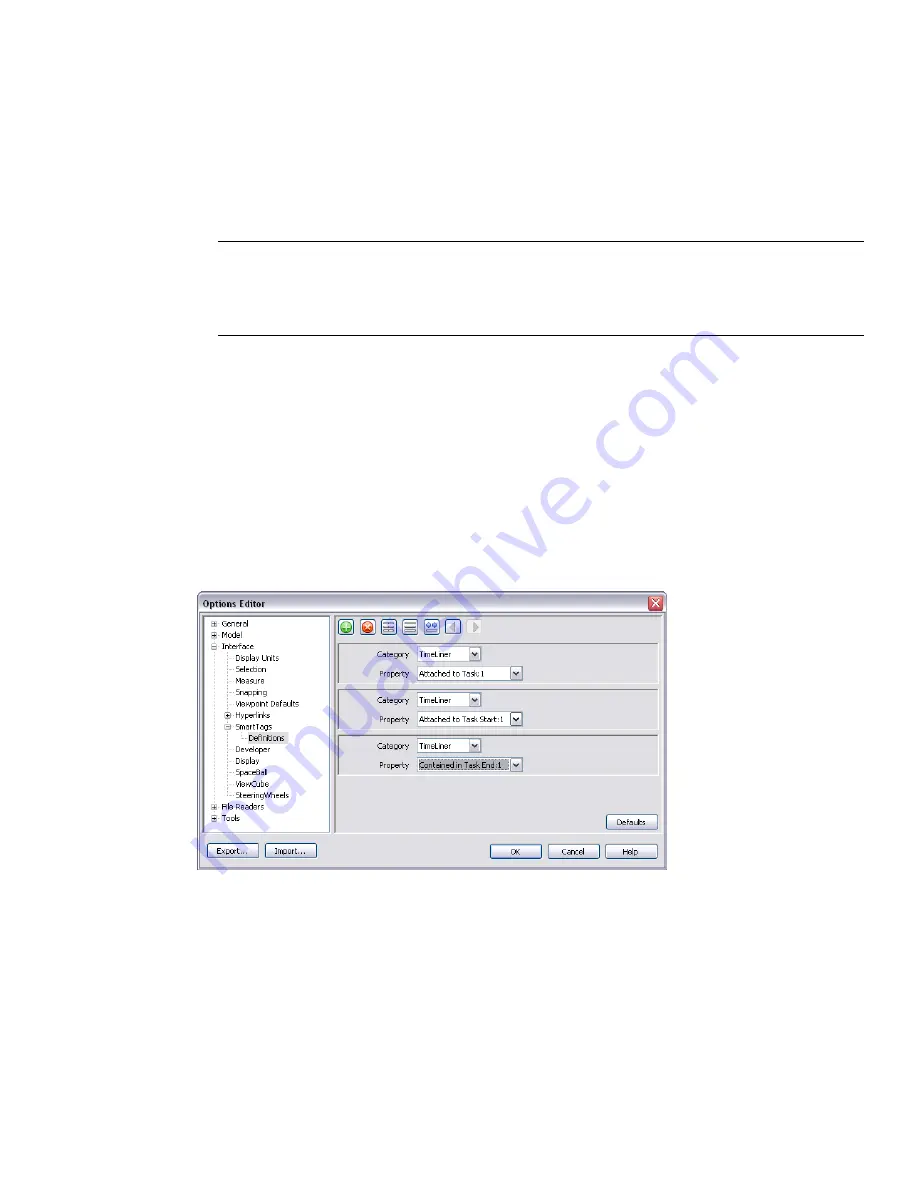
Configure Smart Tags for your report
1
Click Tools
➤
Global Options.
2
Expand the Interface node in the Options Editor, expand the Smart Tags option, and click Definitions.
3
Select TimeLiner in the Category box.
4
Select Attach to Task: 1 in the Property box.
5
Add several more definitions with TimeLiner selected in the Category box, and the desired properties in
the Property box.
6
Click OK to save the changes.
When you now select the Smart Tags check box in the Contents area on the Report tab of the Clash Detective
window, your report will include the additional data you've specified here.
400 | Chapter 16 Locate and Manage Interferences
Содержание 507B1-90A211-1301 - NavisWorks Manage 2010
Страница 1: ...Autodesk Navisworks Manage 2010 User Guide March 2009 ...
Страница 12: ...xii Contents ...
Страница 14: ...2 Part 1 Welcome to Autodesk Navisworks Manage 2010 ...
Страница 64: ...52 Chapter 3 Installation ...
Страница 97: ...Get a Whole Project View 85 ...
Страница 98: ...86 Part 2 Get a Whole Project View ...
Страница 136: ...124 Chapter 5 Work with Files ...
Страница 178: ...To toggle ViewCube Click View Head Up Display ViewCube 166 Chapter 6 Explore Your Model ...
Страница 262: ...250 Chapter 9 Use Viewpoints and Sectioning Modes ...
Страница 270: ...258 Chapter 11 Work Within a Team ...
Страница 282: ...270 Chapter 12 Share Data ...
Страница 346: ...334 Chapter 14 Create Photorealistic Visualizations ...
Страница 460: ...448 Chapter 17 Autodesk Navisworks Reference ...
Страница 466: ...454 Glossary ...


