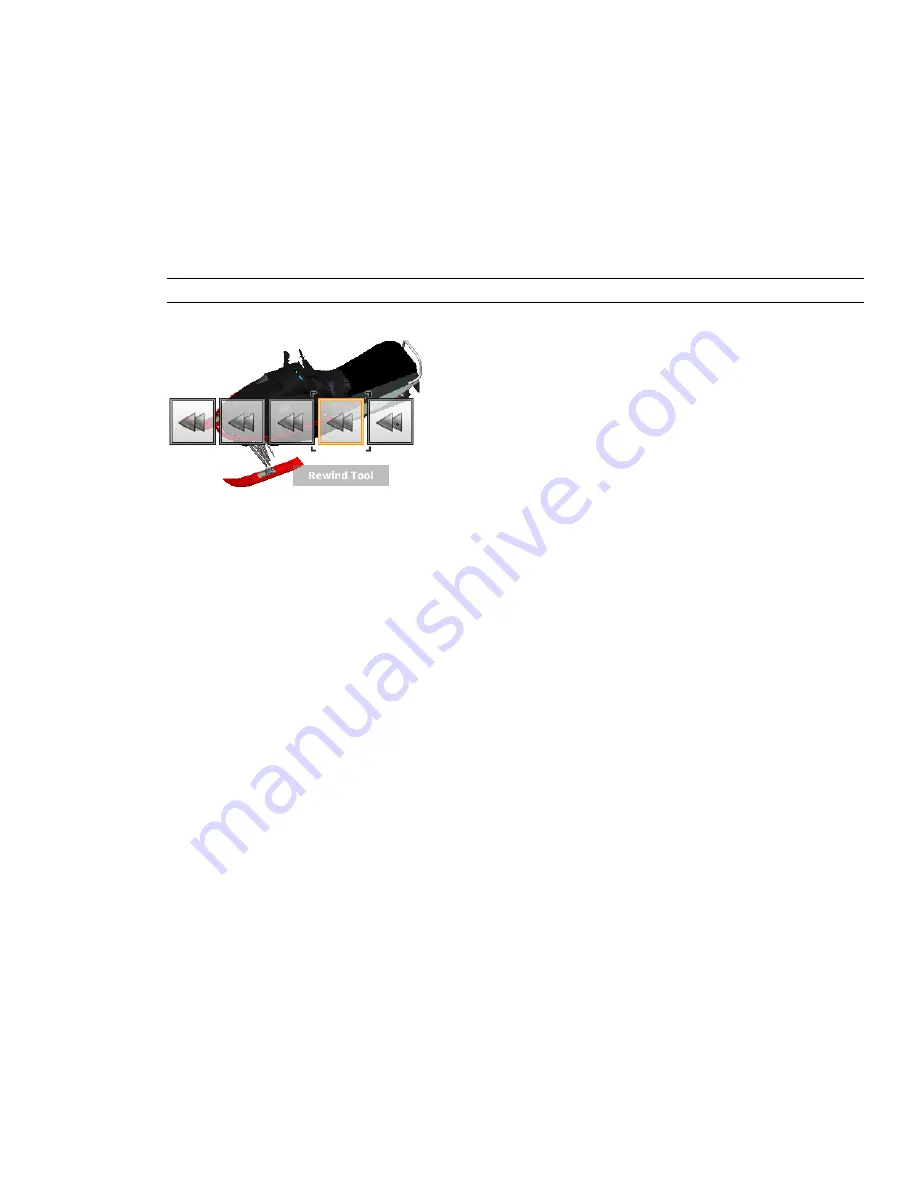
Rewind Tool
As you use the navigation tools to reorient the view of a model, the previous view is saved to the navigation
history. The navigation history holds a representation of the previous views of the model along with a thumbnail.
A separate navigation history is maintained for each window; it is not maintained after the window is closed.
Rewind navigation history is view-specific.
With the Rewind tool, you can retrieve previous views from the navigation history. From the navigation history,
you can restore a previous view or scroll through all of the saved views.
When you hold down the button on the pointing device over the Rewind tool on the wheel, the Rewind History
panel is displayed. You can scroll through the navigation history. To restore one of the previous views in the
navigation history, drag the bracket to the left in the Rewind History panel.
NOTE
Rewind history is not saved between sessions.
To restore the previous view
1
Display a wheel.
2
Click the Rewind wedge.
To restore a previous view with the Rewind History panel
1
Display a wheel.
2
Click and hold the Rewind wedge.
The Rewind History panel is displayed.
3
While holding down the button on your pointing device, drag to the left or to the right to restore a previous
view.
Dragging to the left restores an older previous view. Dragging to the right restores a view that is newer than
the one you are currently viewing. You must have previously used the Rewind tool to see views available
on the right. The current position in the navigation history is indicated by the orange box that is dragged
along the Rewind History panel.
Up/Down Tool
Unlike the Pan tool, you use the UP/Down tool to adjust the height of the current viewpoint along the model's
Z axis. To adjust the vertical elevation of the current view, you drag up or down. As you drag, the current elevation
and the allowed range of motion is displayed on a graphical element called the Vertical Distance indicator.
The Vertical Distance indicator has two marks that show the highest (Top) and lowest (Bottom) elevation the
view can have. While changing the elevation with the Vertical Distance indicator, the current elevation is shown
by the bright orange indicator, while the previous elevation is shown by the dim orange indicator.
146 | Chapter 6 Explore Your Model
Содержание 507B1-90A211-1301 - NavisWorks Manage 2010
Страница 1: ...Autodesk Navisworks Manage 2010 User Guide March 2009 ...
Страница 12: ...xii Contents ...
Страница 14: ...2 Part 1 Welcome to Autodesk Navisworks Manage 2010 ...
Страница 64: ...52 Chapter 3 Installation ...
Страница 97: ...Get a Whole Project View 85 ...
Страница 98: ...86 Part 2 Get a Whole Project View ...
Страница 136: ...124 Chapter 5 Work with Files ...
Страница 178: ...To toggle ViewCube Click View Head Up Display ViewCube 166 Chapter 6 Explore Your Model ...
Страница 262: ...250 Chapter 9 Use Viewpoints and Sectioning Modes ...
Страница 270: ...258 Chapter 11 Work Within a Team ...
Страница 282: ...270 Chapter 12 Share Data ...
Страница 346: ...334 Chapter 14 Create Photorealistic Visualizations ...
Страница 460: ...448 Chapter 17 Autodesk Navisworks Reference ...
Страница 466: ...454 Glossary ...


