24
9. Monitoring sensor test
Sensor test controls that every sensor, its installation and wiring connection to the computer, are running
perfectly.
To start sensor test, enter into Main Menu and select the corresponding option to “Monitor”
MENU > MONITOR > SENSOR TEST (ENABLED)
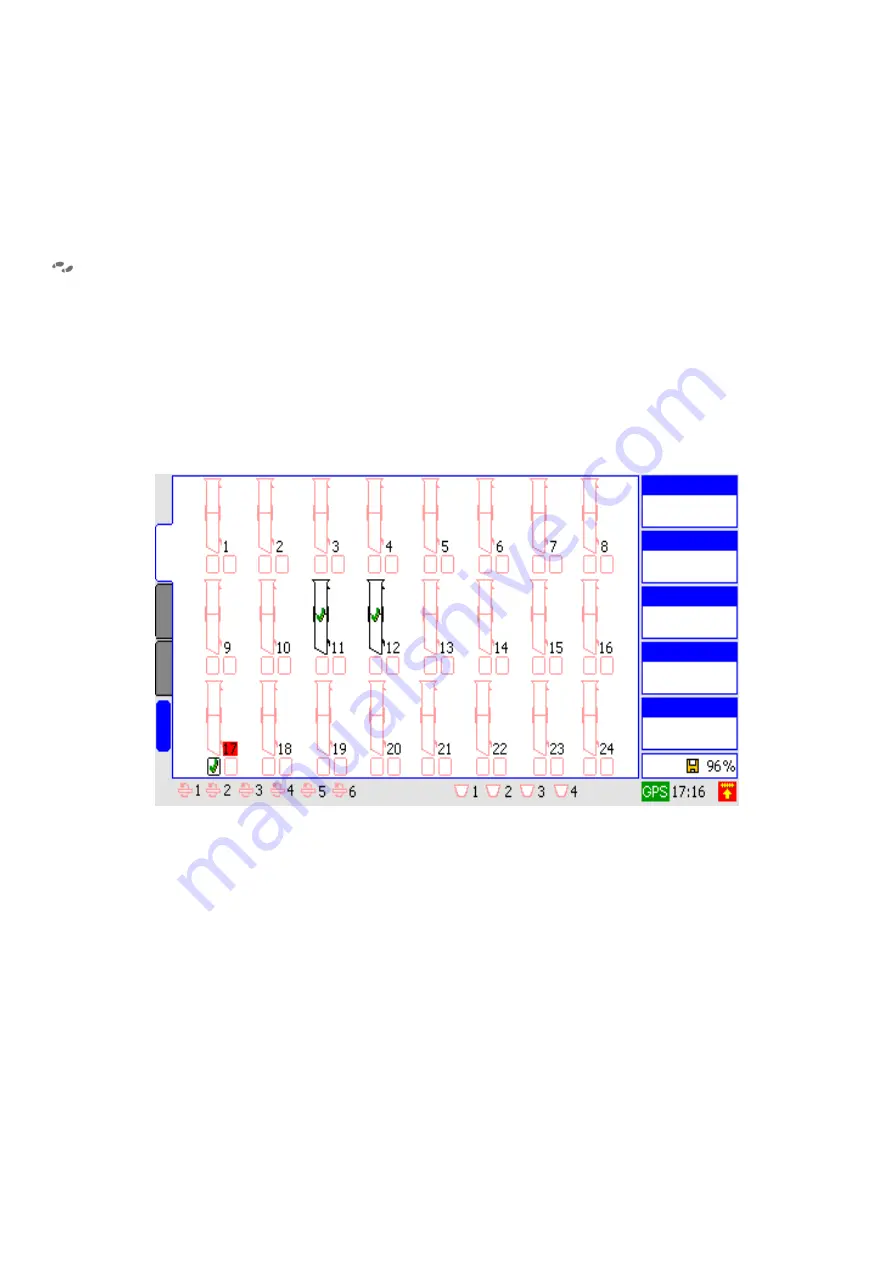
The configurated sensors will be displayed in soft color in the Job Screen. Every time a sensor is activated, an
alarm will go off and the activated sensor will stand out, indicating that it is working correctly. A seed or fertilizer
sensor will be activated every time crops or fertilizer fall through the pipe where the sensor is installed. In order
to test a speed sensor check that the speed is modified when the sensor is activated many times. In order to
test a rpm sensor check that the value displayed is not zero in the corresponding box. A hopper sensor is
activated when an object is put within the lenses. It is recommended to activate one sensor by one. In
Figure 14
there is an example of this.
When working in normally, the sensor test has to be deactivated. Thus, once the test sensor is finalized,
deactivate this menu or turn the computer off and then on.
Figure 14. Sensor test. Seed sensor of rows 11 y 12 have been activated previously. The linear fertilizer sensor of row 17 is
being activated at this moment (indicated by the red blinking on the row number. The rest of the sensors haven’t been
activated previously.
M
e
n
u
R
at
e
C
h
ar
t
P
ip
e
s
Speed
Km/h
0.0
Density 12.0
S/m
0.0
Seed Distance
cm
0.0
Plot Time
h
0.0
Plot Hectares
Ha
0.0
Plot 1


