Chapter 10 Using HiveManager
118
Aerohive
H
IVE
M
ANAGER
C
ONFIGURATION
W
ORKFLOW
(E
NTERPRISE
M
ODE
)
Assuming that you have already set HiveManager in Enterprise mode and configured its basic settings, and that you
have deployed HiveAPs, which are now connected to HiveManager, you can start configuring the HiveAPs through
HiveManager.
2
You can configure numerous objects, some of which might need to reference other objects. An
efficient configuration strategy is first to define any objects that you will later need to use when configuring other
objects. If one object must reference another that has not yet been defined, there is usually a "New" button that
you can click, define the object you need, and then return to the first dialog box to continue with its configuration.
The typical workflow proceeds like this:
1. Use default settings or configure new settings for various features that, when combined, constitute a user
profile, an SSID, and a WLAN policy. These are the three main objects that reference most of the other ones.
Together these features define policies that you can apply to multiple HiveAPs.
2. Define various device-level configuration objects to apply to individual HiveAPs. These include map, CAPWAP
servers, radio profiles, scheduled configuration audits, RADIUS authentication server settings, and DHCP server
or DHCP relay agent settings.
3. Apply the policy-level settings (contained within a WLAN policy) and device-level settings to one or more
HiveAPs, and then push the configurations to physical HiveAP devices across the network.
2. When HiveAPs are in the same subnet as HiveManager, they can use CAPWAP (Control and Provisioning of Wireless Access Points)
to discover HiveManager on the network. CAPWAP works within a layer-2 broadcast domain and is enabled by default on all
HiveAPs. If the HiveAPs and HiveManager are in different subnets, then you can use one of several approaches to enable
HiveAPs to connect to HiveManager. For information about these options, see
"How HiveAPs Connect to HiveManager" on
page 133
.
Note:
An important initial configuration task to perform is to synchronize the internal clocks of all the managed
HiveAPs either with the clock on HiveManager or with the time on an NTP server. If you plan on having the
HiveAPs validate RADIUS, VPN, and HTTPS (captive web portal) certificates, synchronizing all the devices
with the same NTP server helps ensure synchronization
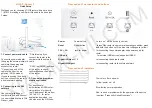
User Profile —>
SSID —>
WLAN Policy
QoS Rate Control & Queuing
user profiles
SSIDs
IP firewall rules
captive web portal (possibly
including a RADIUS server
profile and certificates)
hive (possibly including MAC filters and
MAC DoS)
MAC firewall rules
MAC filters
management options
GRE and VPN tunnel policies
schedules
QoS classifier and marker maps, dynamic
airtime scheduling
VLAN
IP DoS
traffic filters
SLA (service-level agreement)
settings
MAC DoS
VPN service
attribute number
DNS, NTP, SNMP, syslog, location services
User Manager control
service settings for WIPS, virtual access
console, ALG services, Mgt IP filter,
LLDP/CDP link discovery protocols,
and IP tracking
Содержание access point
Страница 1: ...Aerohive Deployment Guide ...
Страница 7: ...HiveAP Compliance Information 6 Aerohive ...
Страница 13: ...Contents 12 Aerohive ...
Страница 37: ...Chapter 2 The HiveAP 20 ag Platform 36 Aerohive ...
Страница 71: ...Chapter 4 The HiveAP 340 Platform 70 Aerohive ...
Страница 81: ...Chapter 5 The HiveAP 320 Platform 80 Aerohive ...
Страница 105: ...Chapter 8 The High Capacity HiveManager Platform 104 Aerohive ...
Страница 123: ...Chapter 10 Using HiveManager 122 Aerohive ...
Страница 209: ...Chapter 14 Deployment Examples CLI 208 Aerohive ...
Страница 217: ...Appenidix A Country Codes 216 Aerohive ...


