


2101510 Rev. AG
Page 3–15
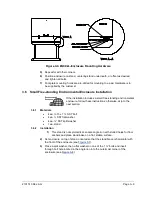
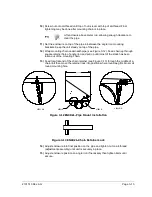
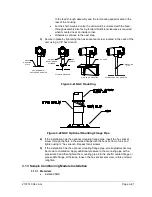
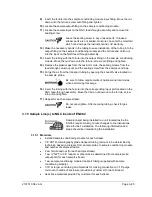
6)
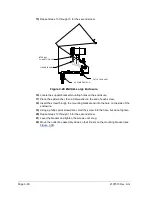
Loosen adjustment handle and drop leg foot down and retighten adjustment
handle.
7)
Foot plate mounting holes are pre-drilled for mounting to a pad. Hardware is to
be supplied by the customer.
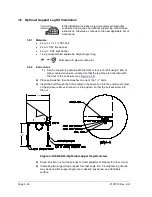
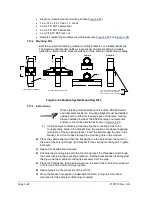
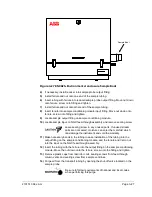
3.9 Small Pipe-Mounted Environmental Enclosure Mounting Kit
If the installation includes a pipe-mounted environmental
enclosure, follow these instructions if applicable. Otherwise,
continue to the next applicable set of instructions. Mounting
kit are available for 2”, 3”, 4”, and 6” pipe only.
3.9.1
Materials
•
2 ea. split U-brackets with hardware
•
2 ea. 10 ½” channel tubes
•
4 ea. ½” spring nut
•
4 ea. ½” SST split washer
•
4 ea. ½-13 x 1 ¼ SST bolt
•
4 ea. ½” SST split washer
3.9.2
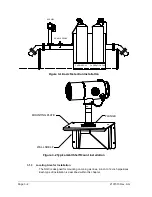
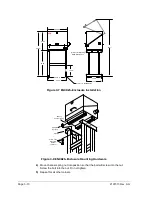
Installation
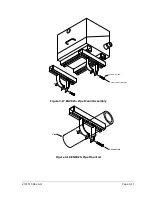
1)
Place enclosure upside-down to gain access to channel tubing on the
bottom of the enclosure.
2)
Insert and move each spring nut into approximate position inside of existing
channel tubing (see
.
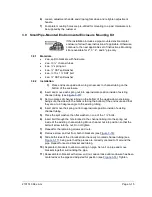
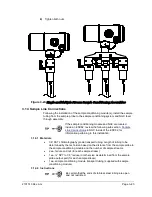
3)
Set two pieces of channel tubing on the bottom of the upside-down enclosure,
being sure the side with the holes is facing the bottom of the enclosure and that
they are at a 90 degree angle to the existing tubing.
4)
Insert and move the spring nut into approximate position inside of existing
channel tubing.
5)
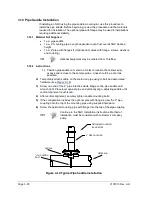
Place the split washer, then flat washer on one of the 1 ¼” bolts.
6)
Insert bolt through the hole located in the channel tubing into the spring nut
inside of the existing channel tubing. Move channel nut into position so that the
bolt will screw into the nut. Do not tighten.
7)
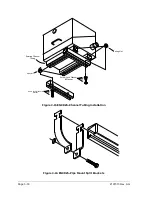
Repeat for the remaining screws and nuts.
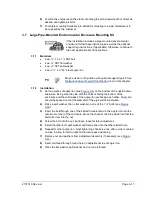
8)
Remove screw and nut from both U-brackets (see
.
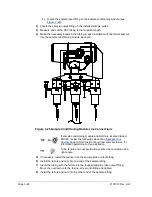
9)
Slide both sides of the U-bracket into the newly mounted channel tubing (see
), being sure that the pieces are correctly oriented to fit around the
pipe. Repeat for second bracket and tubing.
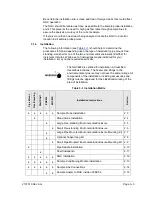
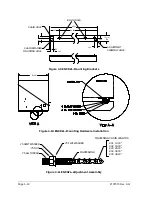
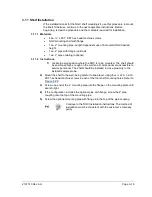
10)
Separate U-brackets to allow mounting on pipe. Set unit on pipe and move
brackets together surrounding the pipe.
11)
Reassemble U-bracket with screw and nut. Leave loose until enclosure has been
centered over the pipe and adjusted for position (see
. Tighten.
Содержание NGC8206
Страница 1: ...2101510 rev AG NGC8206 Chromatograph User s Manual ...
Страница 14: ...xii Figure 6 3 AC Charger Power Supply Wiring 6 28 Figure 6 4 Communication Troubleshooting Flowchart 6 30 ...
Страница 27: ...Page 2 8 2101510 Rev AG Figure 2 4 NGC8206 Enclosure Figure 2 5 NGC8206 Enclosure Left Side ...
Страница 60: ...2101510 Rev AG Page 2 41 hex socket set screw on cap Figure 2 32 Explosion Proof AC Power Supply ...


