


Network Interface Card (NIC)
Appendix C: Installing and Removing Printer Options
❖
C-51
5
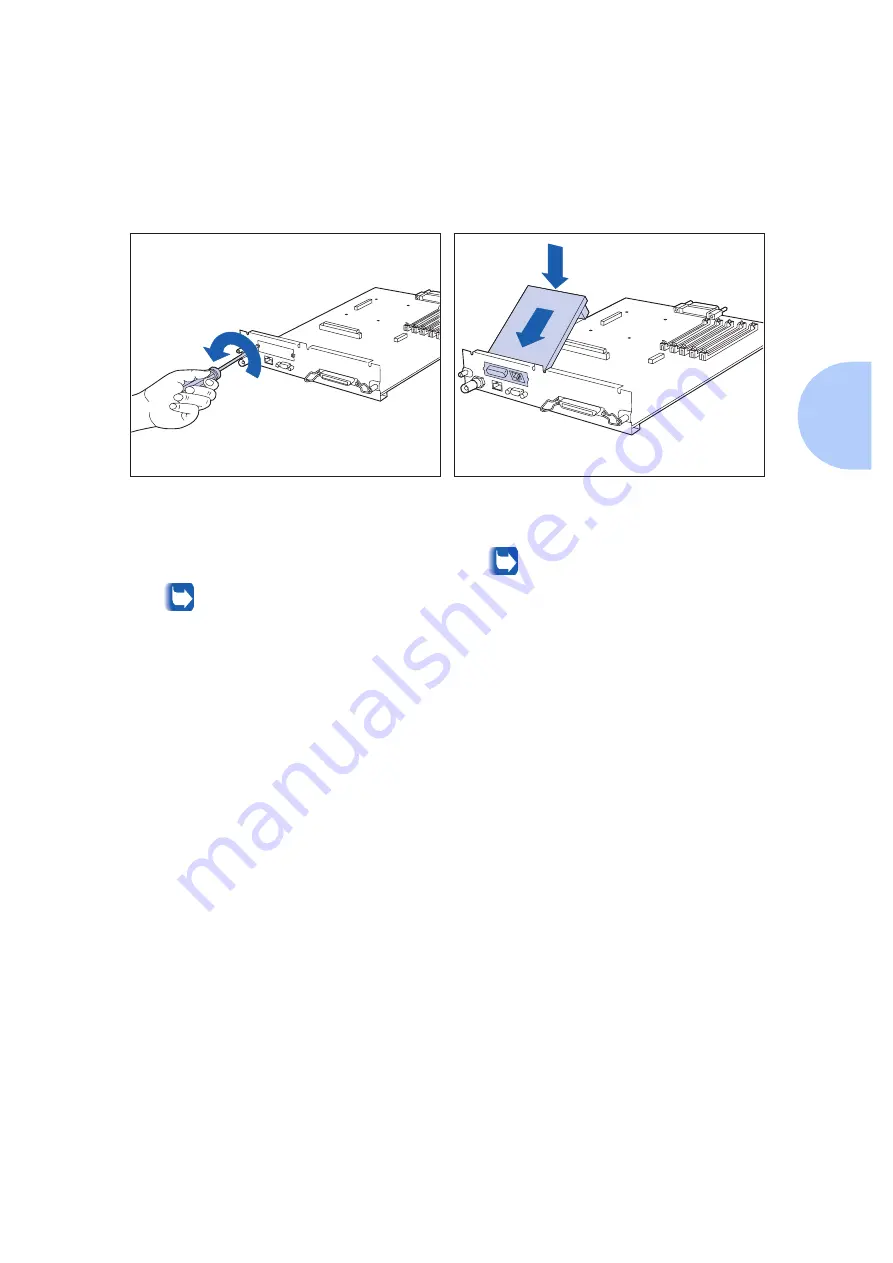
Use the screw driver/nut driver to remove the
two screws holding the cover plate on the
controller board as illustrated. Set the screws
and the cover plate aside.
These screws are the same as the screws
packed with the NIC. You will not need the
cover plate when the NIC is installed but
you should keep it in a safe place in case
you remove the card in the future.
6
Insert the NIC into the controller board as
illustrated.
Align the 96 pin connector on the rear
underside of the card with the 96 pin
receptacle in the controller board. Align
the screw receptacles on the front edge of
the NIC with the screw slots on the front of
the controller board.
Summary of Contents for DP N24
Page 1: ...DP N24 N32 and N40 Network Laser Printers System Administrator Guide ...
Page 38: ...Technical Support 1 30 DP N24 N32 and N40 System Administrator Guide ...
Page 156: ...Reset Menu 3 92 DP N24 N32 and N40 System Administrator Guide ...
Page 220: ...Print Quality Problems 6 46 DP N24 N32 and N40 System Administrator Guide ...
Page 221: ...Appendix A DP N40 Ordering Information A 1 DP N40 Ordering Information A p p e n d i x A ...
Page 224: ...DP N40 Ordering Information A 4 DP N24 N32 and N40 System Administrator Guide ...
Page 310: ...PostScript Fonts D 6 DP N24 N32 and N40 System Administrator Guide ...
Page 311: ...Appendix E Printer Specifications E 1 Printer Specifications A p p e n d i x E ...
Page 314: ...Printer Specifications E 4 DP N24 N32 and N40 System Administrator Guide ...
Page 322: ...PJL Commands F 8 DP N24 N32 and N40 System Administrator Guide ...


