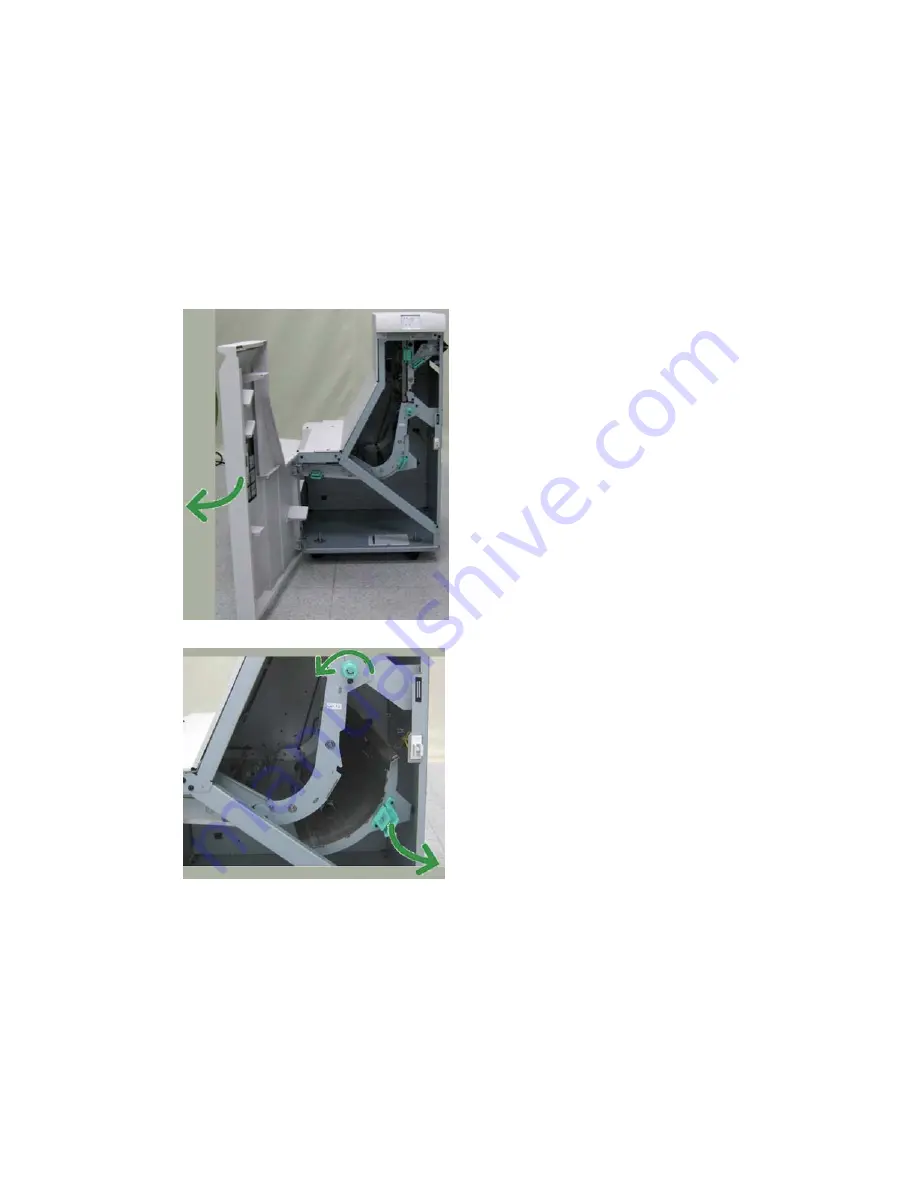
Paper jams in area 2
Remedies differ according to the paper jam location. Follow the instructions displayed
to remove the jammed paper.
Tip
Always ensure that all paper jams, including any small ripped pieces of paper, are cleared
before proceeding with your print jobs. If paper is torn, check inside the Finishing
Transport and remove it.
1. Open the Finishing Transport front door.
2. Grasp the green handle 2 and gently pull down and toward the right.
3. Remove the jammed paper.
4. If necessary, rotate the green knob in the direction shown to remove any jammed
paper in this area.
5. Return the green handle 2 to its original position.
6. Close the Finishing Transport front door.
7. Ensure that the paper jam indication is cleared from the Finishing Transport status
display.
User Guide
24-32
Standard Finisher Plus
Summary of Contents for D95
Page 1: ...Xerox D95 D110 D125 D136 Copier Printer User Guide Version 3 0 September 2013 701P33170...
Page 64: ...User Guide 4 26 Copy...
Page 94: ...User Guide 5 30 Scan...
Page 110: ...User Guide 6 16 Send from Folder...
Page 126: ...User Guide 10 2 Web Applications...
Page 144: ...User Guide 13 8 Machine Status...
Page 208: ...User Guide 15 50 Problem solving...
Page 218: ...User Guide 16 10 Specifications...
Page 230: ...User Guide 17 12 High Capacity Feeder HCF Trays 6 and 7 8 5 x 11 in A4...
Page 292: ...User Guide 20 26 High Capacity Stacker HCS...
Page 328: ...User Guide 21 36 Perfect Binder D110 D125 D136 with integrated controller...
Page 452: ...User Guide 24 48 Standard Finisher Plus...
Page 458: ...User Guide vi Index...
Page 459: ......
Page 460: ......


