10-16 Printer Options
bb
____________________________________
c.
Carefully pull the bracket off the printer. You may have
to squeeze the parallel connector locks together as you
pull the bracket off.
4.
Replace the blank Ethernet access panel with the Ethernet
interface panel using a Phillips screwdriver.
5.
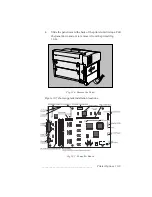
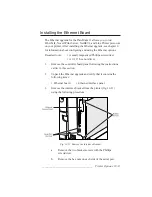
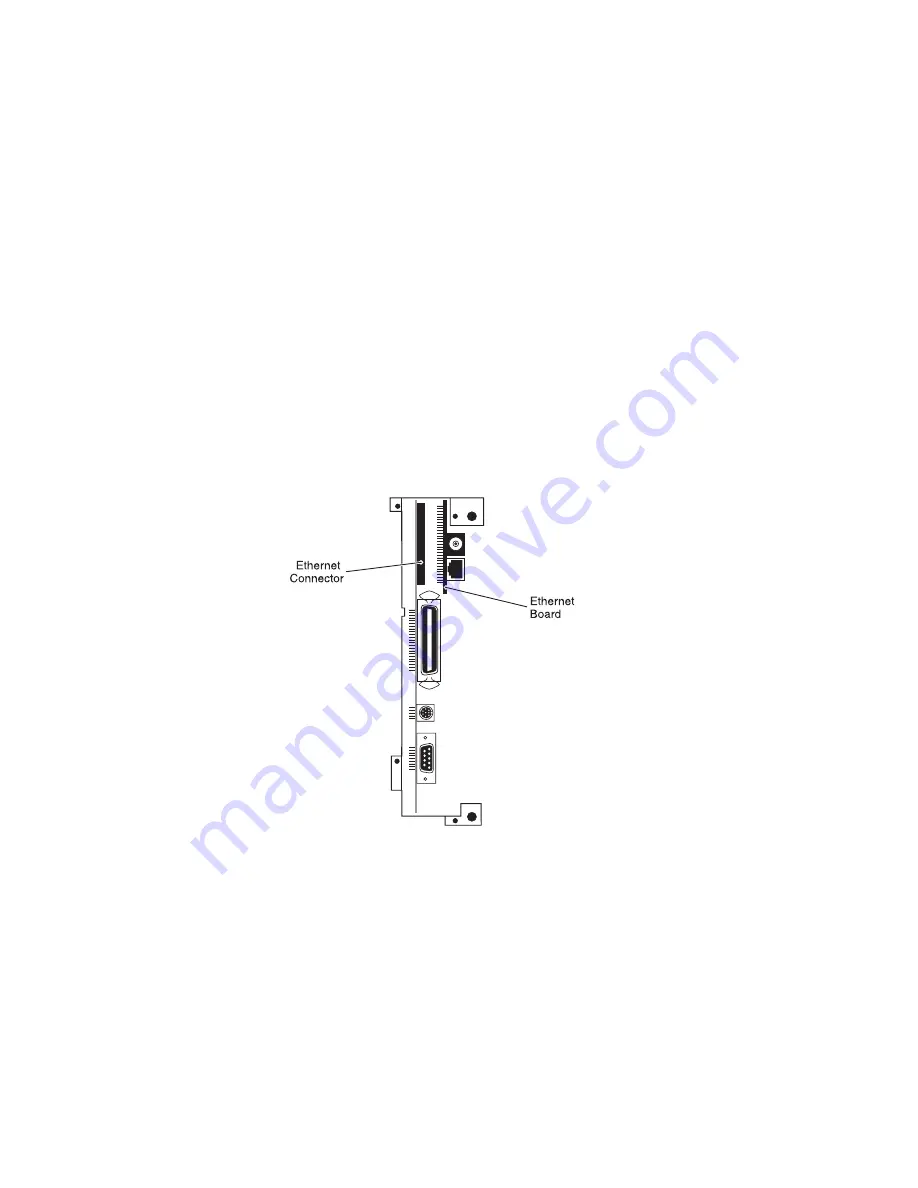
Align the pins on the Ethernet board over the connectors on the
controller board with the 10 Base 2 and 10 Base T connectors
at the edge of the board; then press the Ethernet board onto the
controller board.
Note:
To align the board easily, look at the Ethernet board
and the controller board through the opening left by
the interface bracket (fig. 10.12).
Fig. 10.12 Align the Ethernet Board
6.
Replace the interface bracket on the printer using the following
procedure.
Summary of Contents for PlateMaker 3
Page 2: ...1 2 Introductionbb ________________________________________ Notes...
Page 10: ...1 10 Introductionbb ________________________________________...
Page 12: ...2 2 Installationbb_________________________________________ Notes...
Page 40: ...3 2 Macintosh Setupbb ____________________________________ Notes...
Page 90: ...3 52 Macintosh Setupbb ____________________________________...
Page 92: ...4 2 PC Setupbb __________________________________________ Notes...
Page 142: ...5 2 Ethernet Setupbb ______________________________________ Notes...
Page 212: ...6 38 Configurationbb ______________________________________...
Page 214: ...7 2 Media Optionsbb ______________________________________ Notes...
Page 224: ...8 2 Printing with Various Media Types bb _____________________ Notes...
Page 232: ...9 2 Maintenance and Specificationsbb ________________________ Notes...
Page 246: ...10 2 Printer Optionsbb ____________________________________ Notes...
Page 262: ...10 18 Printer Optionsbb ____________________________________...
Page 264: ...11 2 Troubleshootingbb____________________________________ Notes...

