61
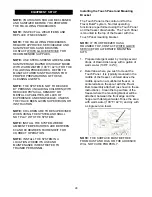
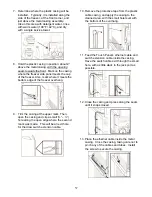
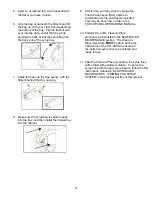
5. Select a numbered tray to correspond with
the flavor you have chosen.
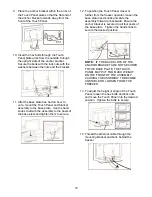
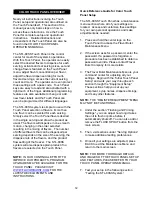
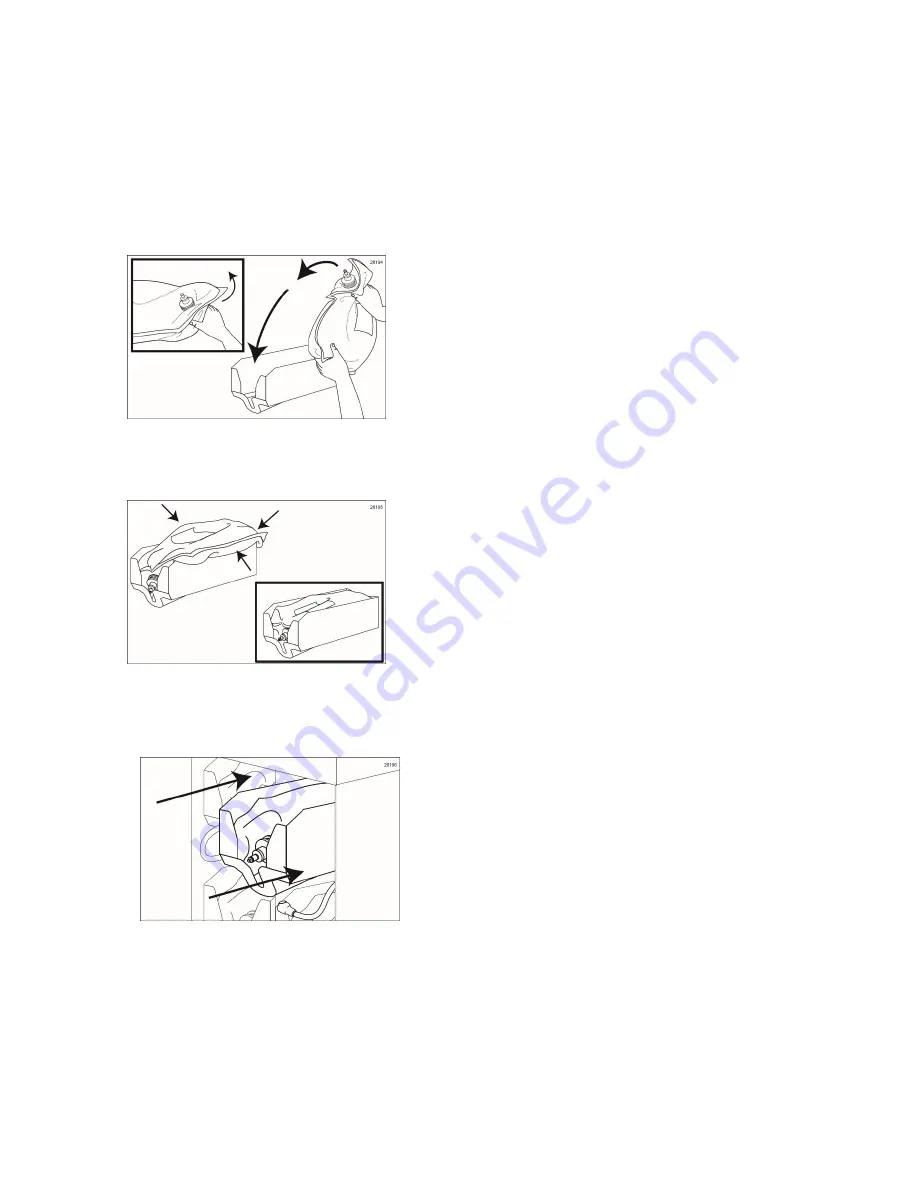
6. Grip the bag underneath the fitment and lift
the bag up, with your other hand supporting
the bottom of the bag. Flip the fitment end
over into the open end of the tray, while
guiding the back end of the syrup bag into
the back end of the syrup tray.
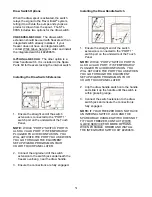
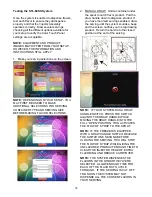
7. Settle the bag into the tray evenly, with the
fitment behind the tray opening.
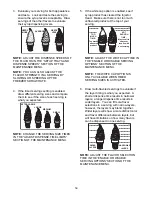
8. Make sure the syrup bag is settled neatly
into the tray, and then install the loaded tray
into the cabinet.
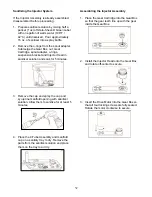
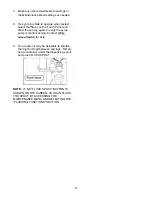
9. At this time, you may wish to change the
Touch Panel menu flavor names to
coordinate with the new flavors installed.
This may be done now or later in the
TOUCH PANEL OPERATIONS MANUAL.
10. Perform the entire Clean-In-Place
procedure as instructed in the SCHEDULED
MAINTENANCE section. The Clean-In-
Place procedure
MUST
be done during the
initial setup of the STL-80SS to ensure all
the parts and syrup lines are sanitized and
ready for use.
11. After the Clean-In-Place procedure, the syrup lines
will be filled with sanitizer solution. To prime the
syrup lines with the new syrup flavors, follow the full
instructions outlined in the SCHEDULED
MAINTENANCE – PRIMING THE SYRUP
SYSTEM in the previous section of this manual.
Summary of Contents for STL-80SS
Page 2: ......
Page 9: ...6 PAGE INTENTIONALLY LEFT BLANK ...
Page 11: ...8 General System Overview Figure 1 ...
Page 13: ...10 Cabinet Continued Figure 2 ...
Page 17: ...14 Syrup Pump and Related Parts Figure 4 ...
Page 19: ...16 Sanitizer Pump and Related Parts Figure 5 ...
Page 23: ...20 Spare Parts Kit Figure 7 ...
Page 24: ...21 PAGE INTENTIONALLY LEFT BLANK ...
Page 36: ...33 PAGE INTENTIONALLY LEFT BLANK ...
Page 50: ...47 PAGE INTENTIONALLY LEFT BLANK ...
Page 73: ......
Page 74: ......


