32
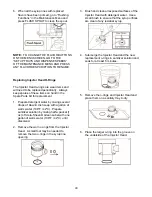
15. Once the flushing process has completed,
disconnect Pump Flush nozzle from the
syrup bag connector. Return the Pump
Flush Adapter to its place in the cabinet.
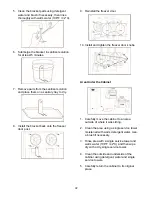
16. Clean the exposed surfaces of the syrup
bag connector and bag fitment with
detergent water, single service towel and
brush if necessary. Then rinse them with
warm water (108°F / 42°C) and dry with
single service towels.
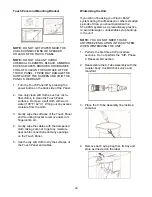
17. Using the spray bottle with the sanitizer
solution, spray the syrup bag fitment and
the syrup bag connector. Allow these parts
to sanitize for at least 5 minutes.
18. Connect the syrup bag connector to the bag
fitment.
19. Repeat Steps 3-18 for any additional flavors
that are being changed out.
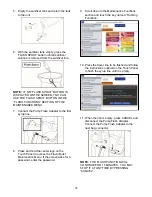
20. After the line is sanitized, select “Priming
Functions” in the Maintenance Menu.
21. Select the flavor button of the line to be
primed. The button will pulse as syrup is
pumped through the line.
22. When the syrup flowing from the spout is
thick and undiluted, press a flavor key again
to stop the prime function.
23. Repeat Steps 21 and 22 to prime any other
new syrup bags that have been installed.
24. When all the syrup lines with replaced
flavors have been primed, go to “Flushing
Functions” in the Maintenance Menu and
press FLUSH SPOUT to clean the spout.
NOTE:
TO CHANGE THE FLAVOR BUTTONS
ON THE MENU SCREEN, GO TO THE
“SETUP TRAYS AND DISPENSE SPEEDS”
OF THE MAINTENANCE MENU AND PRESS
ANY FLAVOR DESPCRIPTION TO EDIT THE
NAME.
Summary of Contents for STL-80SS
Page 2: ......
Page 9: ...6 PAGE INTENTIONALLY LEFT BLANK ...
Page 11: ...8 General System Overview Figure 1 ...
Page 13: ...10 Cabinet Continued Figure 2 ...
Page 17: ...14 Syrup Pump and Related Parts Figure 4 ...
Page 19: ...16 Sanitizer Pump and Related Parts Figure 5 ...
Page 23: ...20 Spare Parts Kit Figure 7 ...
Page 24: ...21 PAGE INTENTIONALLY LEFT BLANK ...
Page 36: ...33 PAGE INTENTIONALLY LEFT BLANK ...
Page 50: ...47 PAGE INTENTIONALLY LEFT BLANK ...
Page 73: ......
Page 74: ......


