144
03-914648-00:7
Installation/Disassembly
If you need to remove the detector components to inspect, clean, or replace
parts, or to install another detector, refer to the following disassembly/re-
assembly instructions for the ECD and the ionization oven.
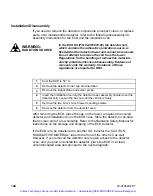
WARNING:
RADIATION SOURCE
In the ECD Kit (P/N 02-001972-00) the detector cell,
which contains the radioactive ionization source, is
fixed within the detector tower and cannot be removed.
Do not attempt to remove the cell from the tower.
Regulations for the handling of radioactive materials
strictly prohibit unlicensed disassembly. Evidence of
removal voids the warranty. Violations of these
regulations are reported to NRC.
1
Cool the ECD to 50
°
C.
2
Remove the detector tower cap and insulation.
3
Remove the signal probe and pulser probe.
4
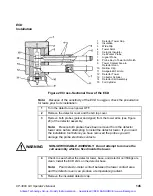
Insert the installation tool into the detector tower assembly (located over the
detector cell). Loosen the hex nut until the cell turns freely
5
Remove the two 8-32 x 3-inch tower mounting screws.
6
Remove the detector from the detector oven.
After removing the ECD, place the cap on the tower, and place the cooled
detector and installation tool in the ECD case. Store the detector in an area
that is clean and of a low humidity. Refer to the Radiation Safety Manual for
instructions on the storage and shipping of the ECD detector.
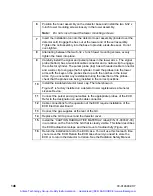
If the ECD is to be transferred to another GC, transfer the “CAUTION
RADIOACTIVE MATERIAL” label to the front of the other GC as well.
However, if you removed the detector only to gain access to the detector
oven, and you plan to reinstall the detector, place the ECD in a clean,
uncontaminated area and proceed to the next paragraph.
Artisan Technology Group - Quality Instrumentation ... Guaranteed | (888) 88-SOURCE | www.artisantg.com


