4WD Rear
Axle
Rev. D
Reelmaster 5500-D
4WD Rear Axle (Rev. C)
Page 9 - 9
Removal
1. Remove rear axle drive shaft (see Drive Shaft in this
section of this manual).
2. Drain rear axle lubricant (see Changing Rear Axle
Lubricant in this section of this manual).
3. Thoroughly clean the steering cylinder hydraulic
hose connections. Disconnect the hydraulic hoses from
the steering cylinder. Put caps or plugs on all the fittings
and hoses to prevent contamination.
Note:
To ease reassembly, tag each of the hoses to
show their correct position on the steering cylinder.
4. Remove steering cylinder (see Chapter 7−Brakes
and Steering in this manual).
5. Remove the cotter pins and slotted hex nuts from the
tie rod ball joints. Use a ball joint fork and remove the ball
joints from the axle case supports.
6. Loosen the rear wheel lug nuts.
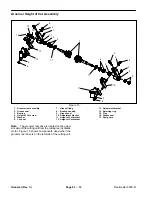
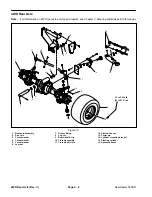
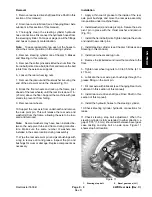
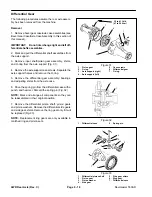
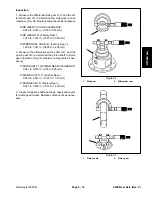
7. Remove the jamnut and thrust washer securing the
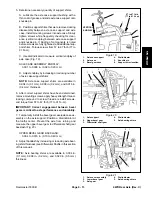
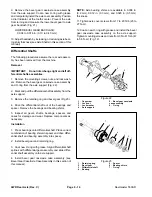
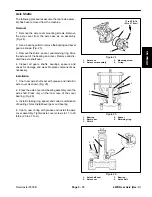
end of the axle pivot pin to the chassis (Fig. 10).
8. Block the front wheels and jack up the frame (just
ahead of the rear wheels) until the rear tire is about 1 in.
(25 mm) above the floor. Support the machine with jack
stands to prevent it from falling.
9. Remove rear wheels.
10.Support the rear axle from underneath and remove
the axle pivot pin. This will release the rear axle and
washer(s) from the frame, allowing the axle to be low-
ered and removed.
Note:
Several washers may have been installed be-
tween the axle pivot tube and frame during manufac-
ture. Make sure the same number of washers are
installed in the same location during reassembly.
11. Wipe the rear axle pivot pin and pivot bushings with
a rag to remove dirt and grease. Inspect the pin and
bushings for wear or damage. Replace components as
necessary.
Installation
1. Apply a thin coat of grease to the inside of the rear
axle pivot bushings and move the rear axle assembly
into position under machine frame.
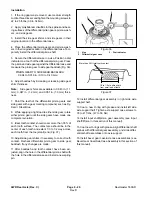
2. Install washer(s) and axle pivot pin. Secure the axle
pivot pin in place with the thrust washer and jamnut
(Fig. 10).
1. Install the tie rod ball joints. Tighten ball joint hex nuts
and install new cotter pins.
2. Install steering cylinder (see Chapter 7−Brakes and
Steering in this manual).
3. Install rear wheels and lug nuts.
4. Remove the jackstands and lower the machine to the
floor.
5. Tighten rear wheel lug nuts to 30 to 35 ft-lbs. (41 to
47 N−m).
6. Lubricate the rear axle pivot bushings through the
grease fitting on the pivot pin.
7. Fill rear axle with lubricant (see Changing Rear Axle
Lubricant in this section of this manual).
8. Install rear axle drive shaft (see Drive Shaft in this
section of this manual).
9. Install the hydraulic hoses to the steering cylinder.
10.Check steering cylinder hydraulic connections for
leaks.
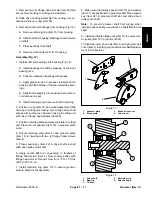
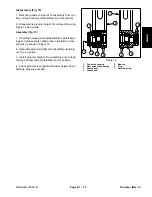
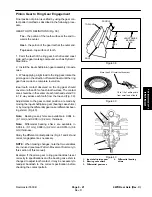
11. Check steering stop bolt adjustment. When the
steering cylinder is fully extended in either direction, a
gap of 1/16” (1.6 mm) should exist between bevel gear
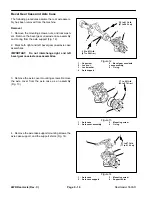
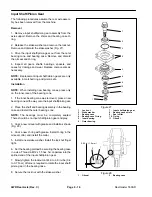
case casting and stop bolt on axle case. Figure 11
shows stop bolt location.
1. Steering stop bolt
2. Bevel gear case (LH)
Figure 11
2
1
Summary of Contents for 00075SL
Page 2: ...Reelmaster 5500 D ...
Page 4: ...Reelmaster 5500 D ...
Page 6: ...Reelmaster 5500 D ...
Page 64: ...Reelmaster 5500 D Hydraulic System Rev C Page 4 26 This page is intentionally blank ...
Page 170: ...Reelmaster 5500 D Page 5 40 Electrical System Rev C ...
Page 192: ...Reelmaster 5500 D Differential Axle Page 6 22 ...
Page 254: ...Reelmaster 5500 D Groomer Rev C Page 8 1 14 ...
Page 278: ...Reelmaster 5500 D Page 10 2 Electrical Diagrams Rev C ...
Page 284: ...Rev C Page 10 8 Harness Drawing Reelmaster 5500 D Serial Number 210000401 to 210999999 ...
Page 285: ...Rev C Page 10 9 Harness Diagram Reelmaster 5500 D Serial Number 210000401 to 210999999 ...
Page 286: ...Rev C Page 10 10 Harness Drawing Reelmaster 5500 D Serial Number 220000001 to 220999999 ...
Page 287: ...Rev C Page 10 11 Harness Diagram Reelmaster 5500 D Serial Number 220000001 to 220999999 ...
Page 288: ...Rev C Page 10 12 Harness Drawing Reelmaster 5500 D Serial Number Above 230000000 ...
Page 289: ...Rev C Page 10 13 Harness Diagram Reelmaster 5500 D Serial Number Above 230000000 ...
Page 290: ...Reelmaster 5500 D ...

