Electrical
System
Reelmaster 5500-D
Page 5 - 11
Electrical System (Rev. C)
TurfDefender Leak Detector
The TurfDefender
is an electronic hydraulic fluid leak
detection device that fits inside the hydraulic tank of your
machine. It is a pressure based system which requires a
sealed hydraulic tank to function properly. Very small
changes to the oil level in the sealed tank result in move-
ment of the leak detector’s internal float. The Turfde-
fender’s internal microprocessor analyzes the float
movement and determines if there is a leak in the sys-
tem.
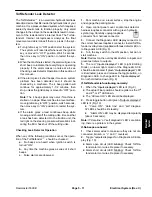
Turn ignition key to “ON” position start the system.
The system will reset itself whenever the ignition
key is moved to “OFF” position. Wait 5 seconds,
then move key to “ON” position to restart the sys-
tem.
When the machine is started, the alarm will give one
short beep to indicate that everything is operating
properly. If the alarm makes no noise at all, see
Checking Leak Detector Operation in this section of
this manual..
If the alarm gives 4 short beeps it means a system
problem has been detected and it should be
checked by a mechanic. The 4 beep pattern will
continue for approximately 1-1/2 minutes, then
stop, unless the ignition key is moved to “OFF” posi-
tion.
Note: The 4 beep signal may occur if machine is
started on a slope. Move machine to a level surface,
move ignition key to “OFF” position, wait 5 seconds,
then move key to “ON” position to restart the sys-
tem.
If the alarm gives a loud continuous beep while
mowing and shuts off the cutting units, it means that
a leak has been detected. On the traction unit, the
red light on the steering console will also blink indi-
cating the ECU has shut off the cutting units.
Checking Leak Detector Operation
When any of the following conditions occur, the opera-
tion of the TurfDefender
should be checked :
a.
No beeps are heard when ignition switch is
turned “ON”.
b. Any time the machine gives a series of 4 short
beeps.
c.
False alarms are observed.
1.
Park machine on a level surface, stop the engine
and engage the parking brake.
2.
Open control panel cover. Locate leak detector
harness loopback connector with a green hydraulic
symbol tag. Carefully unplug loopback
connector from harness connector.
3.
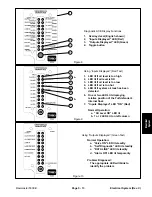
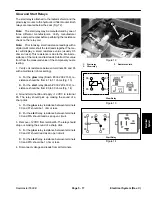
Connect the Diagnostic ACE display connector to
the correct harness loopback connector. Install TurfDe-
fender overlay decal (supplied with leak detector kit) on-
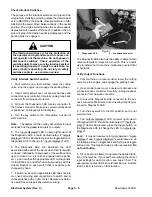
to Diagnostic ACE (Fig. 8).
4.
Turn the key switch to the ON position, but do not
start machine.
Note: Red text on the overlay decal refers to inputs and
green text refers to outputs.
5.
The red “Inputs displayed” LED (Light Emitting
Diode), on lower right column of the Diagnostic ACE,
should be illuminated. If green “Outputs displayed” LED
is illuminated, press and release the toggle button, on
Diagnostic ACE, to change LED to “Inputs displayed”.
Do not hold button down (Fig. 8).
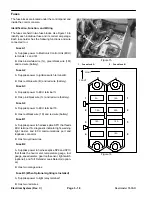
If TurfDefender is functioning normally:
1.
When the “Inputs displayed” LED is lit (Fig. 9),
The actual Float position should register as the 3
rd
and 4
th
, or 4
th
LED down.
The “Oil level OK” LED should be displayed.
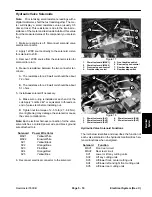
2.
Press toggle button until green “Outputs displayed”
LED is lit (Fig. 10).
“Valve ON”, “data line” and ”self diagnos-
tic”LED’s should be lit steadily.
“Alarm ON” LED may be displayed temporarily
(about 5 seconds).
Note: If “data line” or ”self diagnostic” LED’s are blink-
ing, there is a problem in the system.
If No beeps are heard:
1.
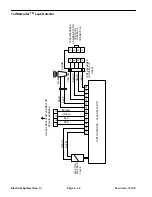
Check alarm wires to make sure they are not dis-
connected, broken, or “+” and “-” reversed.
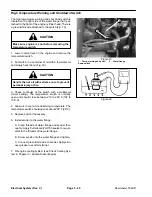
2.
Toggle “outputs displayed” on Diagnostic ACE dis-
play (Fig. 10).
Alarm open circuit (LED blinking): Check TurfDe-
fender alarm or wires. Replace if necessary.
Alarm short circuit (LED blinking): Check TurfDe-
fender alarm or wires. Replace if necessary.
Summary of Contents for 00075SL
Page 2: ...Reelmaster 5500 D ...
Page 4: ...Reelmaster 5500 D ...
Page 6: ...Reelmaster 5500 D ...
Page 64: ...Reelmaster 5500 D Hydraulic System Rev C Page 4 26 This page is intentionally blank ...
Page 170: ...Reelmaster 5500 D Page 5 40 Electrical System Rev C ...
Page 192: ...Reelmaster 5500 D Differential Axle Page 6 22 ...
Page 254: ...Reelmaster 5500 D Groomer Rev C Page 8 1 14 ...
Page 278: ...Reelmaster 5500 D Page 10 2 Electrical Diagrams Rev C ...
Page 284: ...Rev C Page 10 8 Harness Drawing Reelmaster 5500 D Serial Number 210000401 to 210999999 ...
Page 285: ...Rev C Page 10 9 Harness Diagram Reelmaster 5500 D Serial Number 210000401 to 210999999 ...
Page 286: ...Rev C Page 10 10 Harness Drawing Reelmaster 5500 D Serial Number 220000001 to 220999999 ...
Page 287: ...Rev C Page 10 11 Harness Diagram Reelmaster 5500 D Serial Number 220000001 to 220999999 ...
Page 288: ...Rev C Page 10 12 Harness Drawing Reelmaster 5500 D Serial Number Above 230000000 ...
Page 289: ...Rev C Page 10 13 Harness Diagram Reelmaster 5500 D Serial Number Above 230000000 ...
Page 290: ...Reelmaster 5500 D ...

